Night Fury with flapping wings


Print Profile(4)


Description
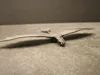
Night Fury with flapping wings.
I've been thinking about a similar model for a long time and finally got around to it.
At first I had a problem with the mechanism for attaching the wings. I experimented with printed rings but it didn't work well.

Eventually I came up with the idea of attaching them using string or filament. I also experimented with different infill settings and found that full infill is the best. However, full infill of 100% also takes the longest to print. So I left holes on the wings so that you can also level the dragon with 15% infill.
Just like in the gif, the large model moves slower and longer and the small one moves quickly but for a short time. Inertia plays a key role here. That's why I used 100% infill, which increases the weight and inertia and also unifies the center of gravity.

Instructions
I used a thin fishing line as a string to hang the model.
If you are printing a small 100% scale model, then connect the wings to the body using string.

If you are printing a 200% model, you can use filament to connect the model.

If you use filament, you need to thicken its ends. I do it this way: I use a small burner to heat the end of the filament and flatten it with a cold spoon.


Next, you need to find the center of gravity in the wings. Thread the string through the holes in the wings and see how the dragon behaves.

In the case of full fill 100%, start with the inner holes. If you used 15% filling, start with the outer holes. (Pink dragon is 15% infill )

Then thread the string through the beam and you can hang the dragon. Finally, you can add a string with an emblem to swing the dragon.
Addition
In second print profile I added also this model with fixed wings if you want it just to play :) in this version be careful with tail because it is thin and may broke.

Have Fun :)
License
You shall not share, sub-license, sell, rent, host, transfer, or distribute in any way the digital or 3D printed versions of this object, nor any other derivative work of this object in its digital or physical format (including - but not limited to - remixes of this object, and hosting on other digital platforms). The objects may not be used without permission in any way whatsoever in which you charge money, or collect fees.
Comment & Rating (292)