Custom Decorative Alphabet Cubes/letter NO AMS/AMS


Print Profile(2)


Description


Boost Me (for free)
Because it helps! 💙 It motivates me to create more and improve. Because later you see how others (or even yourself) sell them online, benefiting from the previous work of others who get nothing in return. And yes, I’ve seen many of my designs (some of them unique) on various online platforms. If you want to support me and get early access just subscribe to my patreon https://www.patreon.com/c/Jotasct or leave a tip at ko-fi. Thx 💙
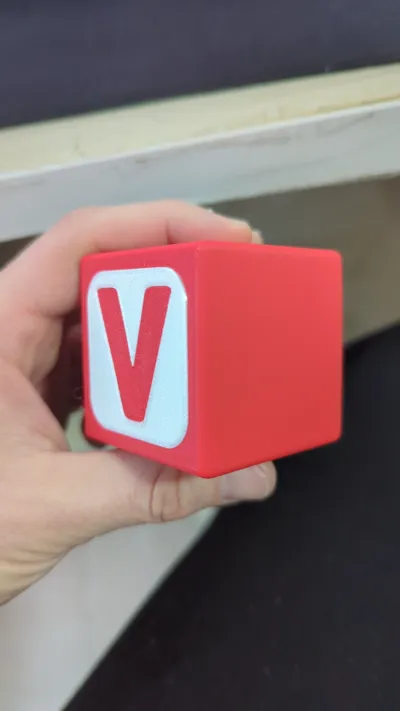
Fantastic 5 × 5 × 5 cm cubes to decorate any space with the name and colors of your choice.
Includes an AMS version and a NON-AMS version, where the pieces are separate and can be assembled without glue. Some pieces may be harder to fit, but it just takes a bit of skill and force in some cases. I recommend using a hard, flat object to apply pressure and ensure a proper fit if needed.
Once you’ve selected the pieces and colors, place them face down for a better finish, as they will retain the texture of the print bed.
At the end of the post, you’ll find explanatory guides for both versions. The NON-AMS version is assembled piece by piece, but if you have an AMS and want to assemble it manually, feel free to do so.
Hope you enjoy it!
WaZaAaAaAaAa!
⭐ A five-star rating would be greatly appreciated.
Boost Me (for free)
It will motivate me to create more while learning to tackle better designs and challenges!
Feel free to ask me any questions in the comments or via PM!
GUIDES
QUICK STEP GUIDE FOR AMS PRINTING
1- Select the cubes you want to use one by one, copying them into a fourth tray added by you. In this example, I use "H E L L O".

2- Decide on the colors you will use and load them into your AMS by clicking “+” in the “Filament” section.

3- Select each cube one by one and apply a layer of paint. In the top menu, click on the paint bucket icon:

Inside this menu, click on the paint bucket again and, using "Edge detection", choose the color and paint the selected cube. Repeat the process for the remaining cubes.

My finished example:

4- Now it's ready to print, but if you want better quality on the front of the letters, we will rotate the cubes so they face downwards. This way, they will have the textured surface of the print bed, resulting in a cleaner finish.
To do this, select a cube and click "Lay on face" (or press “F”):

The cube icon and the arrow will turn green. From this point, you can click on the top face of each cube, and it will rotate.
My result from the top view:

And from the bottom view:

5- You are now ready to slice and print.

6- ENJOY!🎉
QUICK STEP GUIDE FOR NON AMS PRINTING
1- Select the cube you will use as a base (for now, there is only one, but more will be available soon). Delete the rest. Make as many copies as you need to print. Keep in mind that if you want cubes in different colors, you will have to print the desired quantity by changing the filament between prints. (It’s obvious, but I’m writing it anyway).


2- Slice and print the cubes.
3- Copy the letters along with their background into a new empty tray added by you:

4- If you want higher quality, follow this step; otherwise, you can skip it. We are going to flip the backgrounds and letters so they face downward, giving them the texture of the build plate for a better finish.
To do this, select a background and press "Lay on Face" (or the "F" key).
The cube icon and arrow will turn green. From this point, you can click on each cube’s top face to rotate it. There’s no need to exit the option between cubes.
They should look like this:

5- Now, select all the letters and move them to another empty tray created by you, separating them from their backgrounds.

6- Slice and print each of the trays. If you want different colors, follow the same process as with the cubes, changing the filament between prints.

7- Assemble the cubes. Keep in mind that some pieces might be difficult to fit. Try different insertion angles and use a flat, hard surface to apply pressure. I use a pair of large scissors and push with their flat side.
8- ENJOY!🎉
Don't miss out on more logos, decorative elements, and many other designs with NO AMS versions on my profile. You’ll find content related to Dragon Ball, Nintendo, video games, Pokémon, Harry Potter, films and much more.
Hope you Enjoy! 🚀
WaZaAaAaAaAa!!! 💙
⭐ A five-star rating would be greatly appreciated!
License
You shall not share, sub-license, sell, rent, host, transfer, or distribute in any way the digital or 3D printed versions of this object, nor any other derivative work of this object in its digital or physical format (including - but not limited to - remixes of this object, and hosting on other digital platforms). The objects may not be used without permission in any way whatsoever in which you charge money, or collect fees.
Comment & Rating (4)