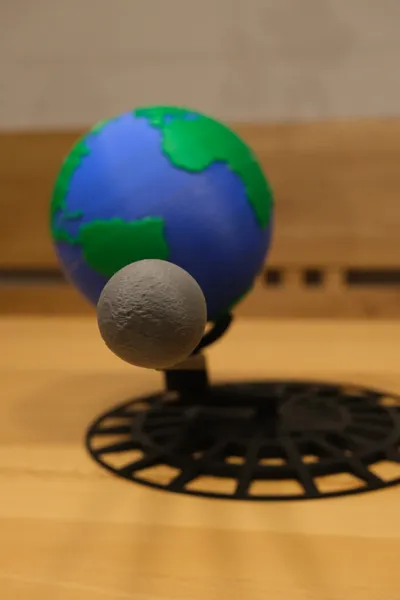
Moon and earth orbit model


Print Profile(1)

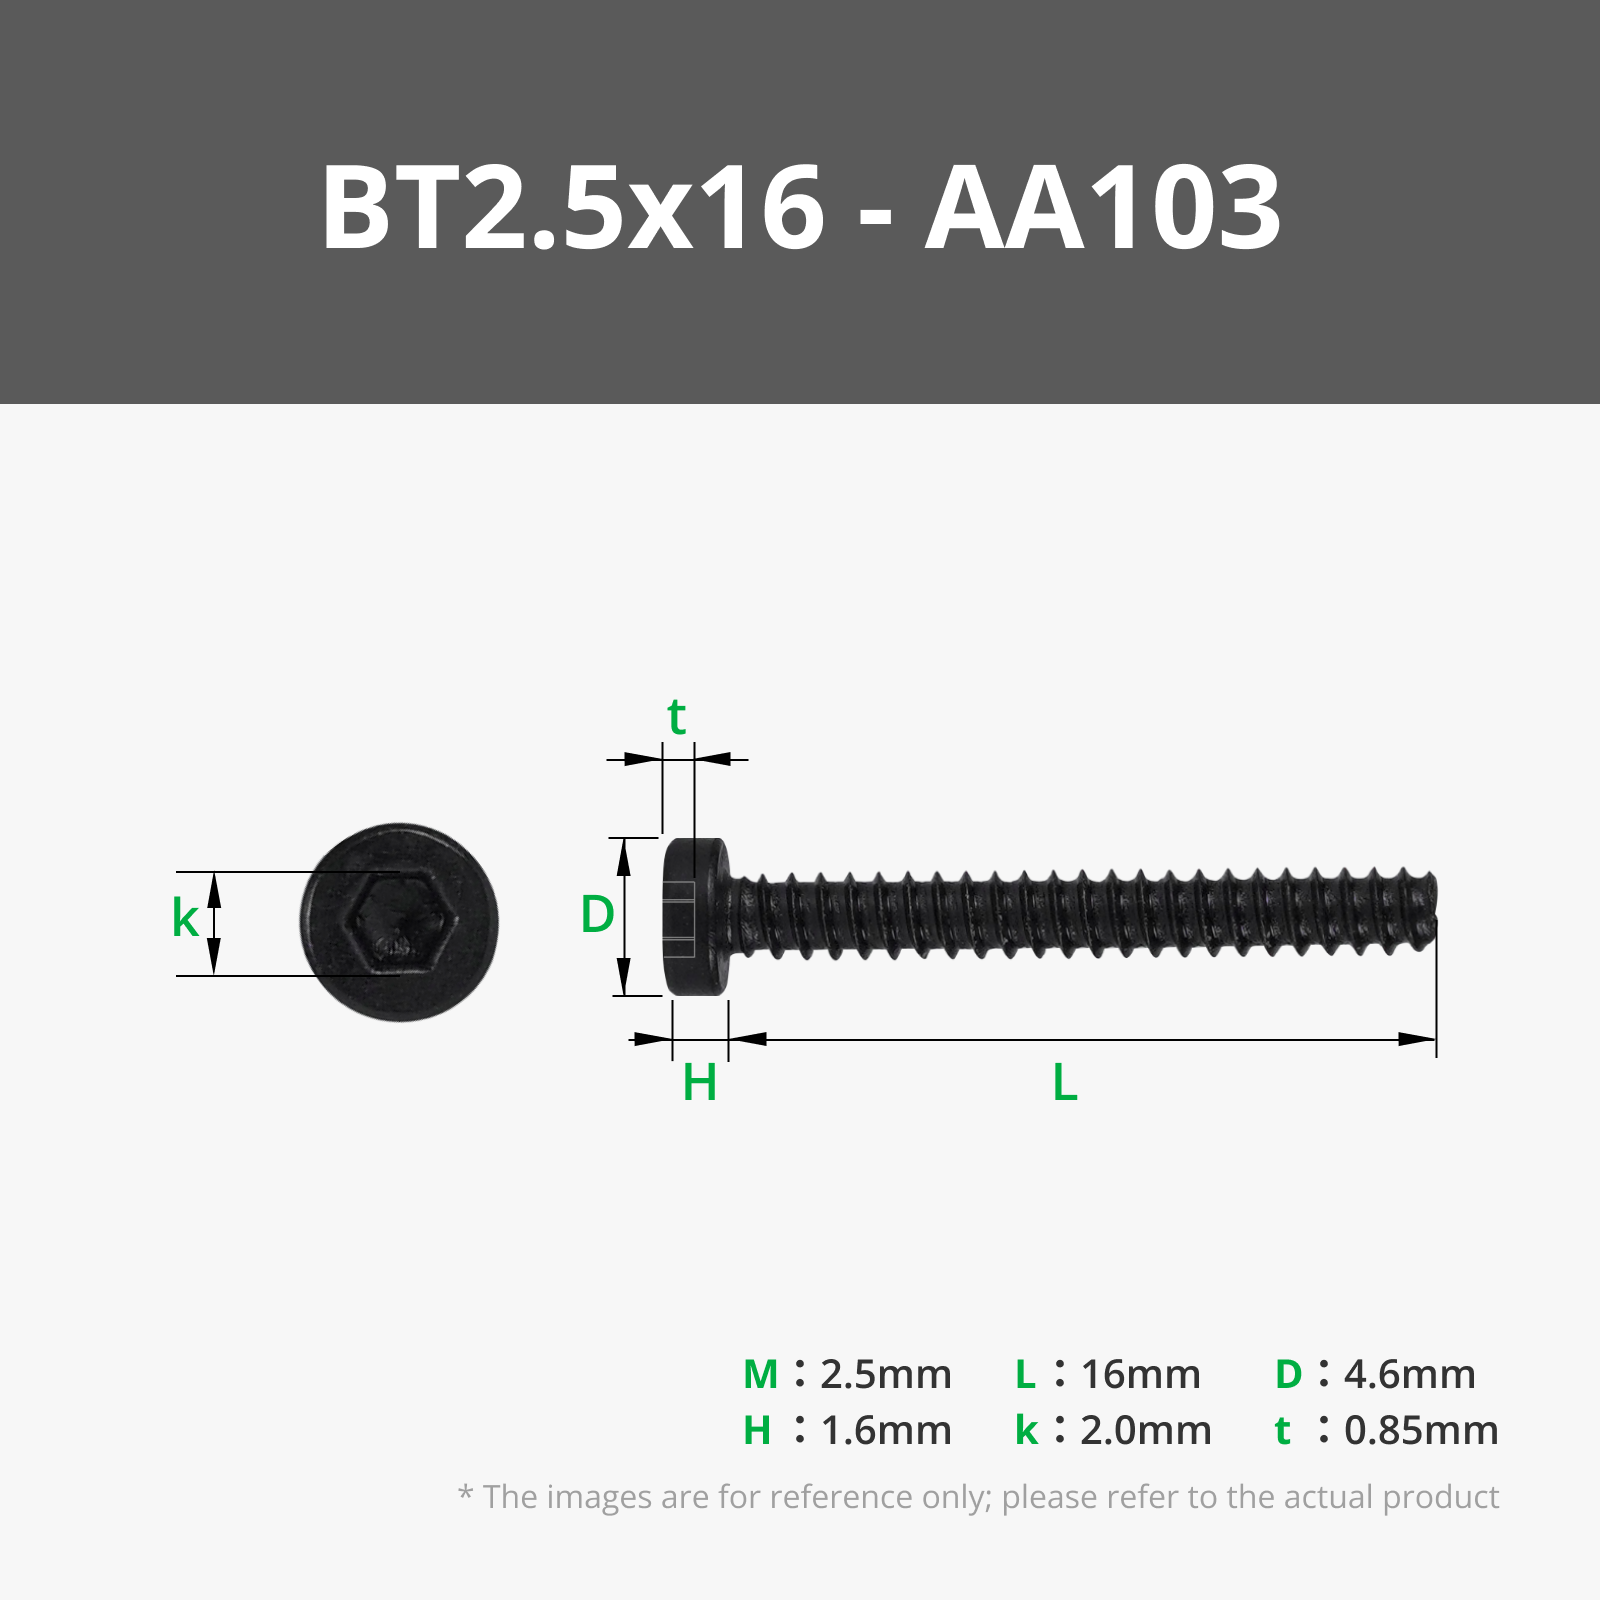
Bill of Materials


Description
This model showcases the orbit of earth and the moon.
It can be used to teach students in astronomy or science class about how orbits work, as is accuratly showcases the different planes on which rotations happen with their respective angles to each other
Scale of diameters and distance of the barycenter:
1cm equals 1000km (1:100 000 000)
Scale of the distance between earth and moon:
1cm equals 17 500 km (1: 1 750 000 000)
To showcase the true scale of space, remove the moon from its stand and place it 3,84 meters (the distance is then also scaled to 1:100 000 000) away from earth.
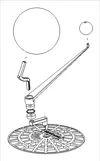
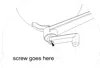
Assembly:
Glue the 2 halves of earth togehter, you can use 4 pieces of a toothpick for alignment (they should be around 15mm in length each), which will fit in their corresponding holes.
I used contact cement, but you can also use super glue (you need to work fast) or similar glues (at best with a working time of 5 to 10 minutes before they start setting)
- Assemble the stand as shown in the provided drawing, you can either use the provided printed bearings (you need to grease them, for example with pfte or graphite spray) or use 2 standard 608 skateboard bearings (they can also be found in fidget spinners)
- Screw the needed self tapping screw (2,5 or 3 x 16) into the slit shown in the drawing
- If the bearings have to much friction try also inserting the inner bearing spacer between them
- Enjoy your new display model
Documentation (2)
License
You shall not share, sub-license, sell, rent, host, transfer, or distribute in any way the digital or 3D printed versions of this object, nor any other derivative work of this object in its digital or physical format (including - but not limited to - remixes of this object, and hosting on other digital platforms). The objects may not be used without permission in any way whatsoever in which you charge money, or collect fees.
Comment & Rating (10)