Search models, users, collections, and posts
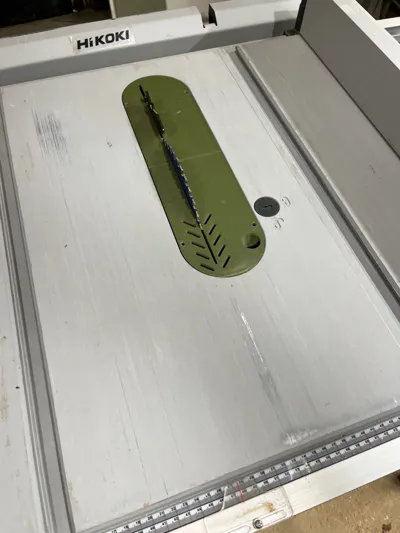
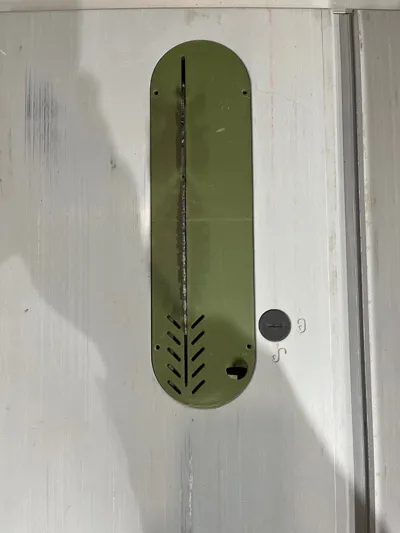
Hikoki C10RJ - zero clearance insert
IP Report


Print Profile(2)

0.2mm layer, 5 walls, 25% infill
Designer
6.2 h
1 plate

A1 mini - 0.2mm layer, 5 walls, 25% infill
Designer
6.4 h
2 plates
Open in Bambu Studio
Boost
43
104
9
7
131
65
Released
Bill of Materials
Bambu Filaments
Select all

List other parts
- threaded pin - M5 - 10mm x 4:
- metal rod - diameter: 4mm; length: 90mm x 6:
Description
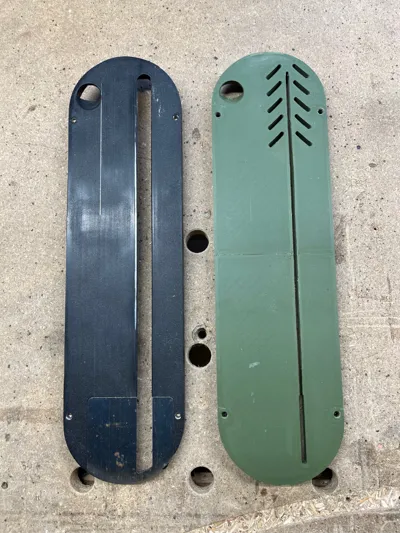
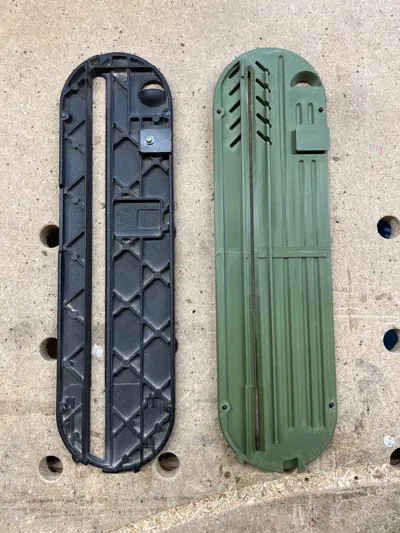
Zero clearance insert / throat plate for the Hikoki / Hitachi / Metabo C10RJ table saw / contractor saw.
To connect the two halves you have to use 6 metal rods with a diameter of 4mm and a length of 90 mm. These will also add some rigidity to the insert.
What you need besides the print:
- 6 metal rods with a diameter of 4mm and a length of 90mm
- 4 Threaded pins - M5 - length 10mm

- ca glue (although I didn't end up using it)
Assembly:
- After printing, drill out the holes with a 4mm drill bit, make sure not to go deeper than 48mm (the total depth of the hole is 50mm).
- Sand the edges of the 2 halves that will connect. Best way to do it is by using a sander with a guiderail or plate, that ensures you can sand at a 90 degree angle to the topside.
- Mark the rods at 45mm (so you know how far to insert them).
- Insert the rods in one half, the rods I used are a bit larger in diameter than the drill bit I used, so the fit was very snug and I needed to use a hammer to tap them in.
- If the rods go in easily, apply some glue in the hole first.
- Align the holes of the second half of the print to the rods Apply glue between the two halves and press them together.
- The rods I used had a really snug fit, so I didn't use glue (as I couldn't get the pieces separated after my dry fit). to press the two halves together I used a glue clamp.
- Insert the 4 threaded pins (you might have to rethread the thread with a tap).
- Lower your sawblade completely and place the insert in your table saw and use the threaded pins to adjust the height of the insert.
- Now move the fence of your blade over the insert, but make sure to stay clear of the slit for the sawblade.
- Start your saw and slowly raise the sawblade to cut the slit to it's exact width.
Boost Me (for free)
If you are happy with the insert, gimme a boost as a thank you!
License
This user content is licensed under a
Creative Commons Attribution-Noncommercial-Share Alike
Comment & Rating (9)