


Print Profile(3)


Bill of Materials


Description
Boost Me (for free)
You can boost me for free to support my model makings!
Maglev Hot Air Balloon
Man o man was this a doozy to stabilize to this point.
This idea was inspired by my previous light bulb model (and i am very much, as the kids would say “in my maglev era”).
The real challenge of this model was balancing (no pun intended) quality and stability. This model is somewhat still being optimized, as i am always trying to get the max amount of lift with these maglevs.
What's the point really if it doesn't LEVITATE, am i right?
I have included a multicolor version (with layer swaps), to be used with the AMS. To my great shame i only own one of these bad boys, so to print a 5 color balloon, i just swapped the top most color to the first color. And then in printing, after the first color change, i just yoinked the first color spool and replaced with the color i wanted to be the last. This works as long as you're using the same material with the flow rates being in the same ballpark (dif color obv).
Also included, a single color variant. But i must say you probably can get decent results with adding a pause every 230 layers and just swapping the spool manually before continuing.
As for the madman who wants vertical strips: Buckle up, i checked and its +15h. I would have tried this myself but i fear the waste.
Hardware needed:
-Maglev diy kit
-18 x 6mm steel balls (did i mention this was hard to balance?)
All included in the BOM.
Instructions:
Gather all your materials
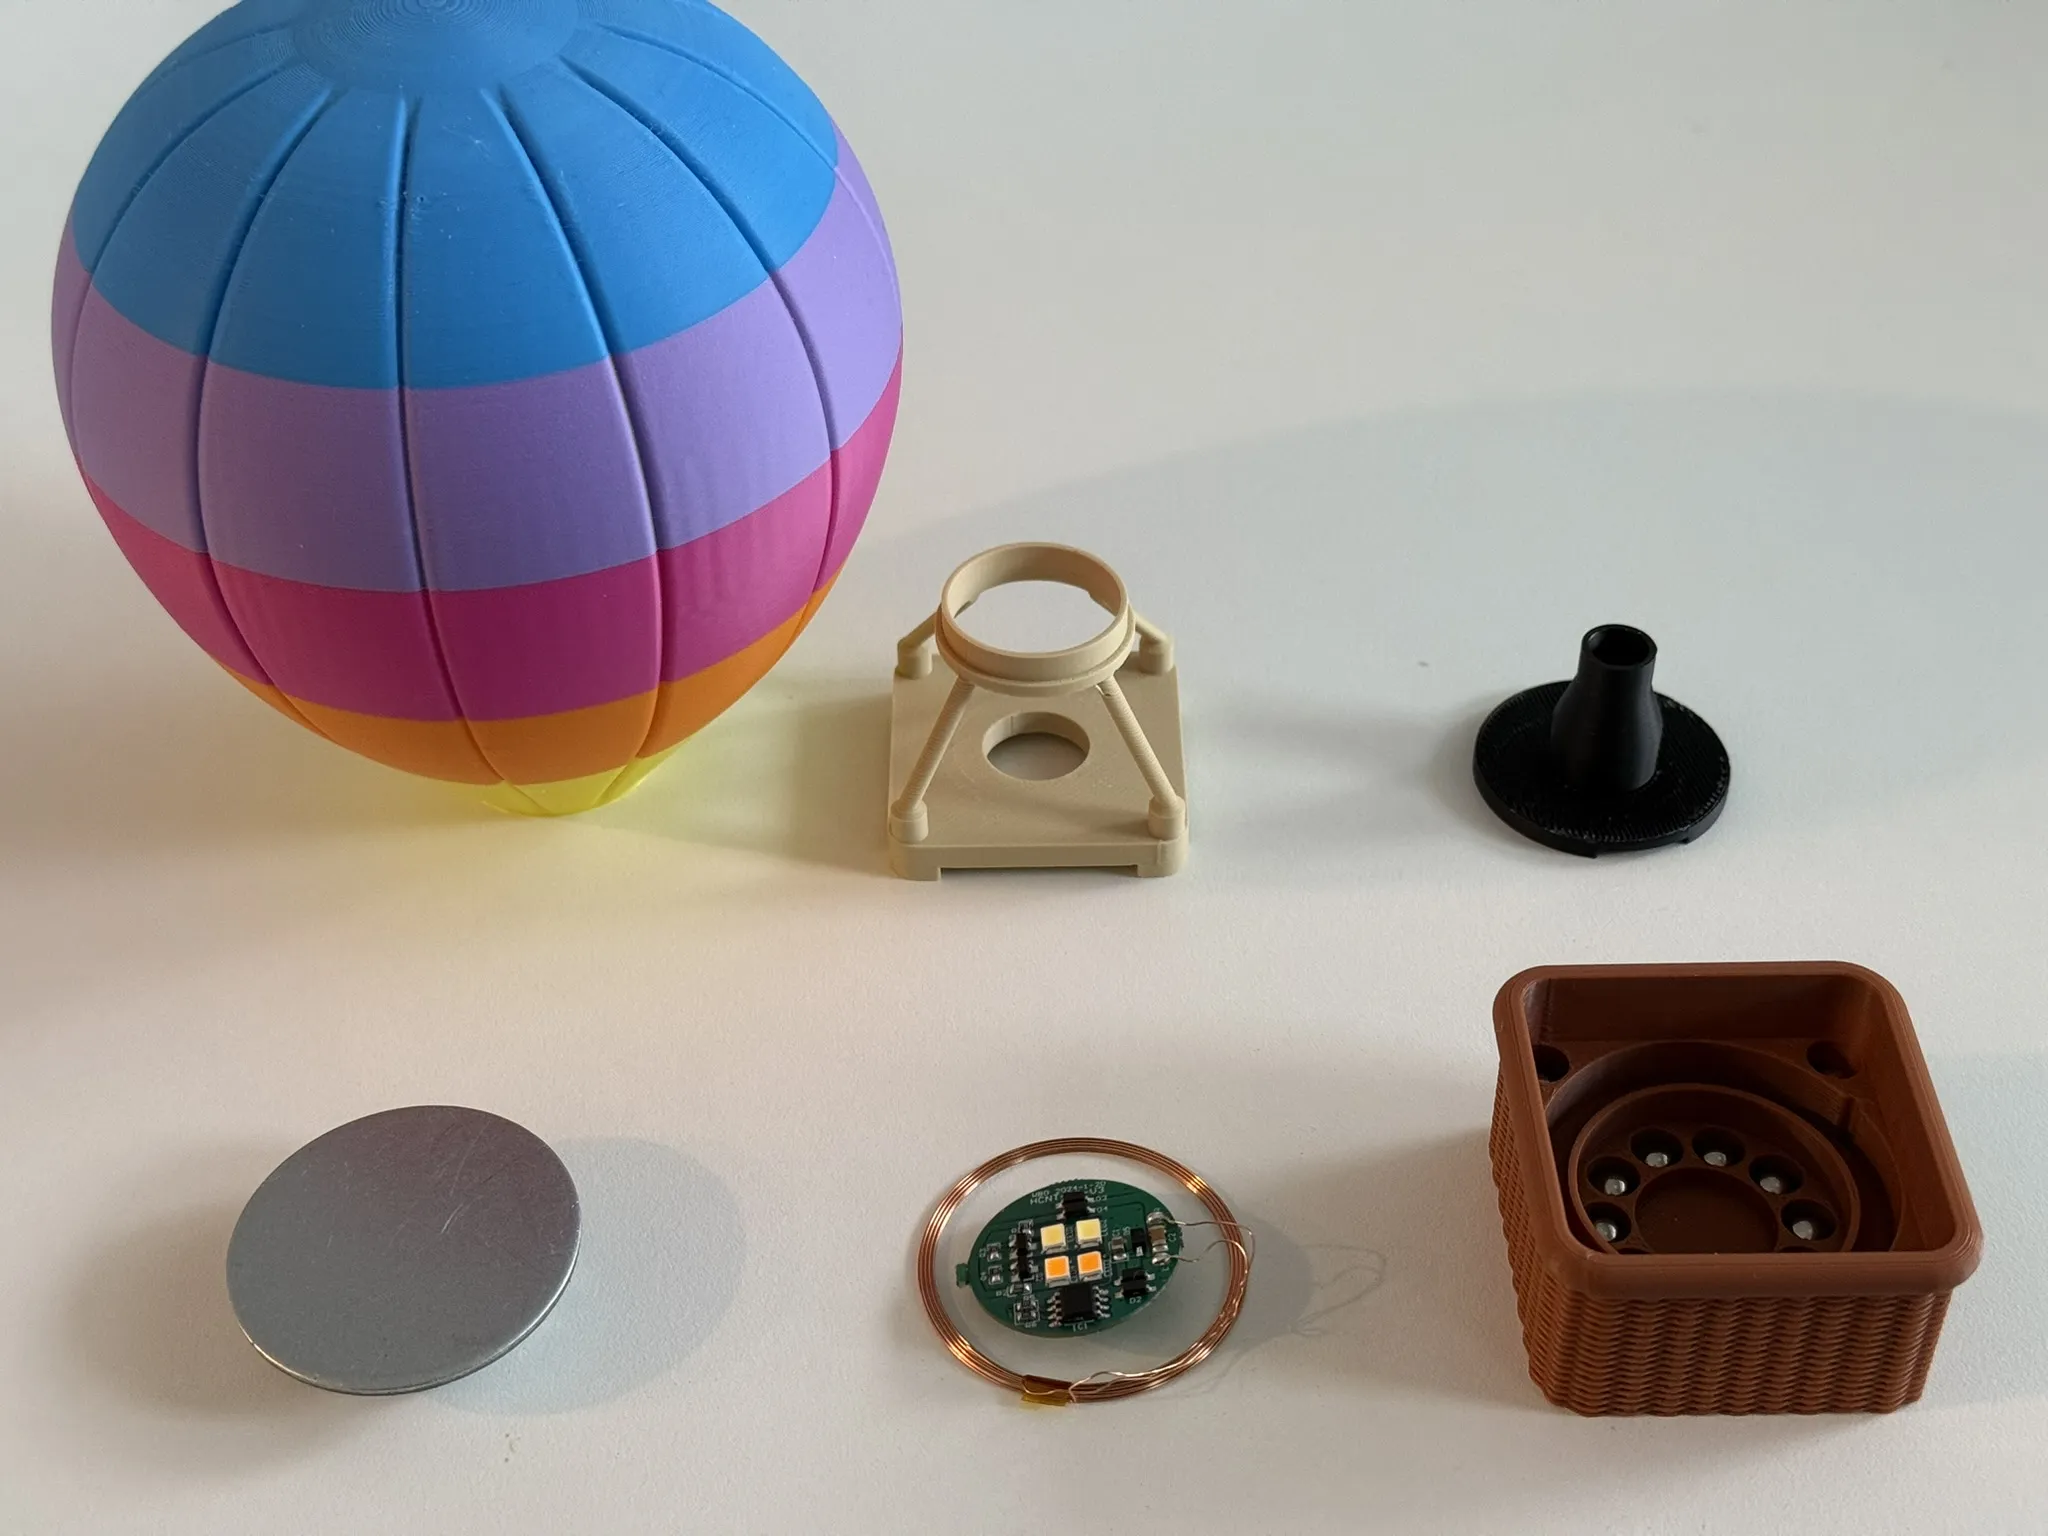
2. Start by inserting the 18 6mm balls into the base. Note, the corners will take 2 balls in each hole
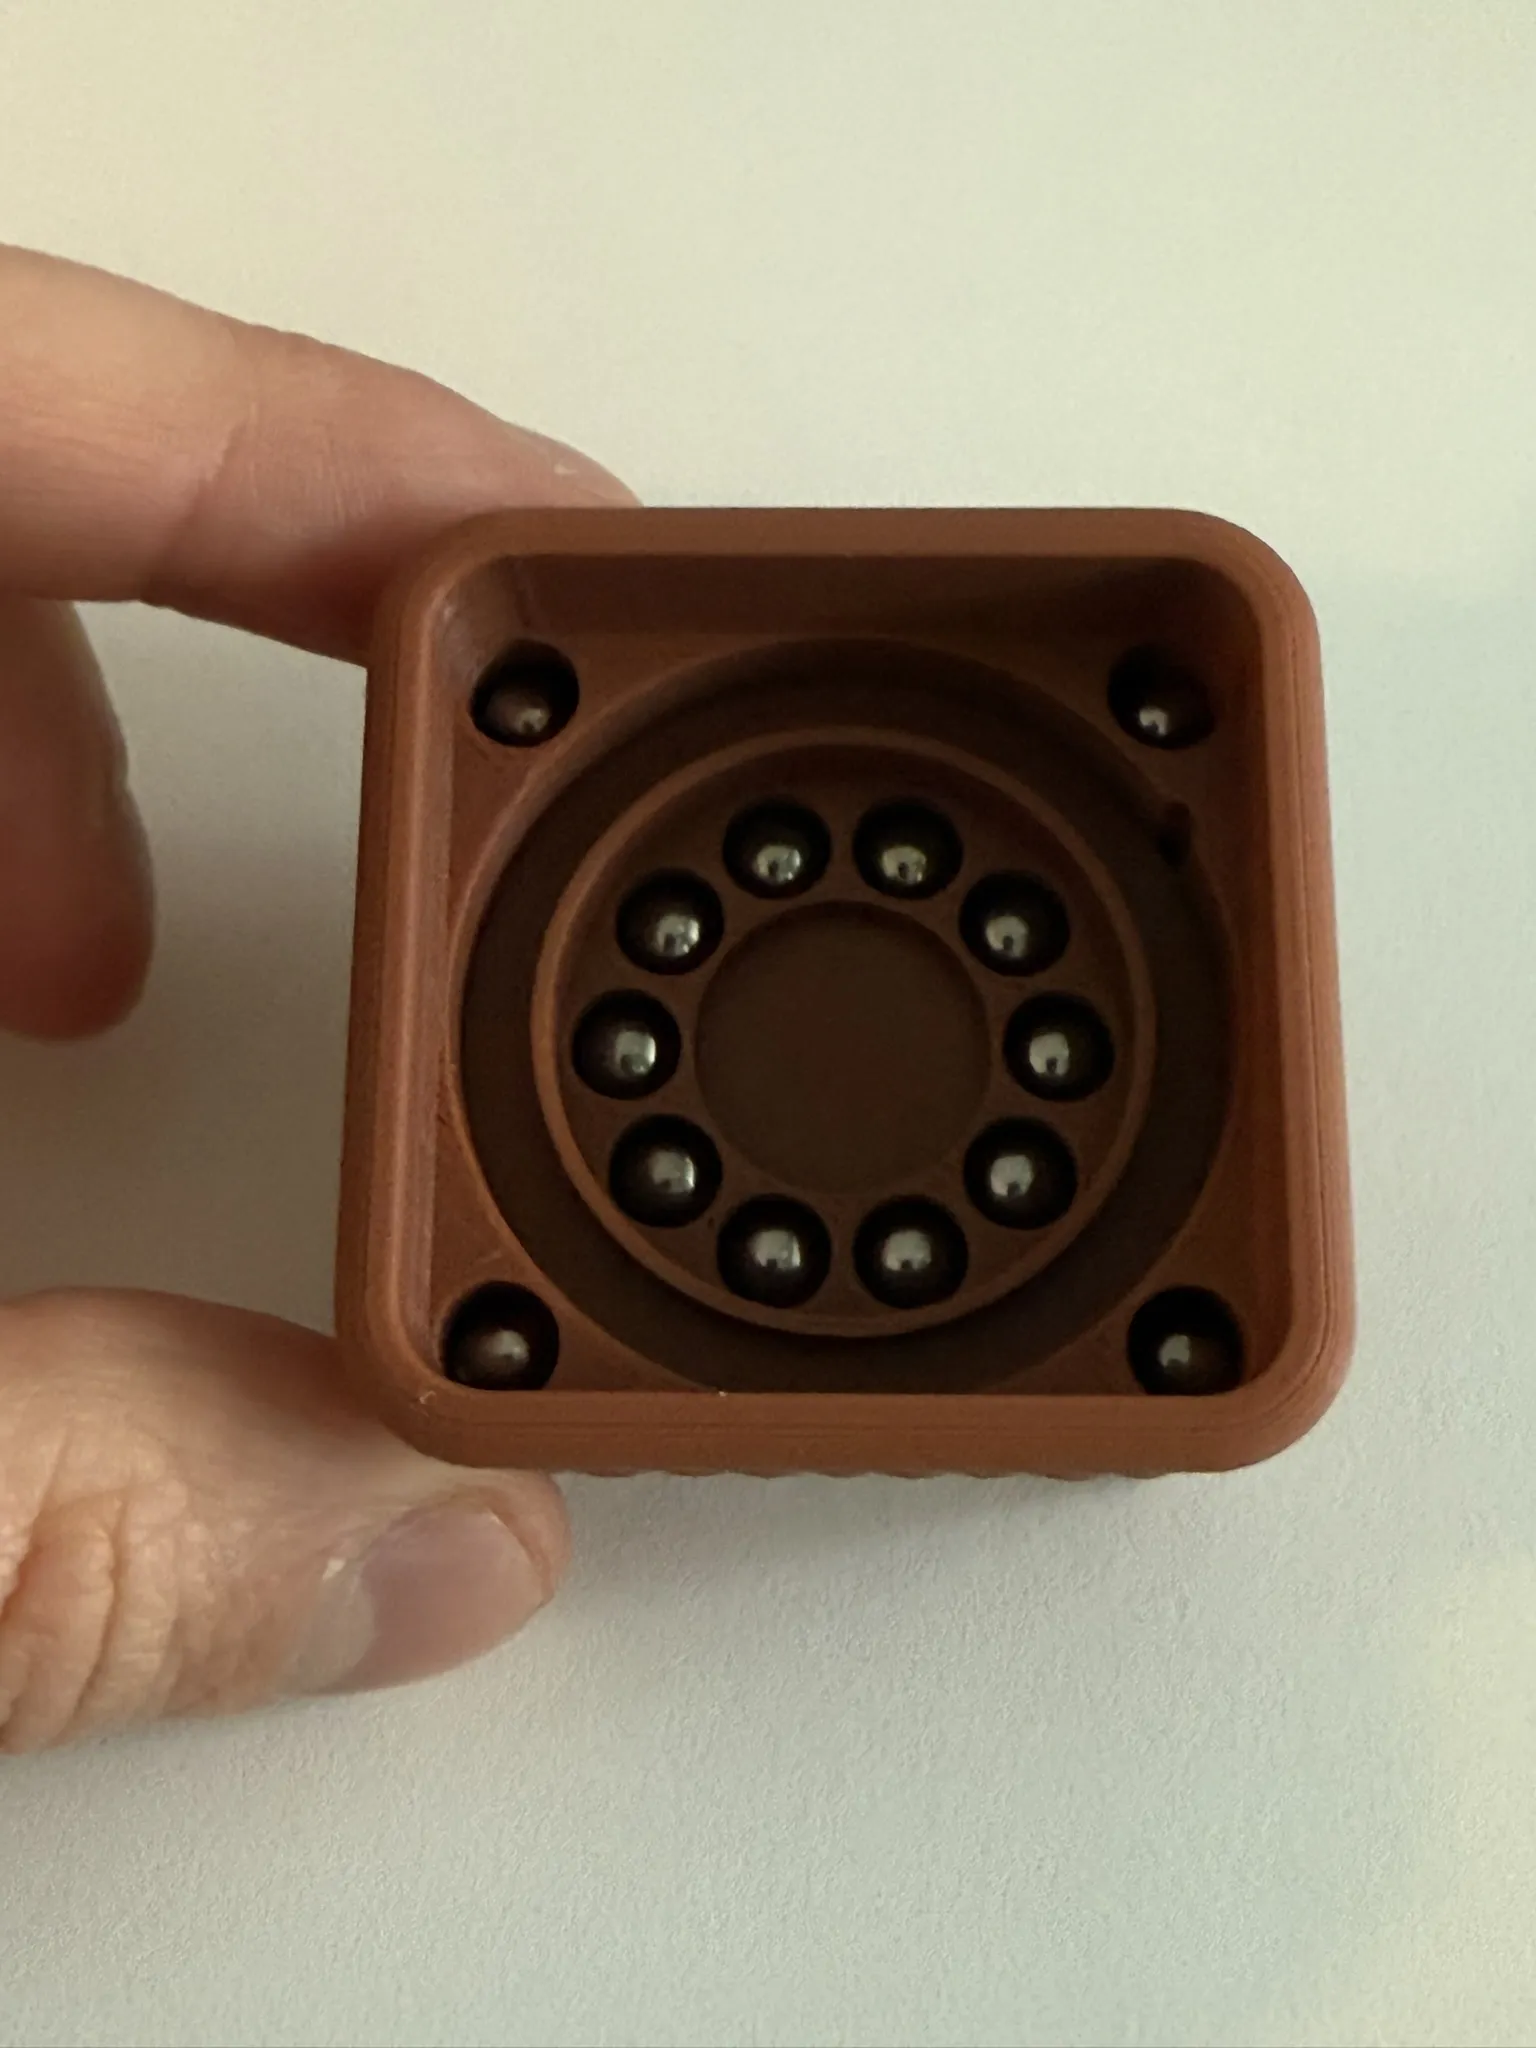
3. Insert the led modules coil

4. Slide in the magnetic puck so tat the excess wiring is neatly below the edge. There is a small groove in the printed base piece, try to snake through it to the top.

5. once fully inserted, make sure the led module is aligned in the center. Next take the burner piece and aligned it so that the wires and protruding circuit piece go below the grooves in the burner piece.


6. Insert the bases top part. Note, this will be a snug fit, also make sure it is evenly inserted, any angle might affect the stability!

7. Top it all off by inserting the balloon on top!

(8. if youre having trouble removing the puck, try using something metallic, i use a caliper for this.)

License

You shall not share, sub-license, sell, rent, host, transfer, or distribute in any way the digital or 3D printed versions of this object, nor any other derivative work of this object in its digital or physical format (including - but not limited to - remixes of this object, and hosting on other digital platforms). The objects may not be used without permission in any way whatsoever in which you charge money, or collect fees.


Comment & Rating (356)