
miniVICE X2-Series - Modular mini painting handle


Print Profile(2)


Description
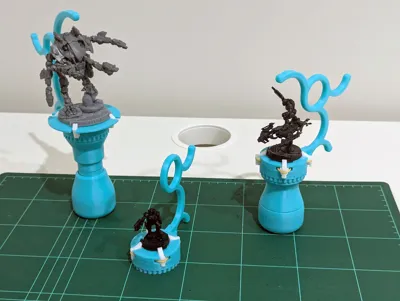
This is a complete remake of my previous painting handle system, with several key upgrades:
- Optimized for Easier Printing & Assembly - Parts are designed to print more efficiently, fit together seamlessly, and function better.
- Stronger & More Secure - The improved design provides a firmer grip, reducing the chance of miniatures slipping or getting knocked out
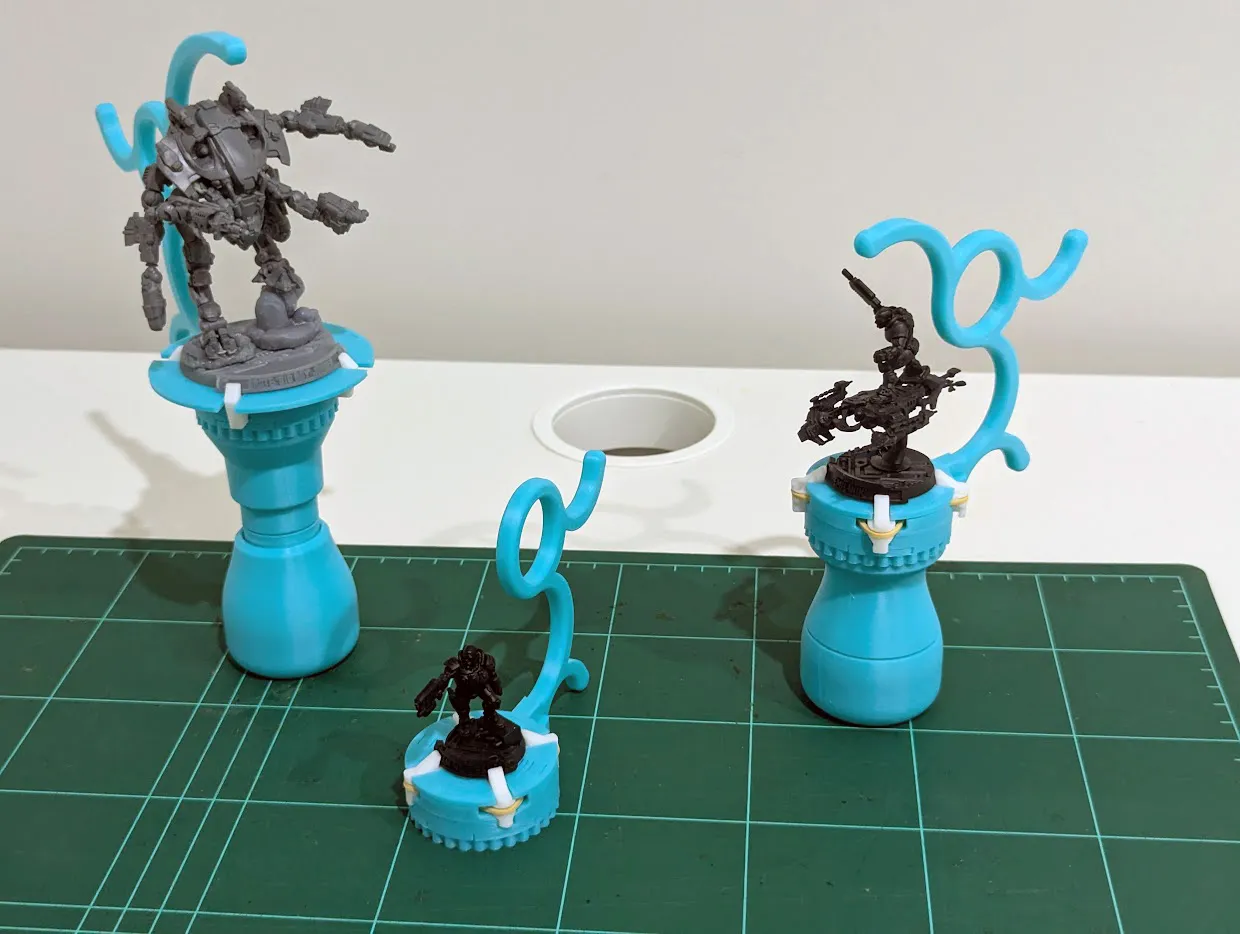
- Higher Weight Capacity - Most miniatures weigh under 20g, but this vice securely holds up to 100g. ideal for heavier resin or metal models. It may support even more, though higher weights haven’t been tested yet.
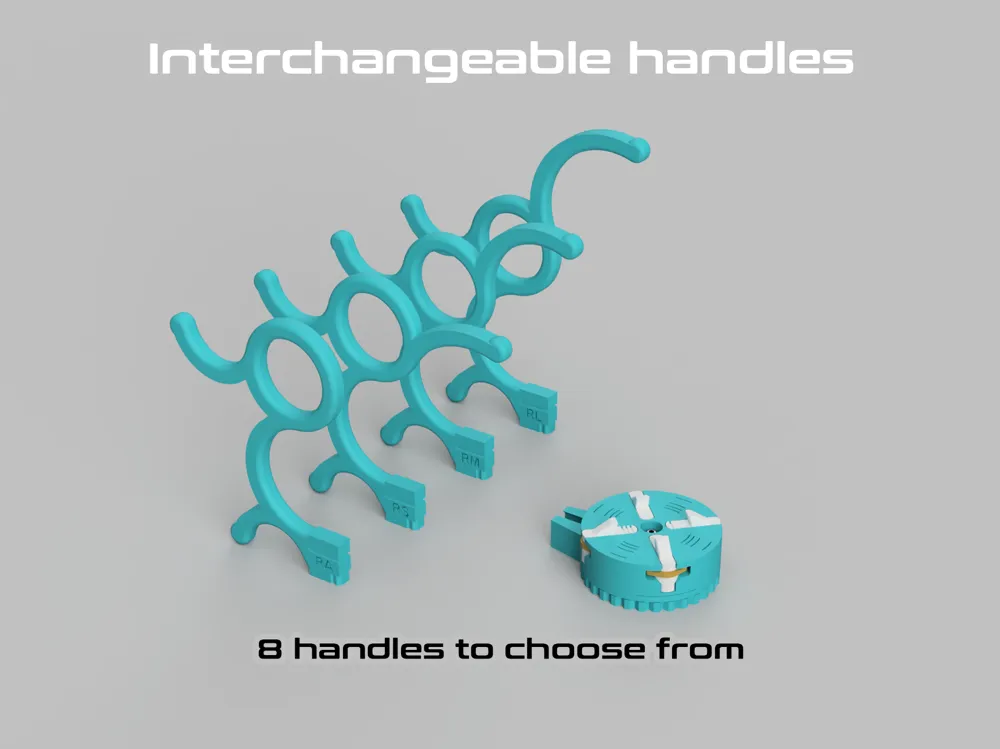
- Interchangeable Handles - Swap handles as needed for different painting styles or preferences.
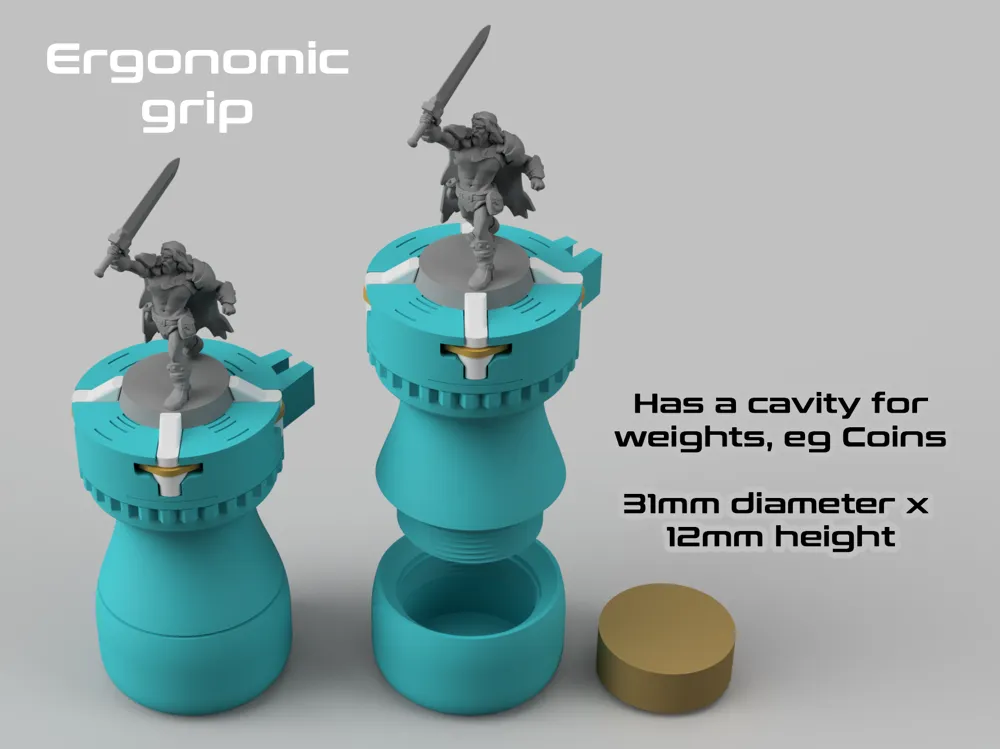
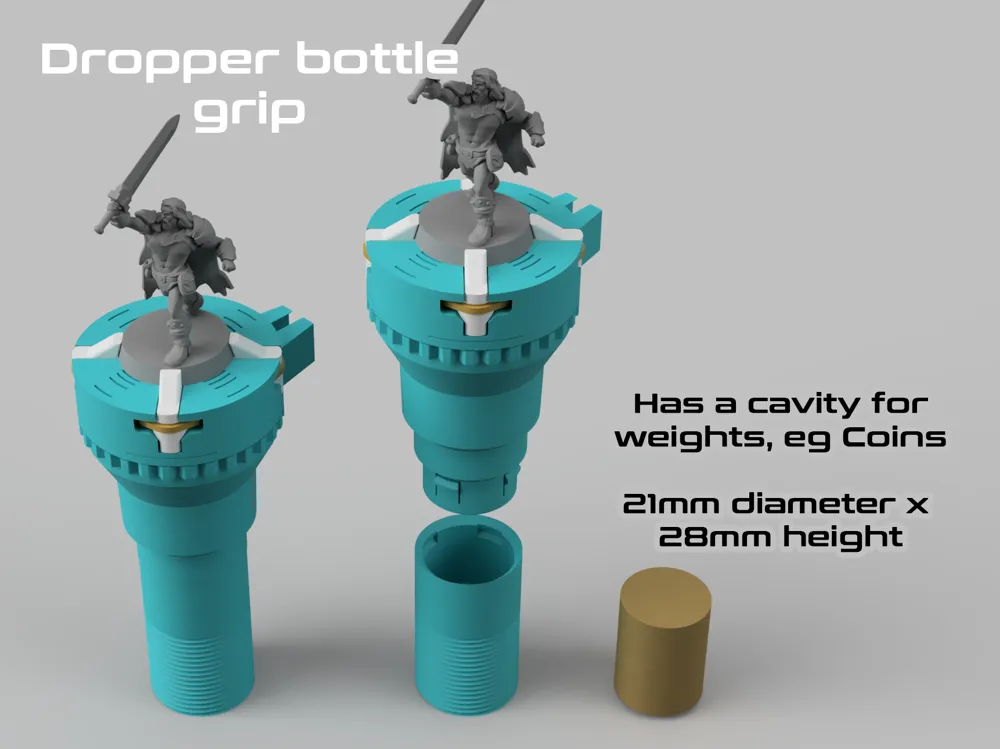
- Enhanced Grip Options - Grips can hold additional weights for extra stability, and ergonomic alternatives are available for improved comfort.
Important Usage Tips
- Jaw Alignment - Avoid opening the jaws past the edge of the chuck top. Doing so can misalign them. If this happens, loosen or remove the screw, separate the top and bottom chuck parts, and reset the jaws as you would during assembly.
- M3 Locknut - When using a standard M3 nut, turning the dial may gradually loosen the screw and nut over time. Be sure to periodically retighten the nut. To avoid this issue, I highly recommend using locknuts.
- Choosing the Right Parts - If you're unsure which parts to use, check the Recommended Builds Configurations section. The print profile also includes a pre-arranged build plate for each configuration.
Bill of Materials
Essential Components
Rubber Bands - 1.5mm thickness, (50mm flat length, approx. 35mm outer diameter). Here in Australia that is N14 but seems N14 is different in other countries so just be aware. Anything close to 50mm flat length/35mm diameter should work fine.
Screw and Nut - M3 x 12mm screw/bolt with a locknut (Regular nuts work but may require occasional retightening)
Optional (but recommended)
Weights: the dropper bottle grip and ergonomic grip can hold weights, this is optional but highly recommended as it will make them more stable and harder to accidentally knock over. You can use coins, lead pellets/shot/ballast or whatever can fit in the cavity. I don't recommend sand or water as its hard and very messy to use.
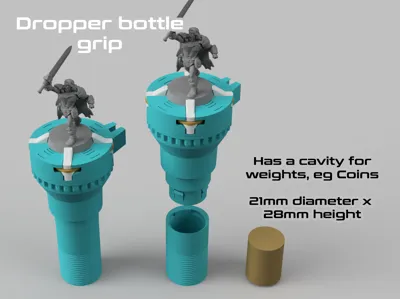
- dropper-bottle-grip has a cavity of 21mm diameter by 28mm high.
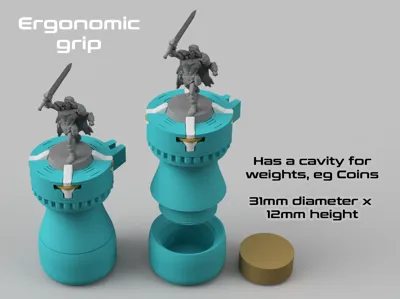
- ergonomic grip has a cavity of 31mm diameter by 12mm high.
Assembly
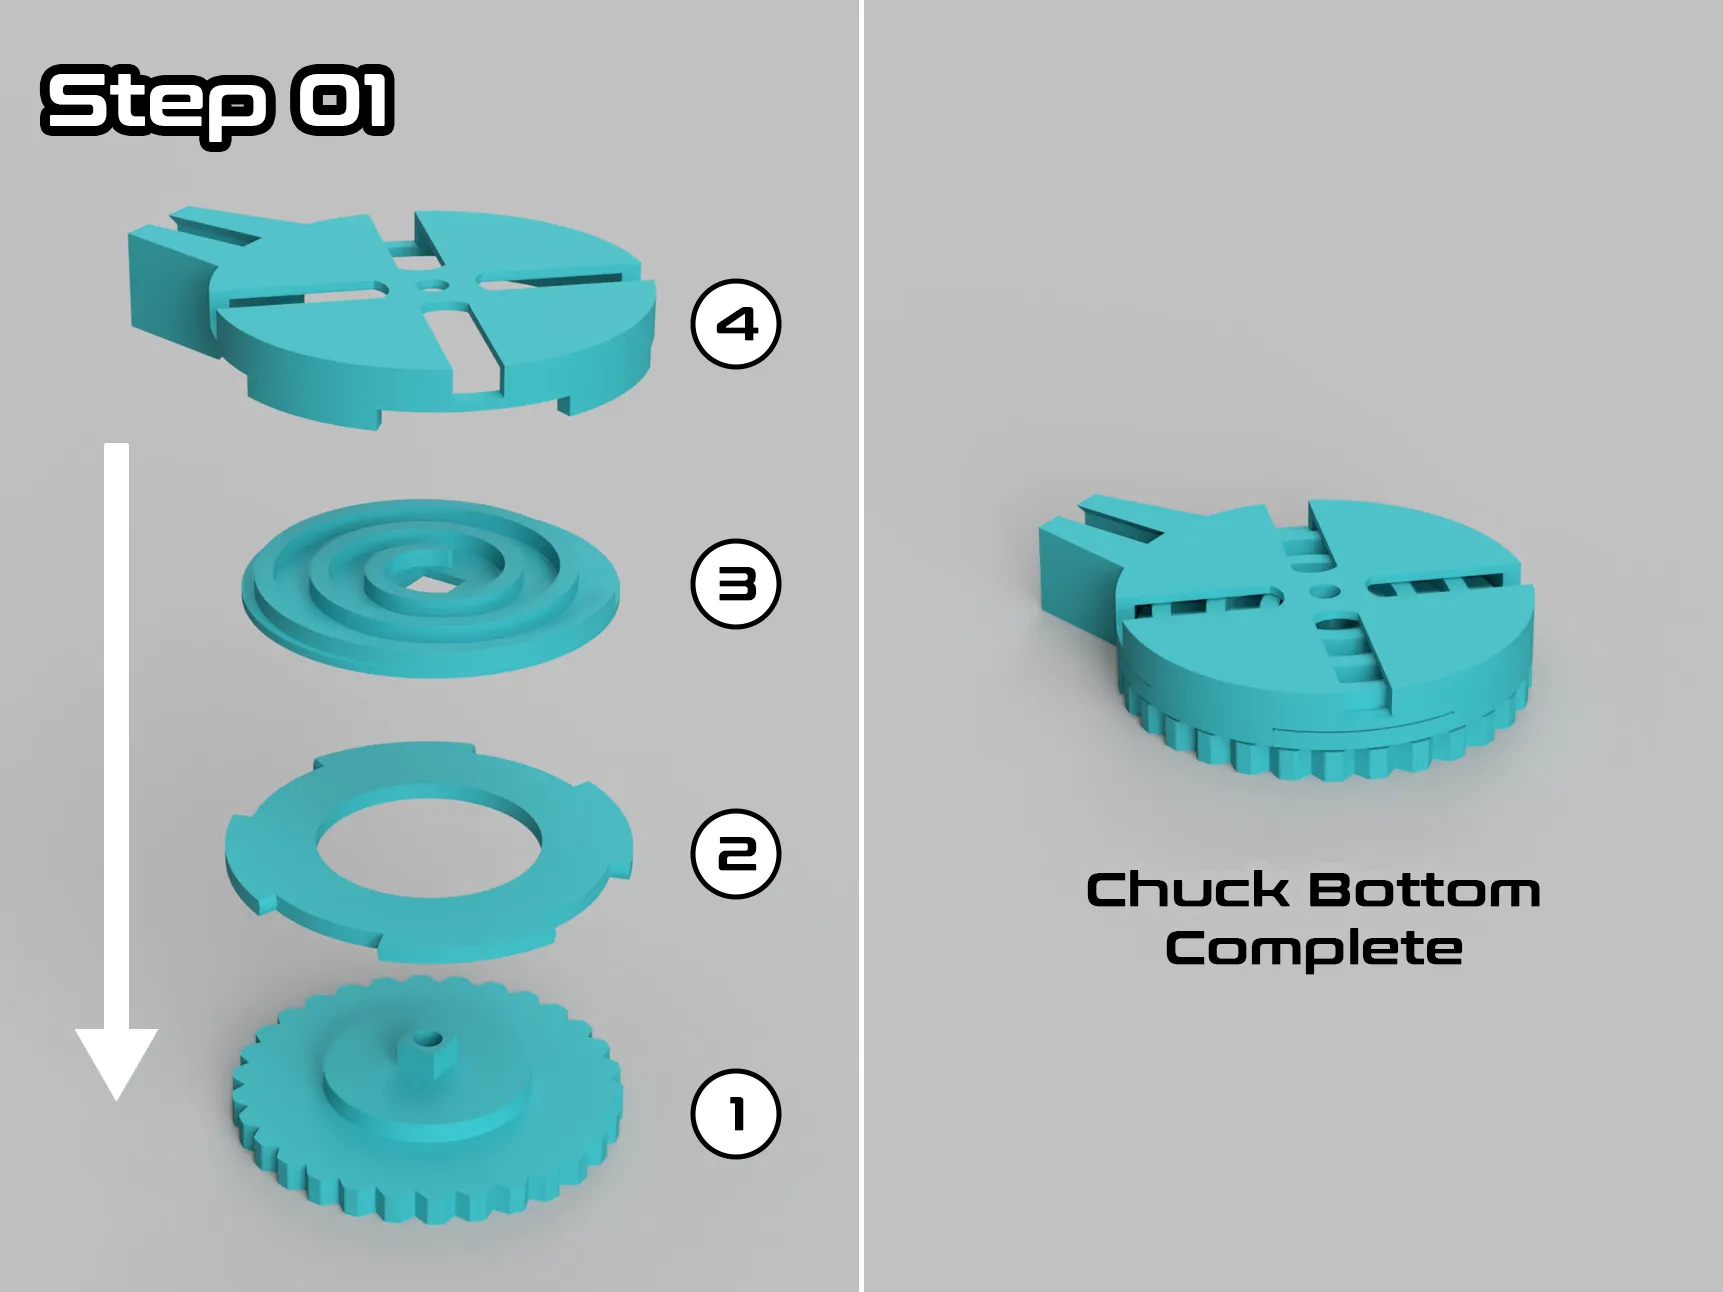
STEP 01 - Assemble the Chuck Bottom
Parts needed:
- chuck-bottom_dial
- chuck-bottom_case-base
- chuck-bottom_scroll
- chuck-bottom_case-cover
You can assemble this upside down or right way up, whichever works best for you. Part 1 has a square peg that needs to align into the square hole in Part 3. Part 2 and Part 4 use finger joints for friction fit, no glue needed. When assembled you should be able to rotate the dial and see the spiral rotate.
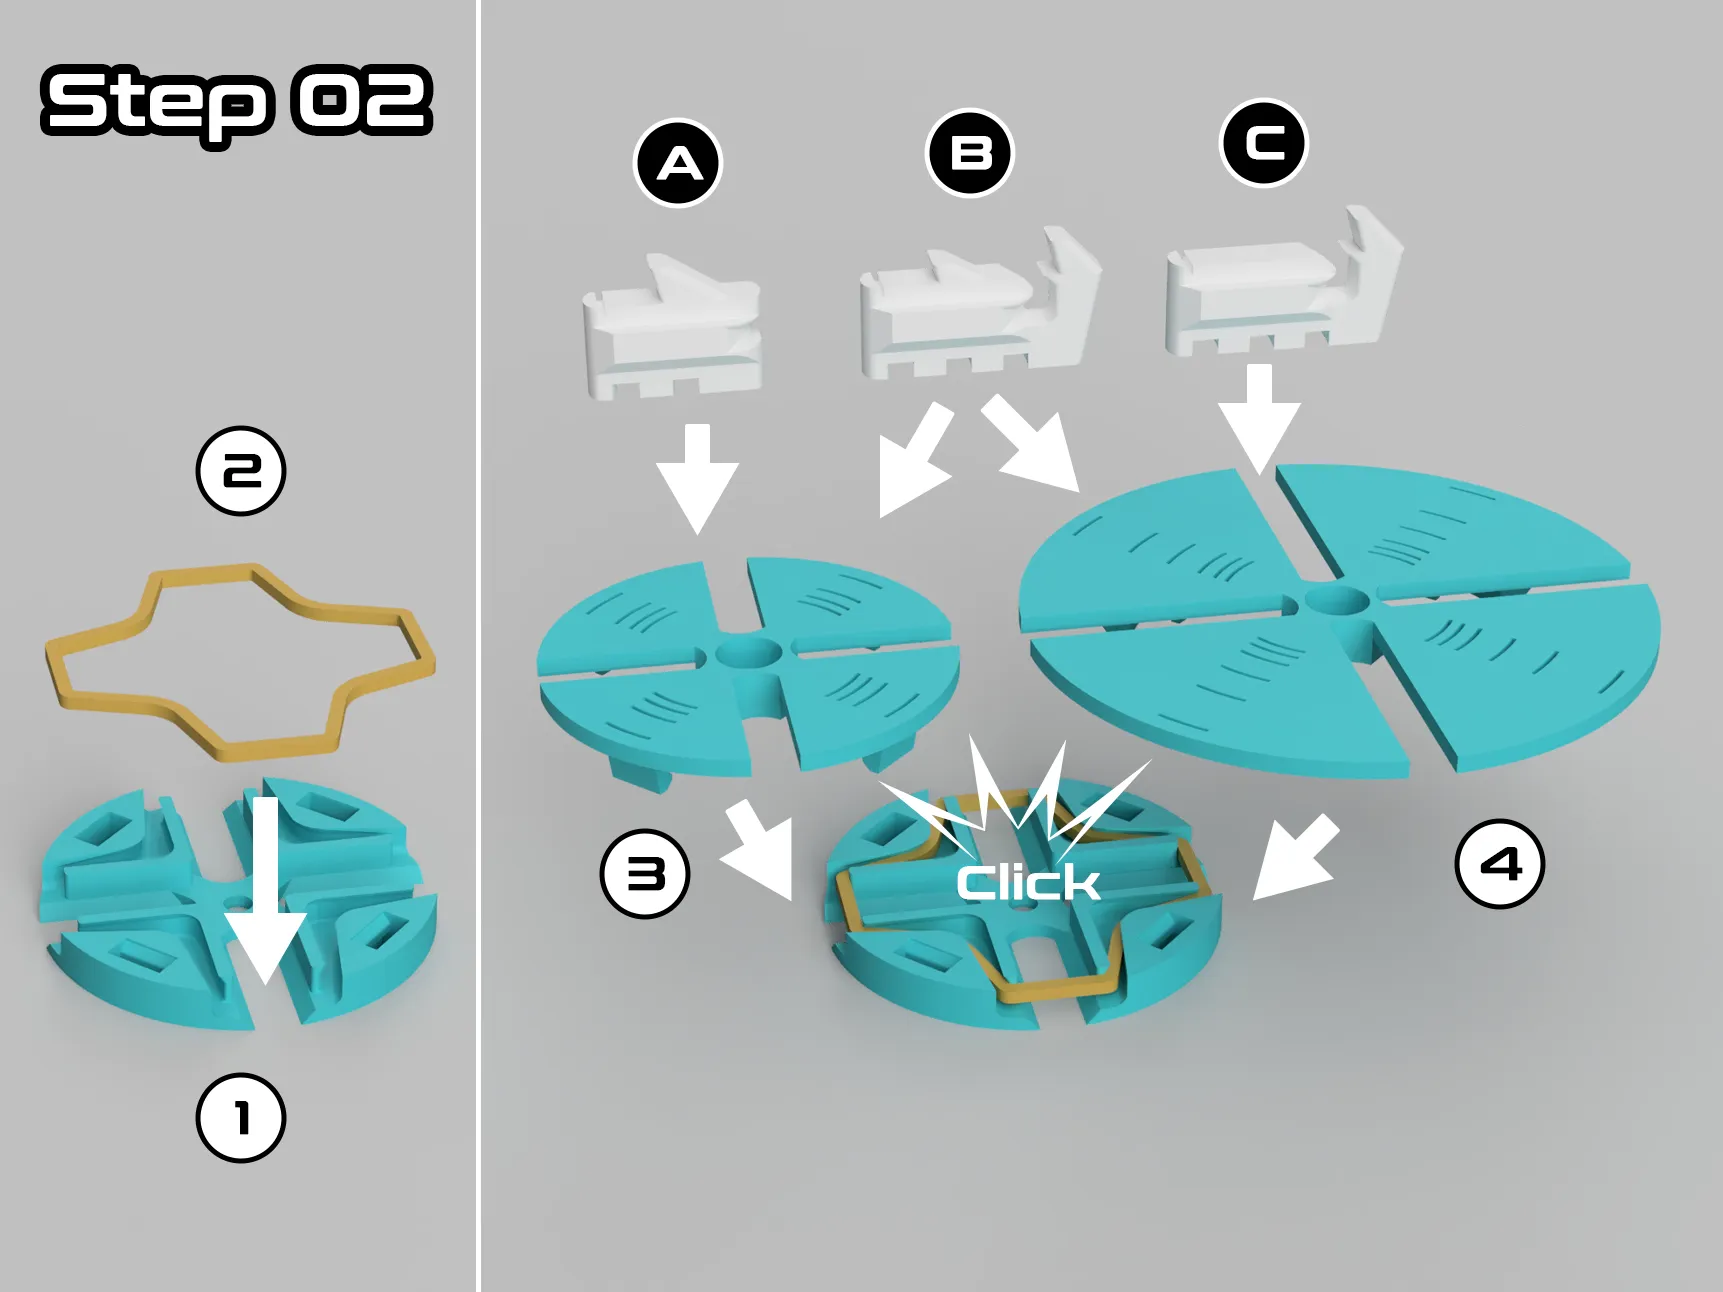
STEP 02 - Assemble the Chuck Top
Parts needed:
- chuck-top_rails
- rubber band: 1.5mm thickness, size N14 (50mm length when flat, approx 35mm outer diameter).
choose between - chuck-top_cover: this is the regular top. good for bases 25-40mm in diameter.
or - chuck-top_cover__large: this larger version of the top can be used for bases 25-60mm in diameter.
For the Jaws choose between
- Regular jaws: jaw_25-40__1, jaw_25-40__2, jaw_25-40__3 and jaw_25-40__4
These jaws only pair with the part 3 and are made for bases 25-40mm in diameter. - Combo jaws: jaw_25-65-combo__1, jaw_25-65-combo__2, jaw_25-65-combo__3 and jaw_25-65-combo__4
These jaws have 2 jaws built in and can be paired with either part 3 or 4. NOTE: that if using the outer jaws then the base must be hollow, it can not be solid or have any obstructions like magnets, otherwise the inner jaws will not let the base rest in the jaws. - large jaws: jaw_50-65-large__1, jaw_50-65-large__2, jaw_50-65-large__3 and jaw_50-65-large__4
These jaws only pair with part 4 and are made for bases 50-65mm in diameter. Since there is no inner jaw they will work with solid or hollow bases
Before proceeding, decide how you want your build to function. I have provided preconfigured options in the Recommended Builds Configurations section and they are also in the print profile. Tip: It’s generally better to build for a specific purpose rather than trying to create a one-size-fits-all solution.
- Add the rubber band
- locate the chanel in Part 1 designed to hold the rubber band.
- Stretch the rubber band into place so it sits securely in the groove.
- Attach the top (example regular top, Part 3)
- Align the pegs on Part 3 with the holes in Part 1
- Firmly press Part 3 into Part 1. You should hear all 4 pegs click into place.
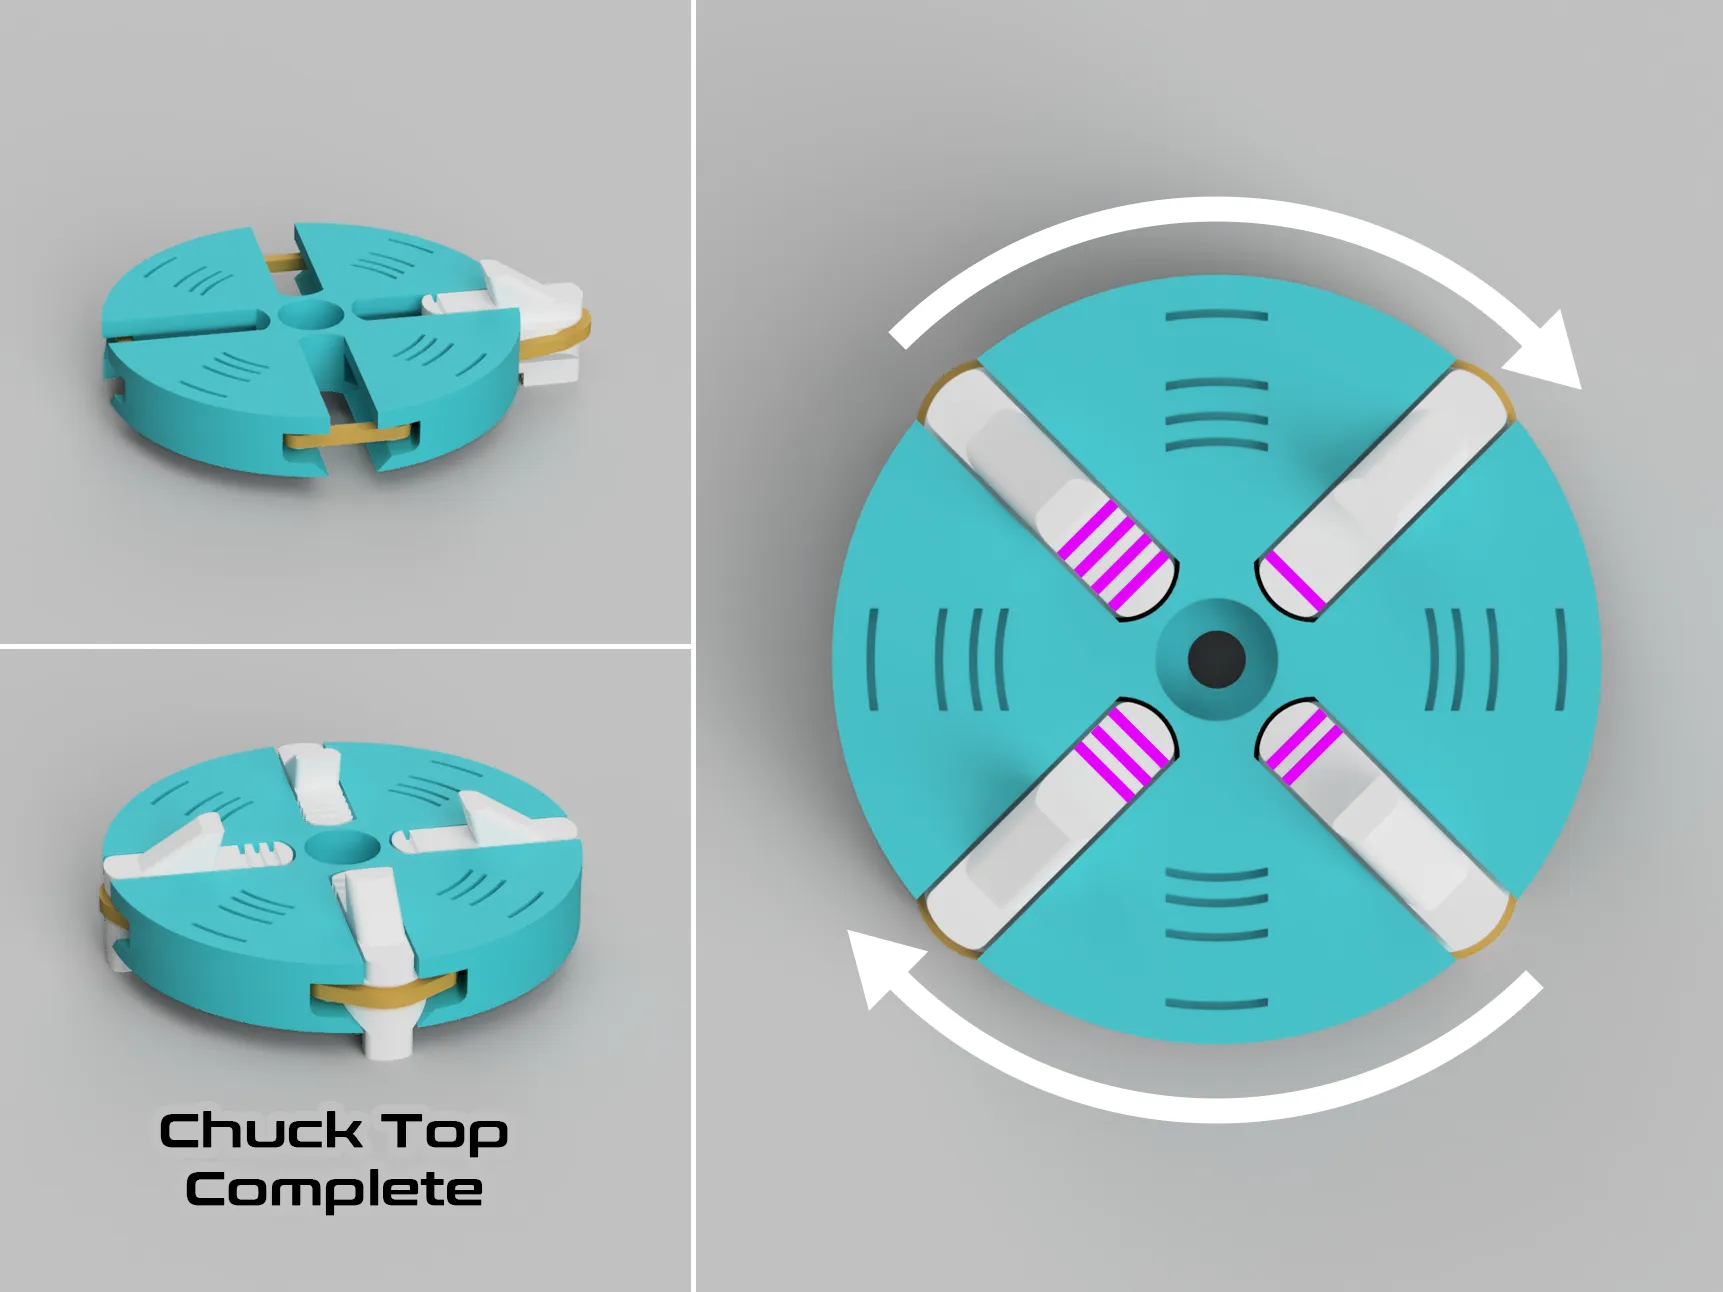
Installing the Jaws (example Jaws A)
IMPORTANT: Insert the Jaws in the correct order. Install the jaws clockwise, following the numbered notches (marked in magenta above).
- Gently pull the rubber band out from the channel in Part 1
- Keep it lifted so you can slide the jaws into place.
- Slide each jaw into its channel, ensuring the rubber band sits properly in the notch.
Hints and tips:
- You can hook the rubber band with a jaw and pull it out. Then, use your finger to lift the band while sliding the jaw into place.
- When using the large top Part 4 with Jaws B or Jaws C, first place them facing outward, upside down and ensure the rubber band is in the jaw's cutout. Rotate and flip the jaw counter clockwise into position, it will naturally slide into its channel.
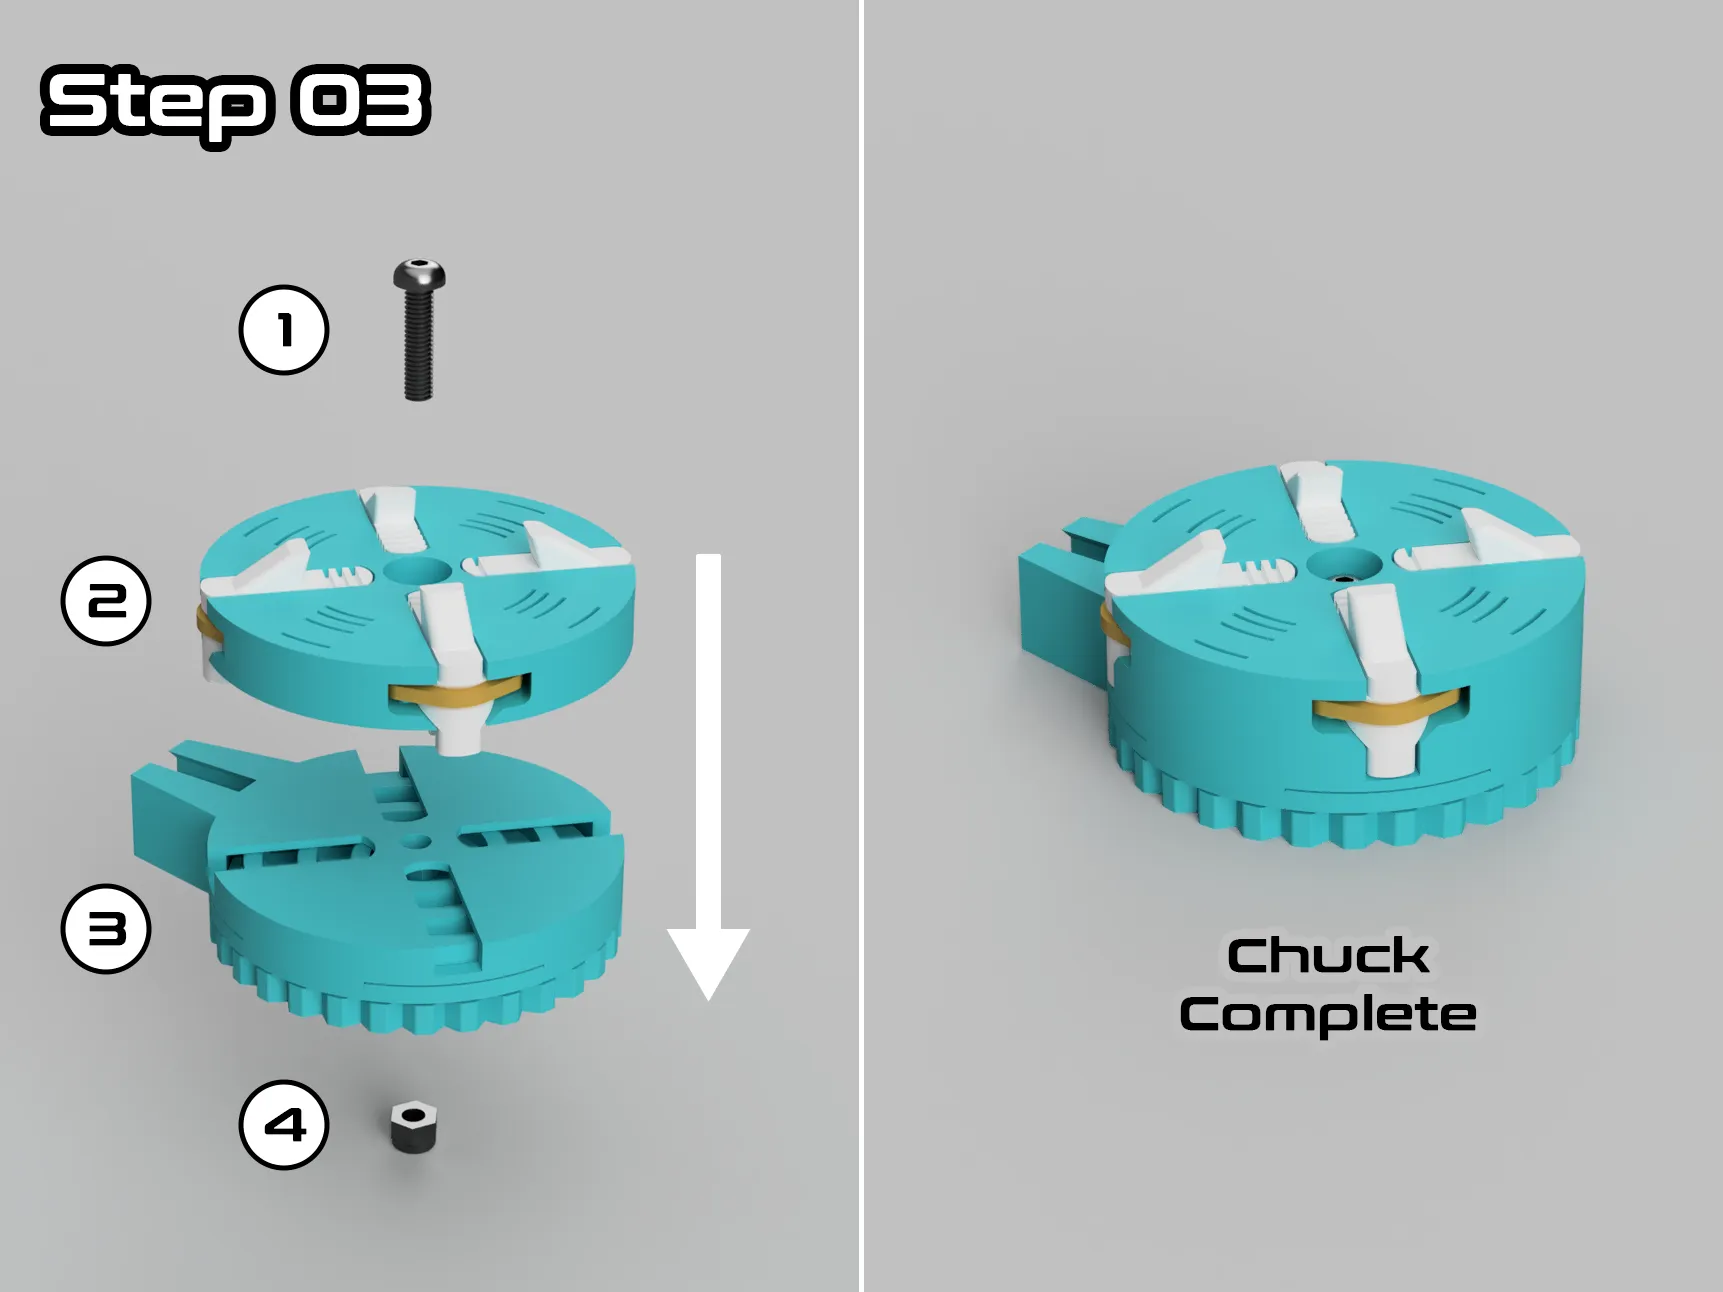
STEP 03 - Assemble the Chuck
Parts needed:
- M3 x12mm bolt
- assembled chuck top
- assembled chuck bottom
- M3 Locknut (more effective) or M3 regular nut
Time to bring the top and bottom together.
- Aligning the Jaws
- When you fit these parts together, the jaws may not immediately align with the spiral mechanism. Turn the dial in the OPEN direction until all four jaws fall into place within the spiral.
- Securing the Assembly
- Locate the cutout in the dial for the nut and insert the nut. Locknut (Recommended) – Prevents the nut from loosening over time.
- Insert the M3 screw form the top side.
- rotate the dial in CLOSE direction until the jaws close as far as they can go.
- Tighten the screw and nut
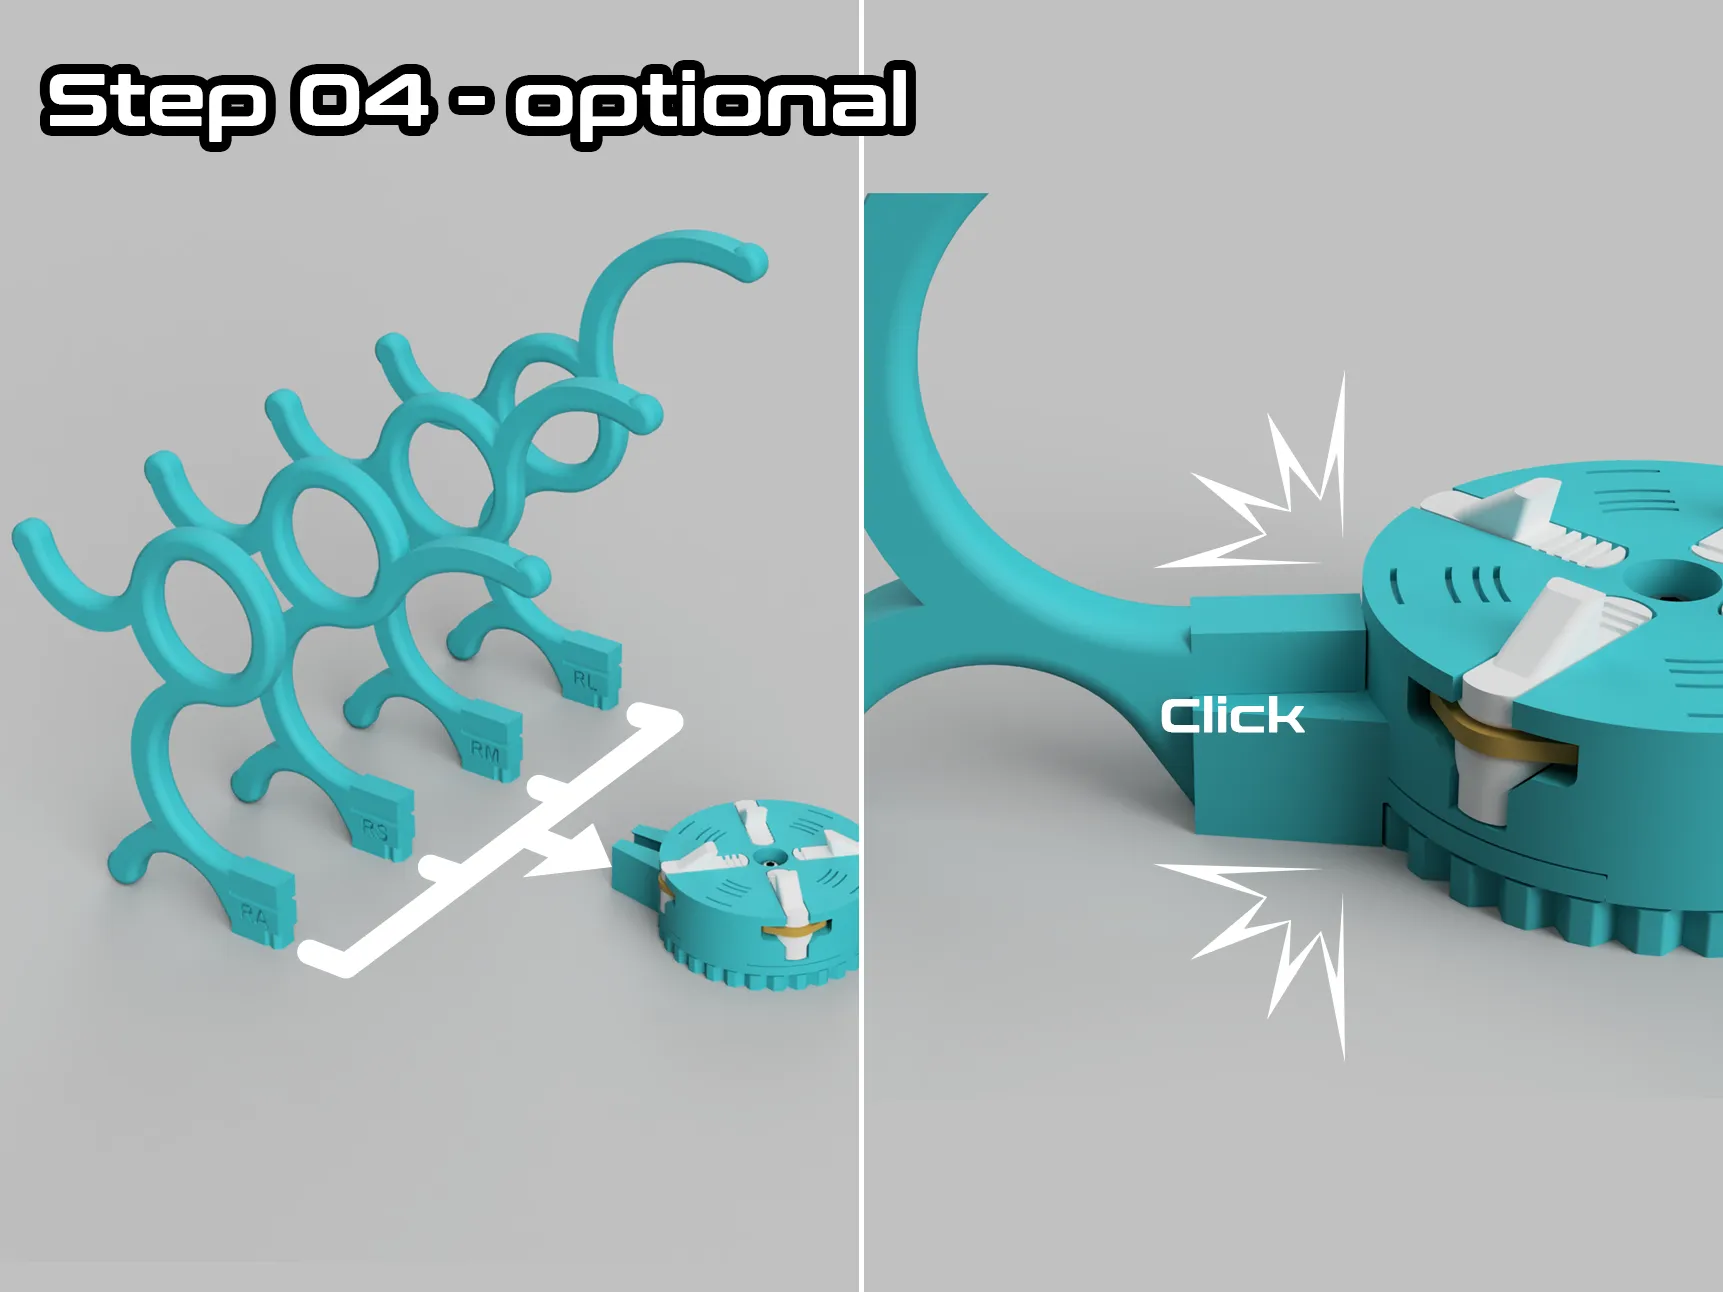
STEP 04 - Interchangeable handles
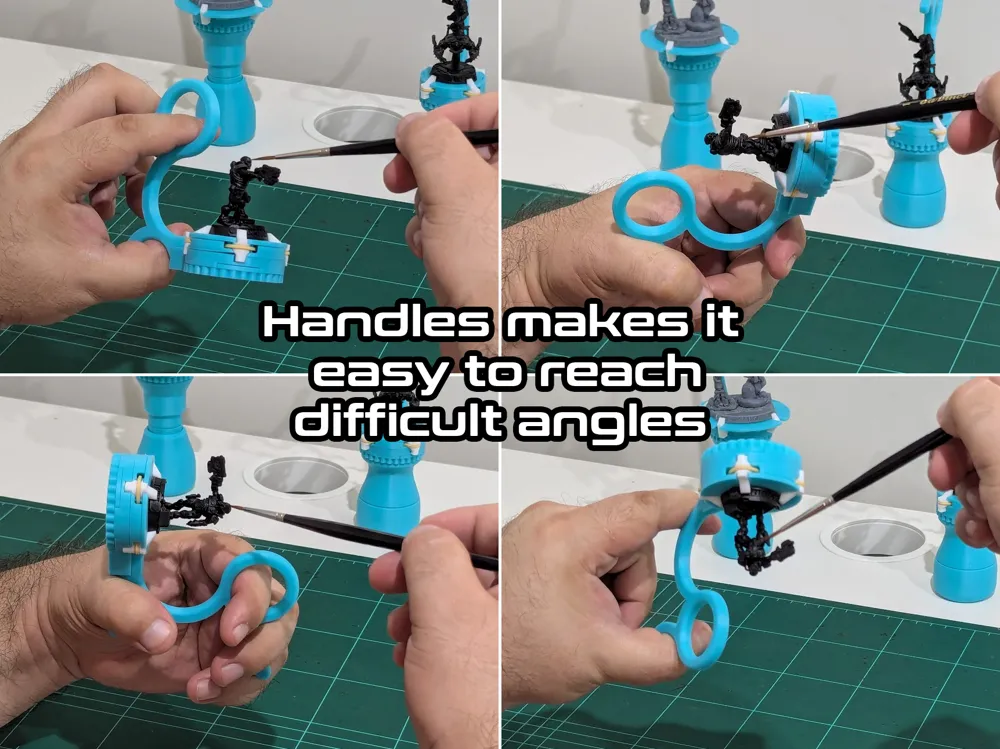
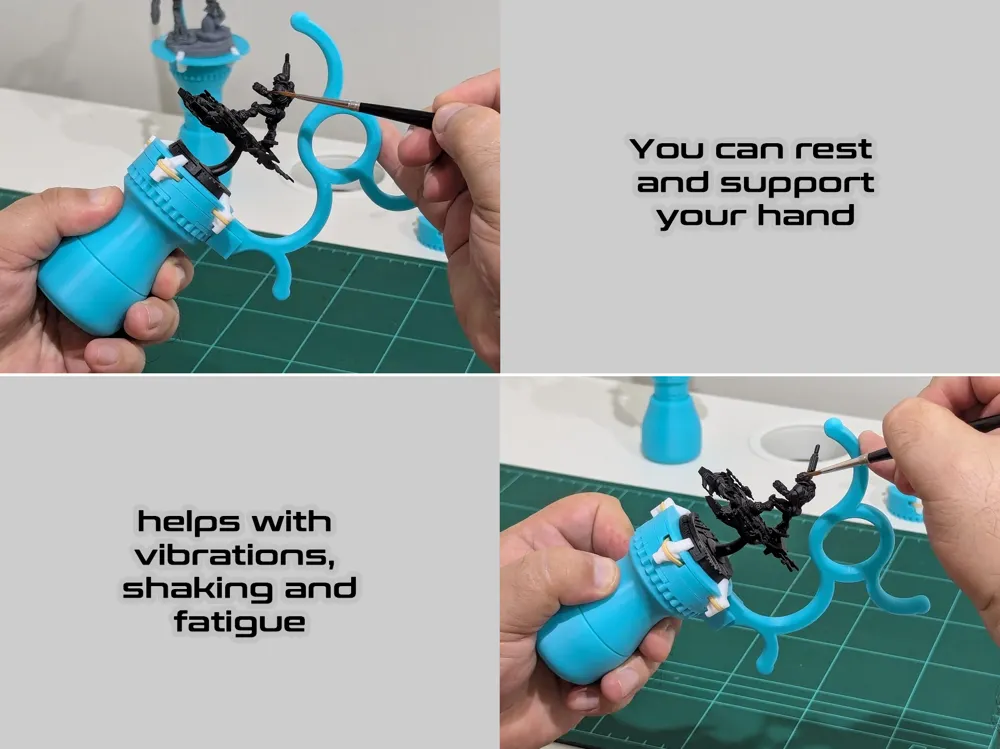
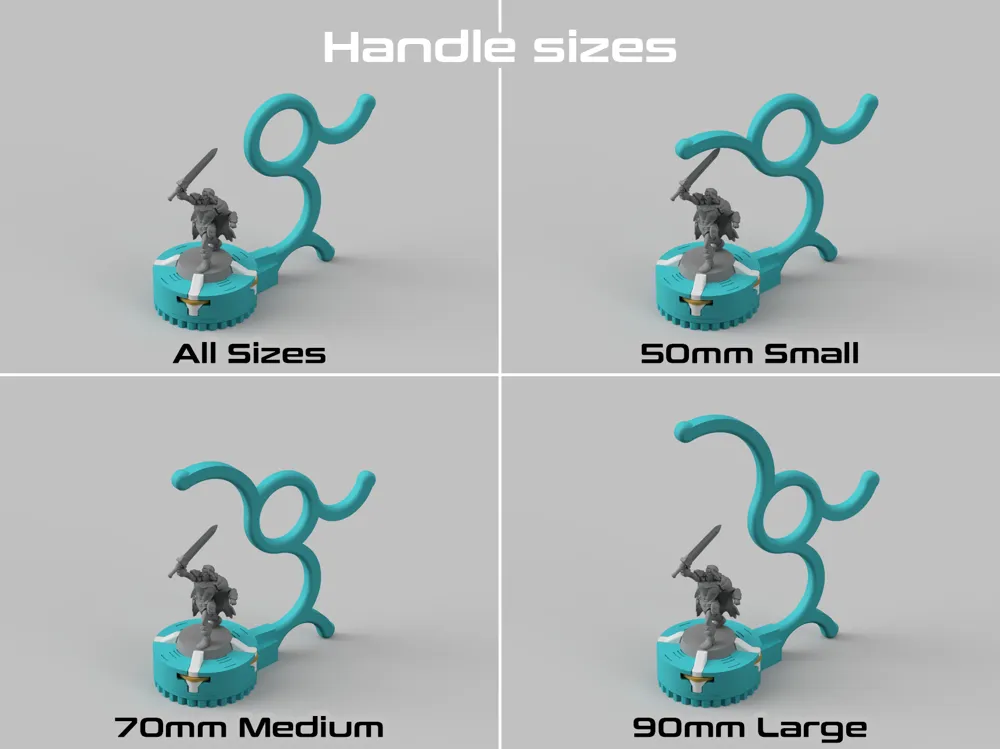
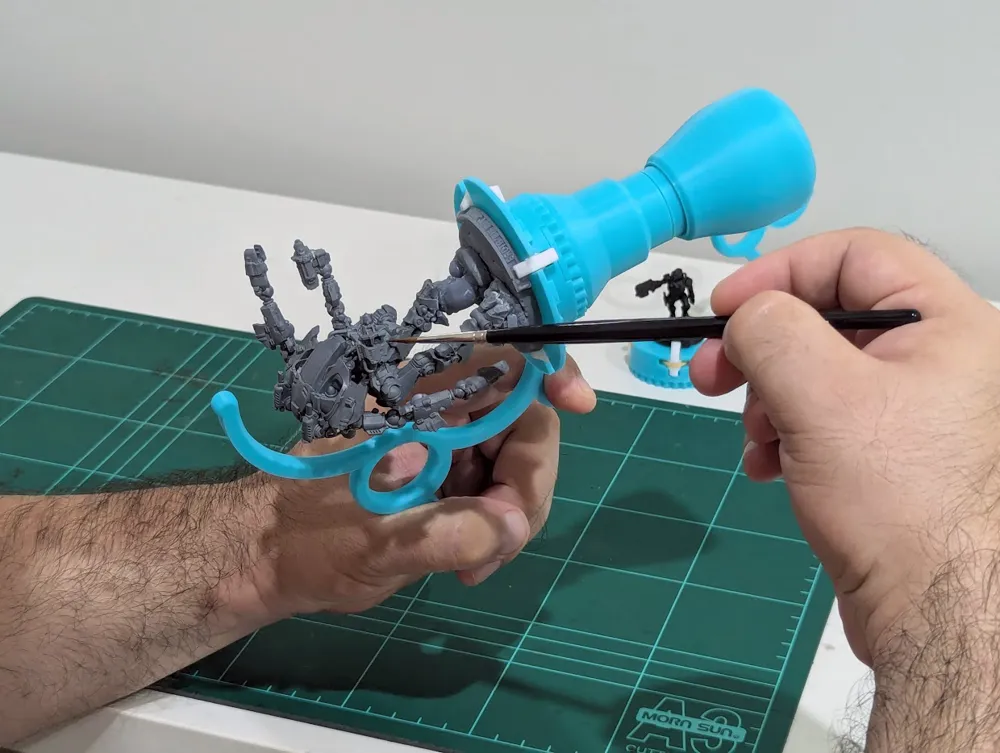
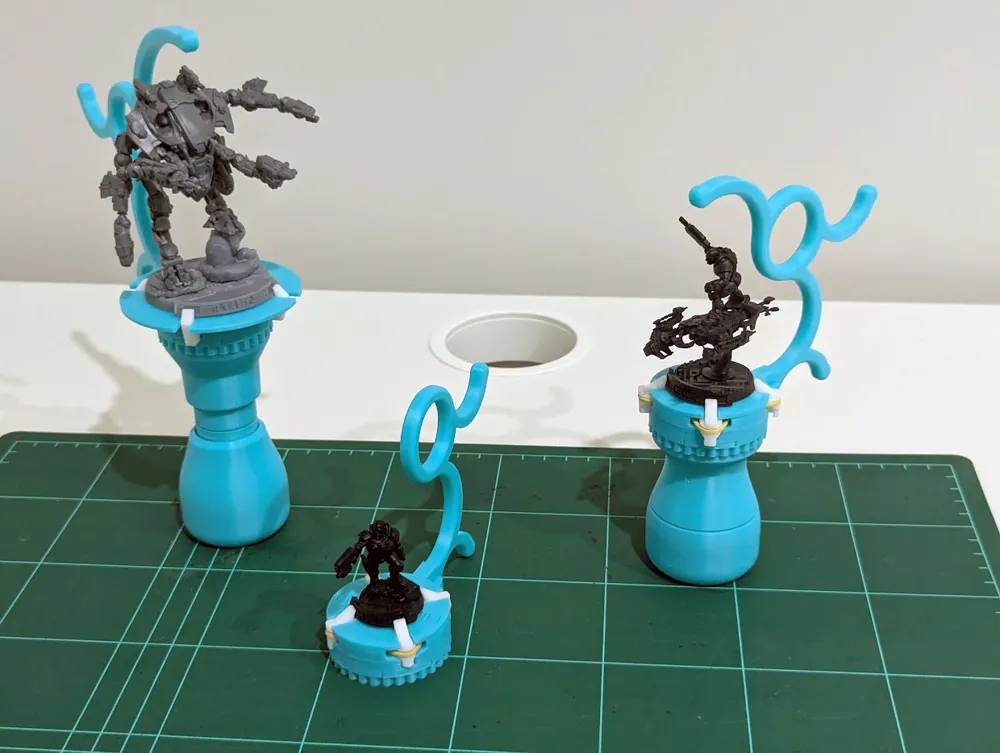
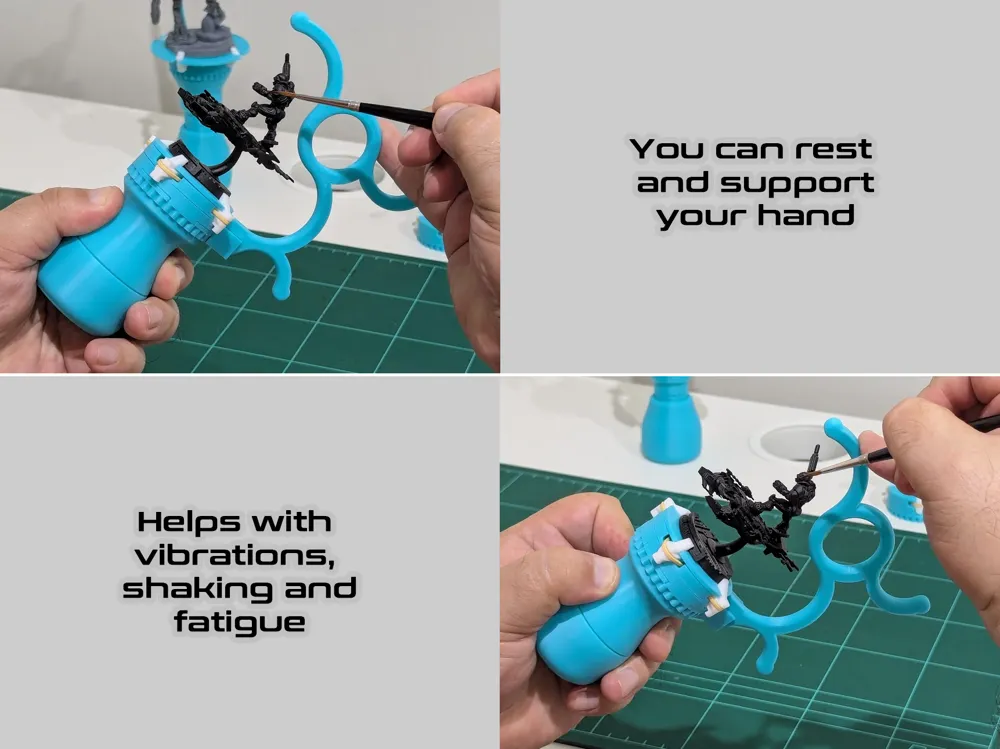
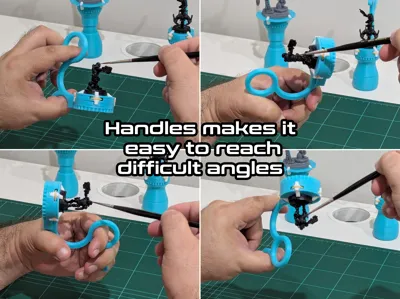
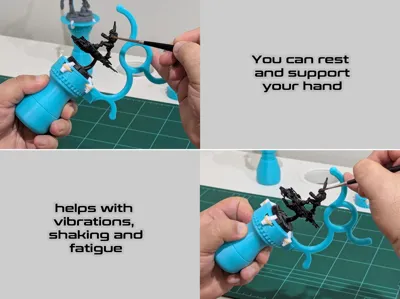
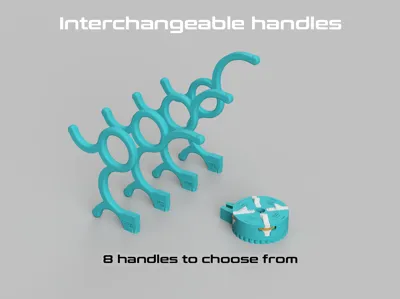
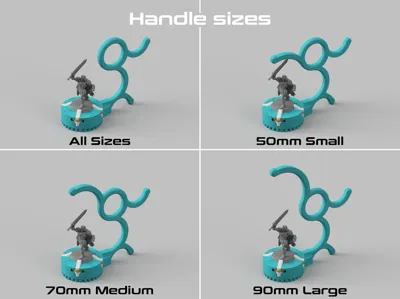
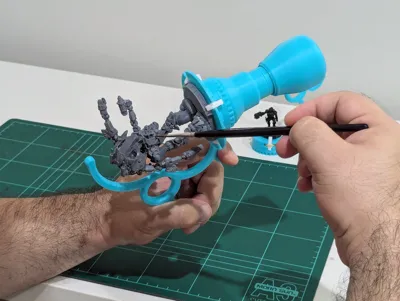
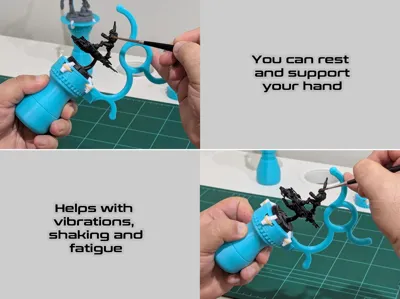
There are 4 sizes of handles. The handles are great to rest your painting hand and to use for stabilising your hand to reduce shaking.
- All sizes: this handle does not add a resting point and works for any size miniature
- Small 50mm: This adds a stabilising point at 55mm so it has room for minis with a max height of around 50mm
- Medium 70mm: This adds a stabilising point at 75mm so it has room for minis with a max height of around 70mm
- Large 90mm: This adds a stabilising point at 95mm so it has room for minis with a max height of around 90mm
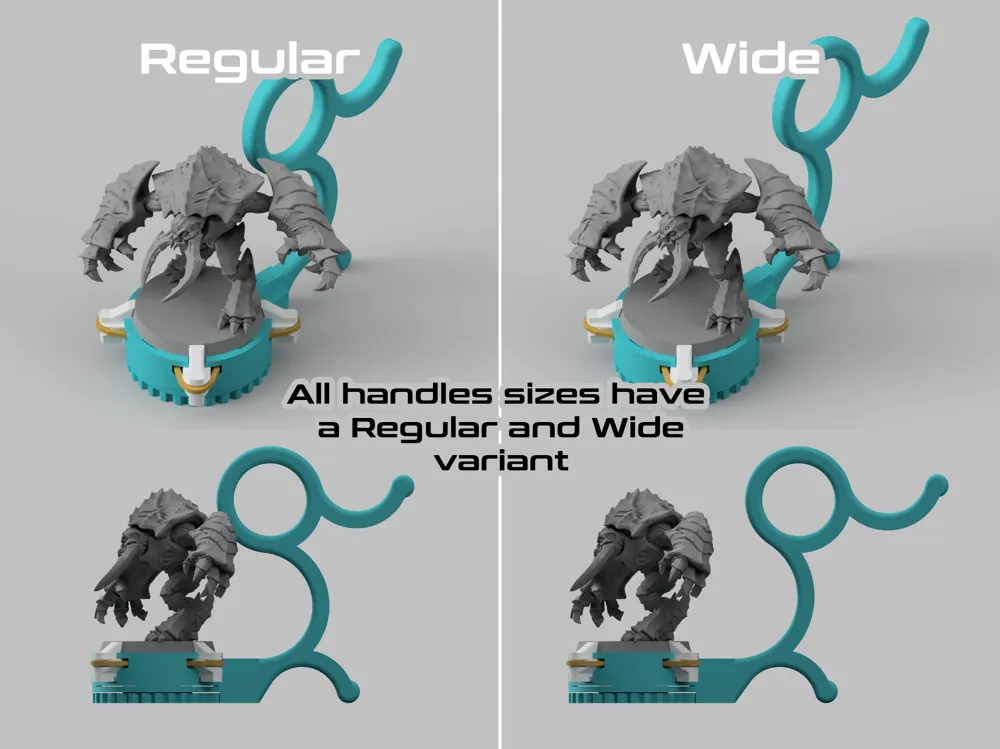
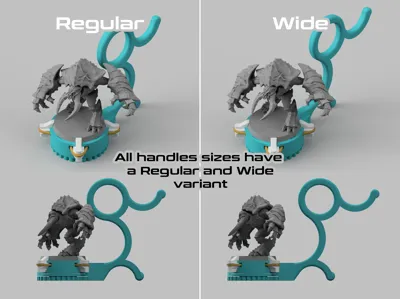
Each handle size comes in 2 variations
- Regular:
- Keeps the center of gravity closer to the middle for better balance.
- Easier to maneuver, but for lightweight plastic minis, the difference is minimal.
- Best for metal or heavier minis, as it offers better stability.
- Wide:
- Provides more space for miniatures with protruding parts like capes, bulky armor, weapons etc.
- Works well with resin and plastic minis, which are generally lightweight.
Best Practice: Always attach or remove the handle when there is no miniature in the vice to avoid damage.
- Attaching the Handle
- The handle locks into the chuck using friction to prevent wobbling. The tolerances here are really tight so you will need some force
- Push firmly until the handle sits flush with the chuck. You should hear a click when it locks into place.
- Removing the Handle
- Pull firmly to release the handle. The tight tolerances mean it will require some force.
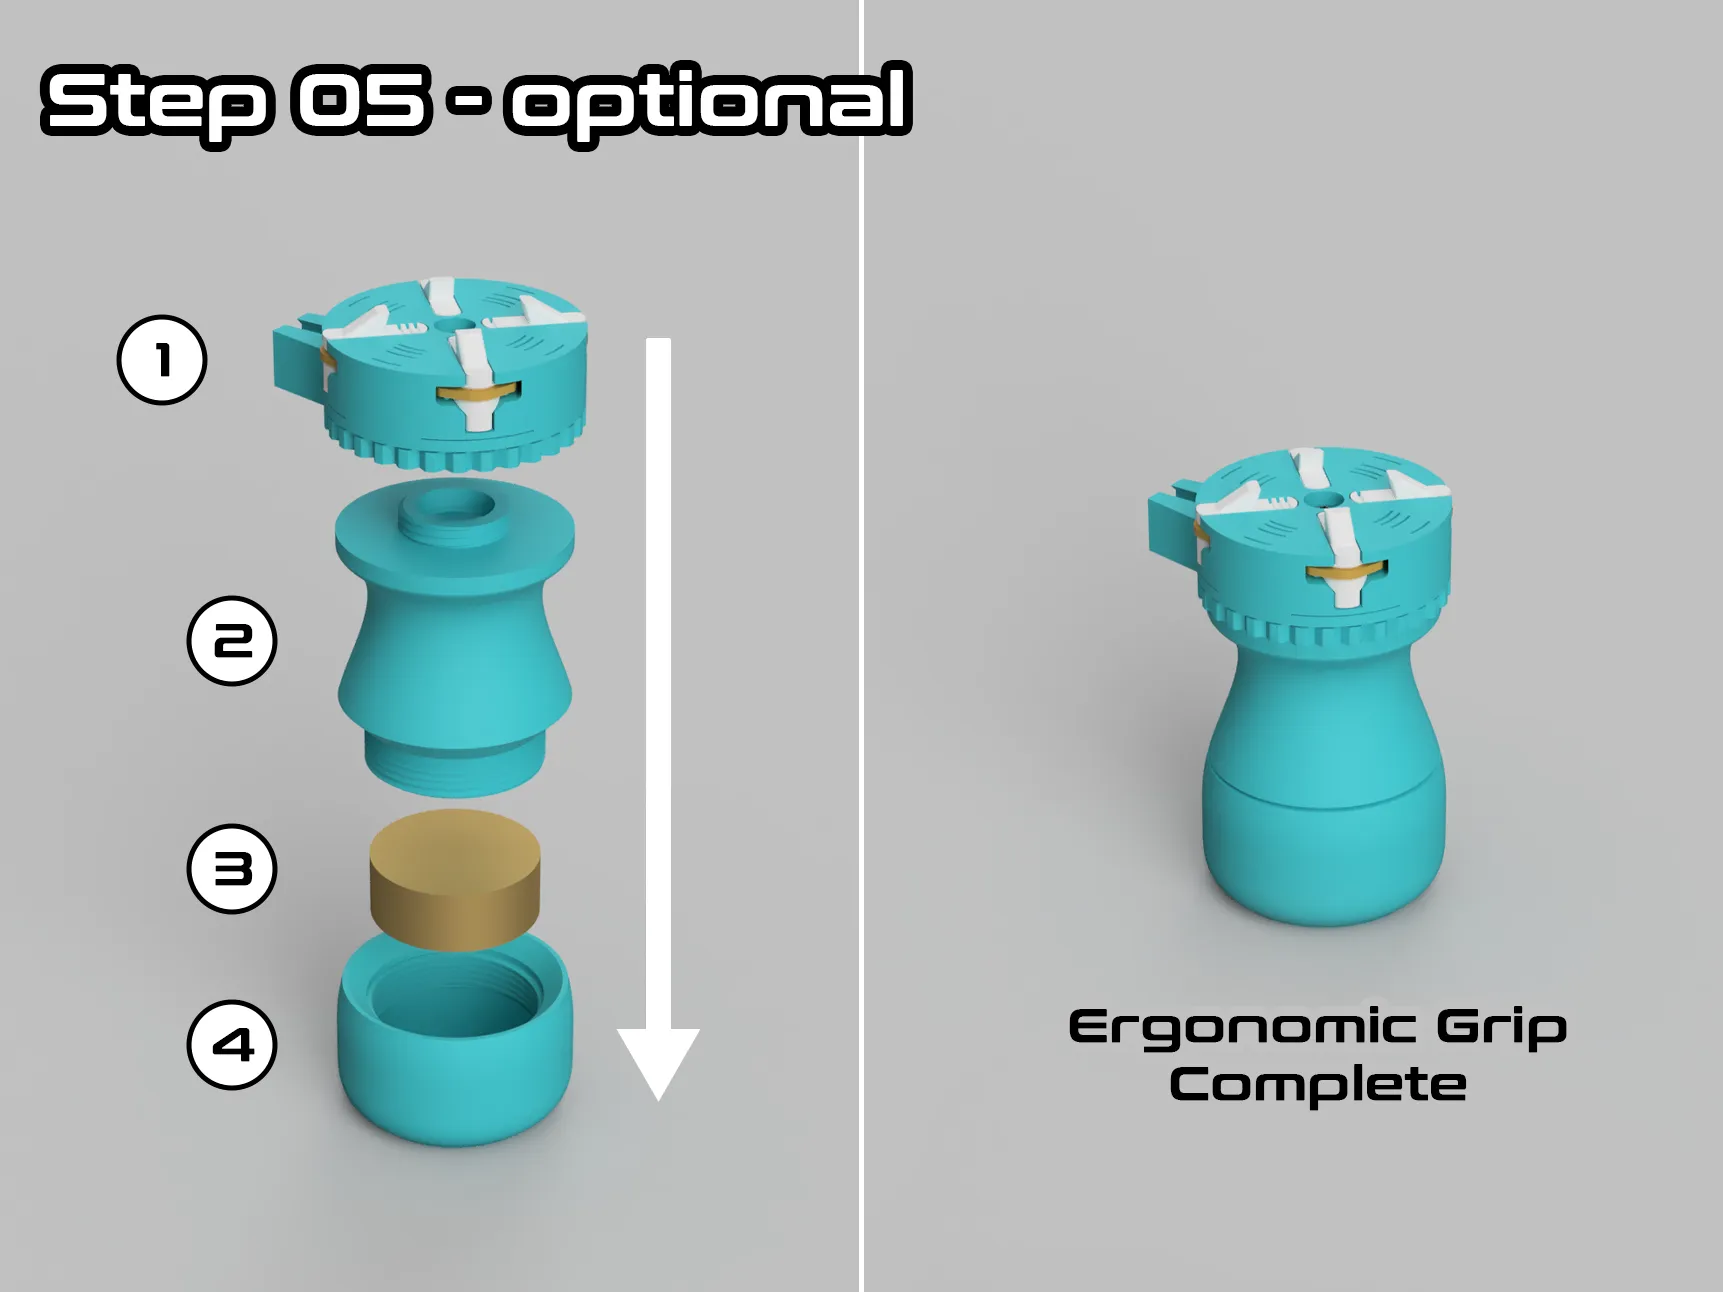
STEP 05 - Assemble the Ergonomic Grip
Parts needed:
- Assembled Chuck
- grip-ergonomic_part1
- weight (optional)
- grip-ergonomic_part2
I highly recommend using weights when assembling the grip to improve stability. You can use Coins, lead pellets/shot/ballast or any desne material that fits into the 31mm diameter by 12mm high cavity.
- Add weight to Part 4
- Place your chosen weight inside the cavity in Part 4.
- Attach Part 2 to Part 4
- Screw Part 2 tightly onto Part 4 to secure the weight inside.
- That’s it, your Ergonomic Grip is now assembled
- Attach to Chuck
- The grip screws directly into the dial.
- Tighten it firmly to ensure a secure fit.
- Once attached, you can use the grip itself to rotate the dial.
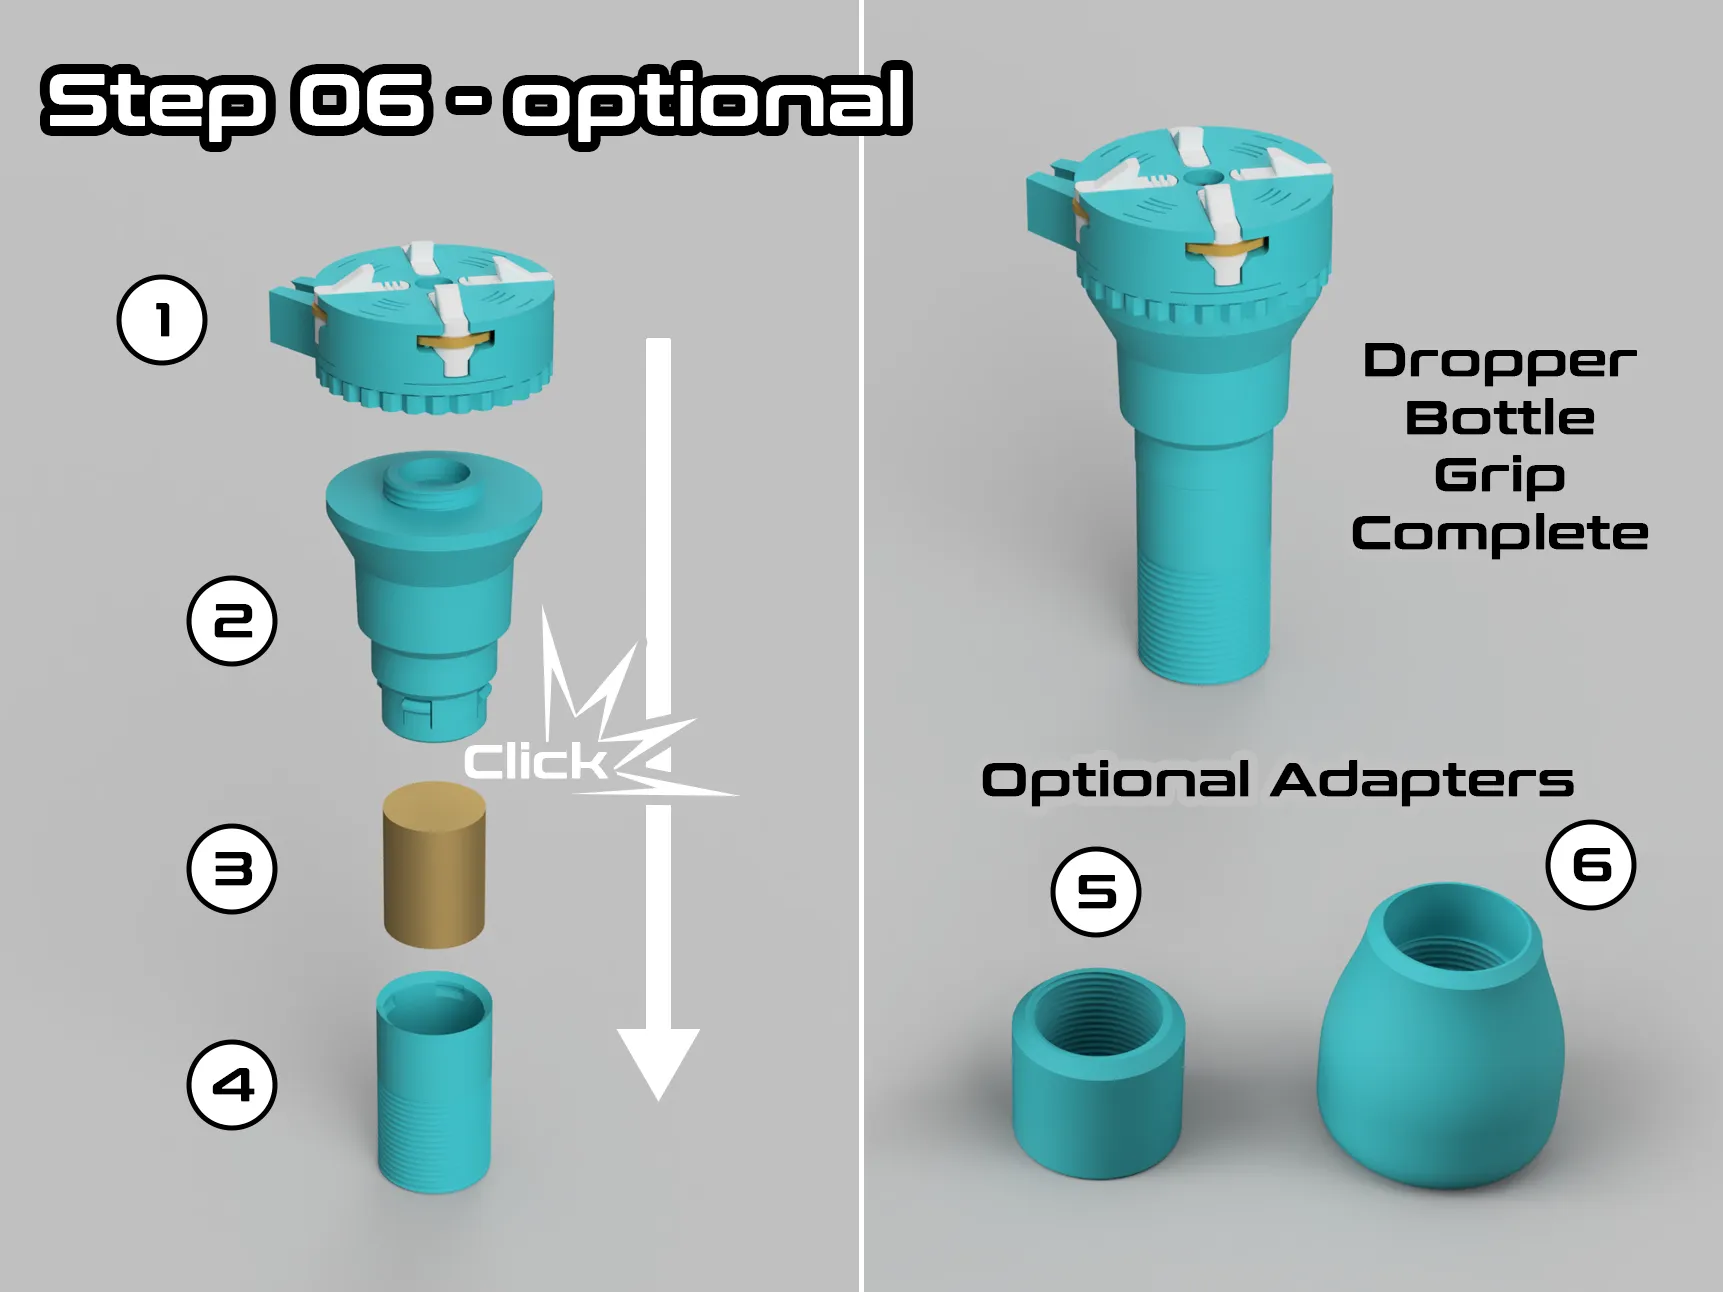
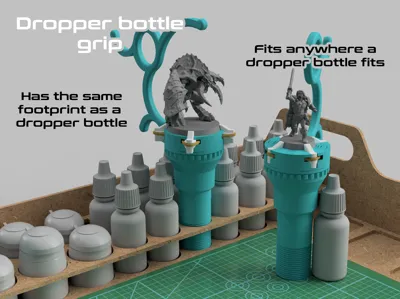
STEP 05 - Assemble the Dropper Bottle Grip
Parts needed:
- Assembled Chuck
- grip-dropper-bottle_part1
- weight
- grip-dropper-bottle_part2
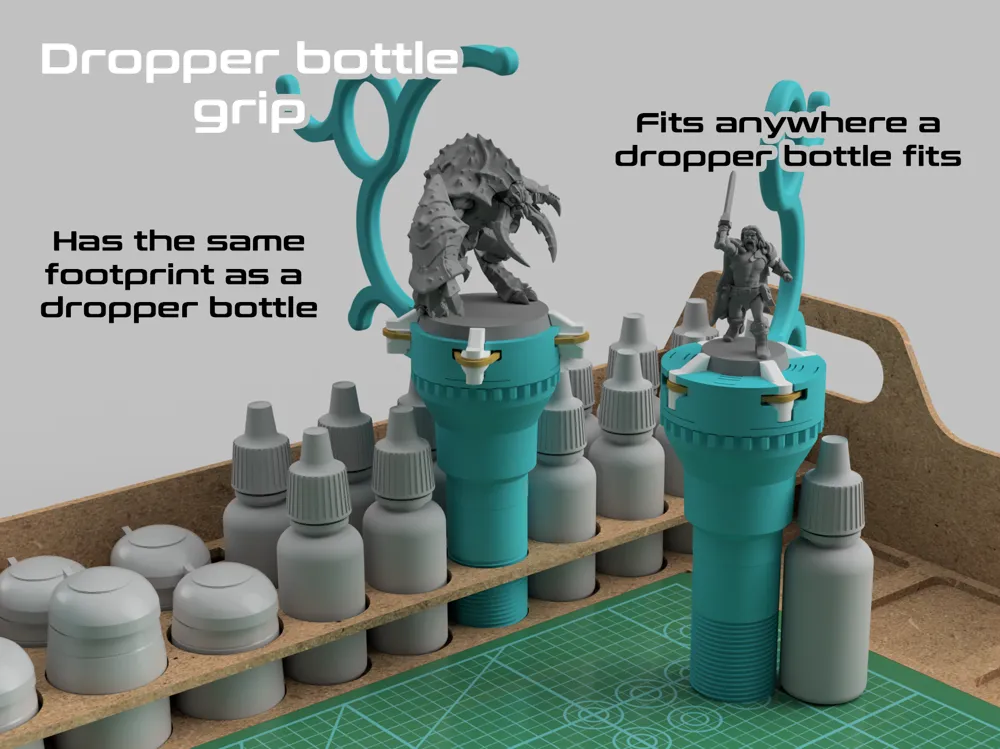
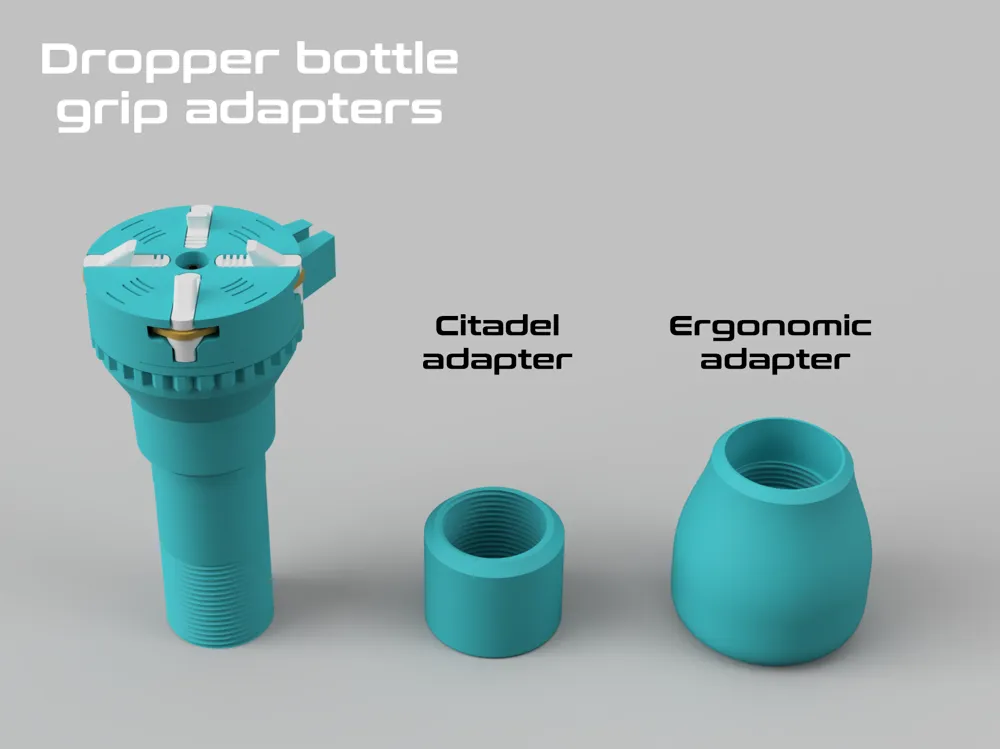
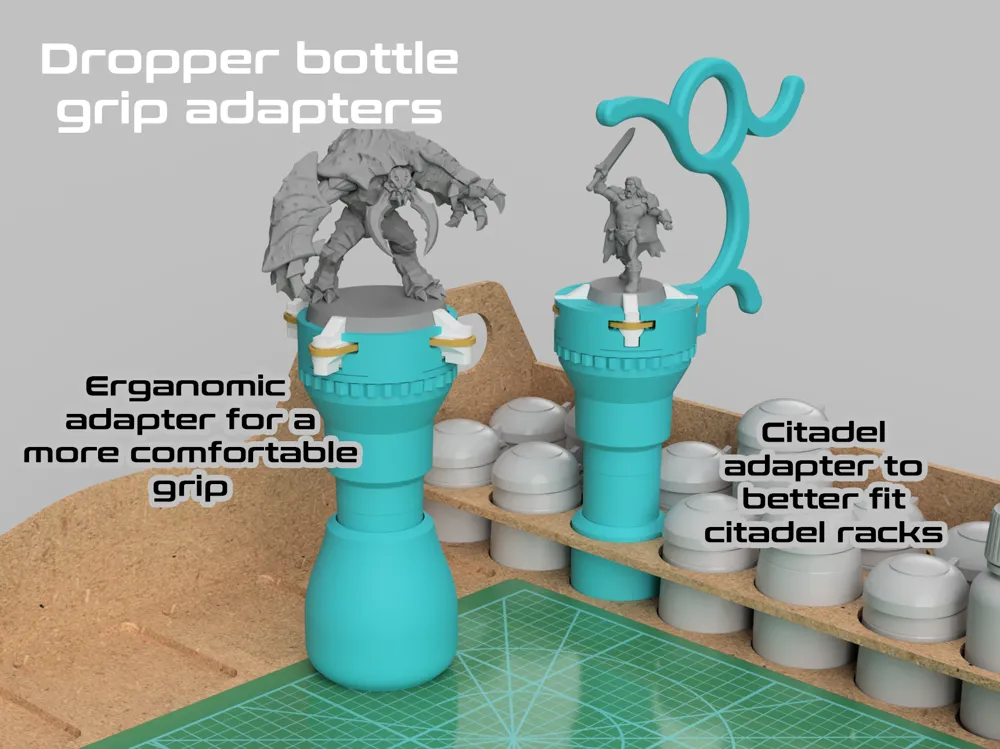
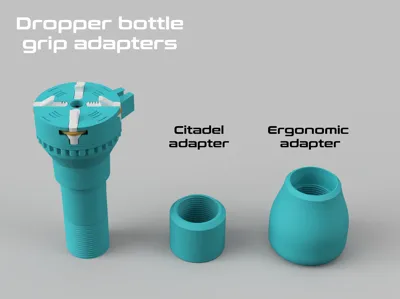
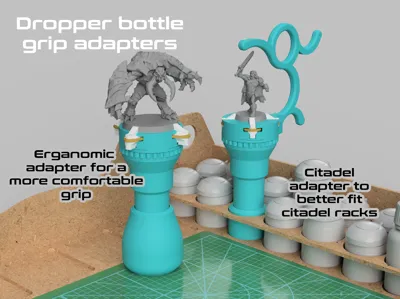
- grip-dropper-bottle_adapter__citadel: allows grip to fit better into holes meant for citadel paint pots
- grip-dropper-bottle_adapter__ergonomic: allows the grip to fit nicely into your hand and give the grip a wider base amking it more stable
IMPORTANT: Decide whether to use weights before assembly. Due to the thin walls, this grip uses a one-way clipping system for strength. Once Part 2 and Part 4 are clipped together, they are very difficult (if not impossible) to separate without damage.
I highly recommend using weights when assembling the grip to improve stability. You can use Coins, lead pellets/shot/ballast or any desne material that fits into the 21mm diameter by 28mm high cavity.
- Add weight to Part 4
- Place your chosen weight inside the cavity.
- Attach Part 2 to Part 4
- Line up the clips on Part 2 with the notches on Part 4.
- Press down firmly until you hear a click, which means the pegs have locked into place.
- Attach to Chuck
- The grip screws directly into the dial.
- Tighten it firmly to ensure a secure fit.
- Once attached, you can use the grip itself to rotate the dial.
Optional Adapters
- There are adapters available for this grip that allow it to be used in more scenarios.
- The grip functions well without them, but they’re available if you need extra customization.
Recommended Builds Configurations
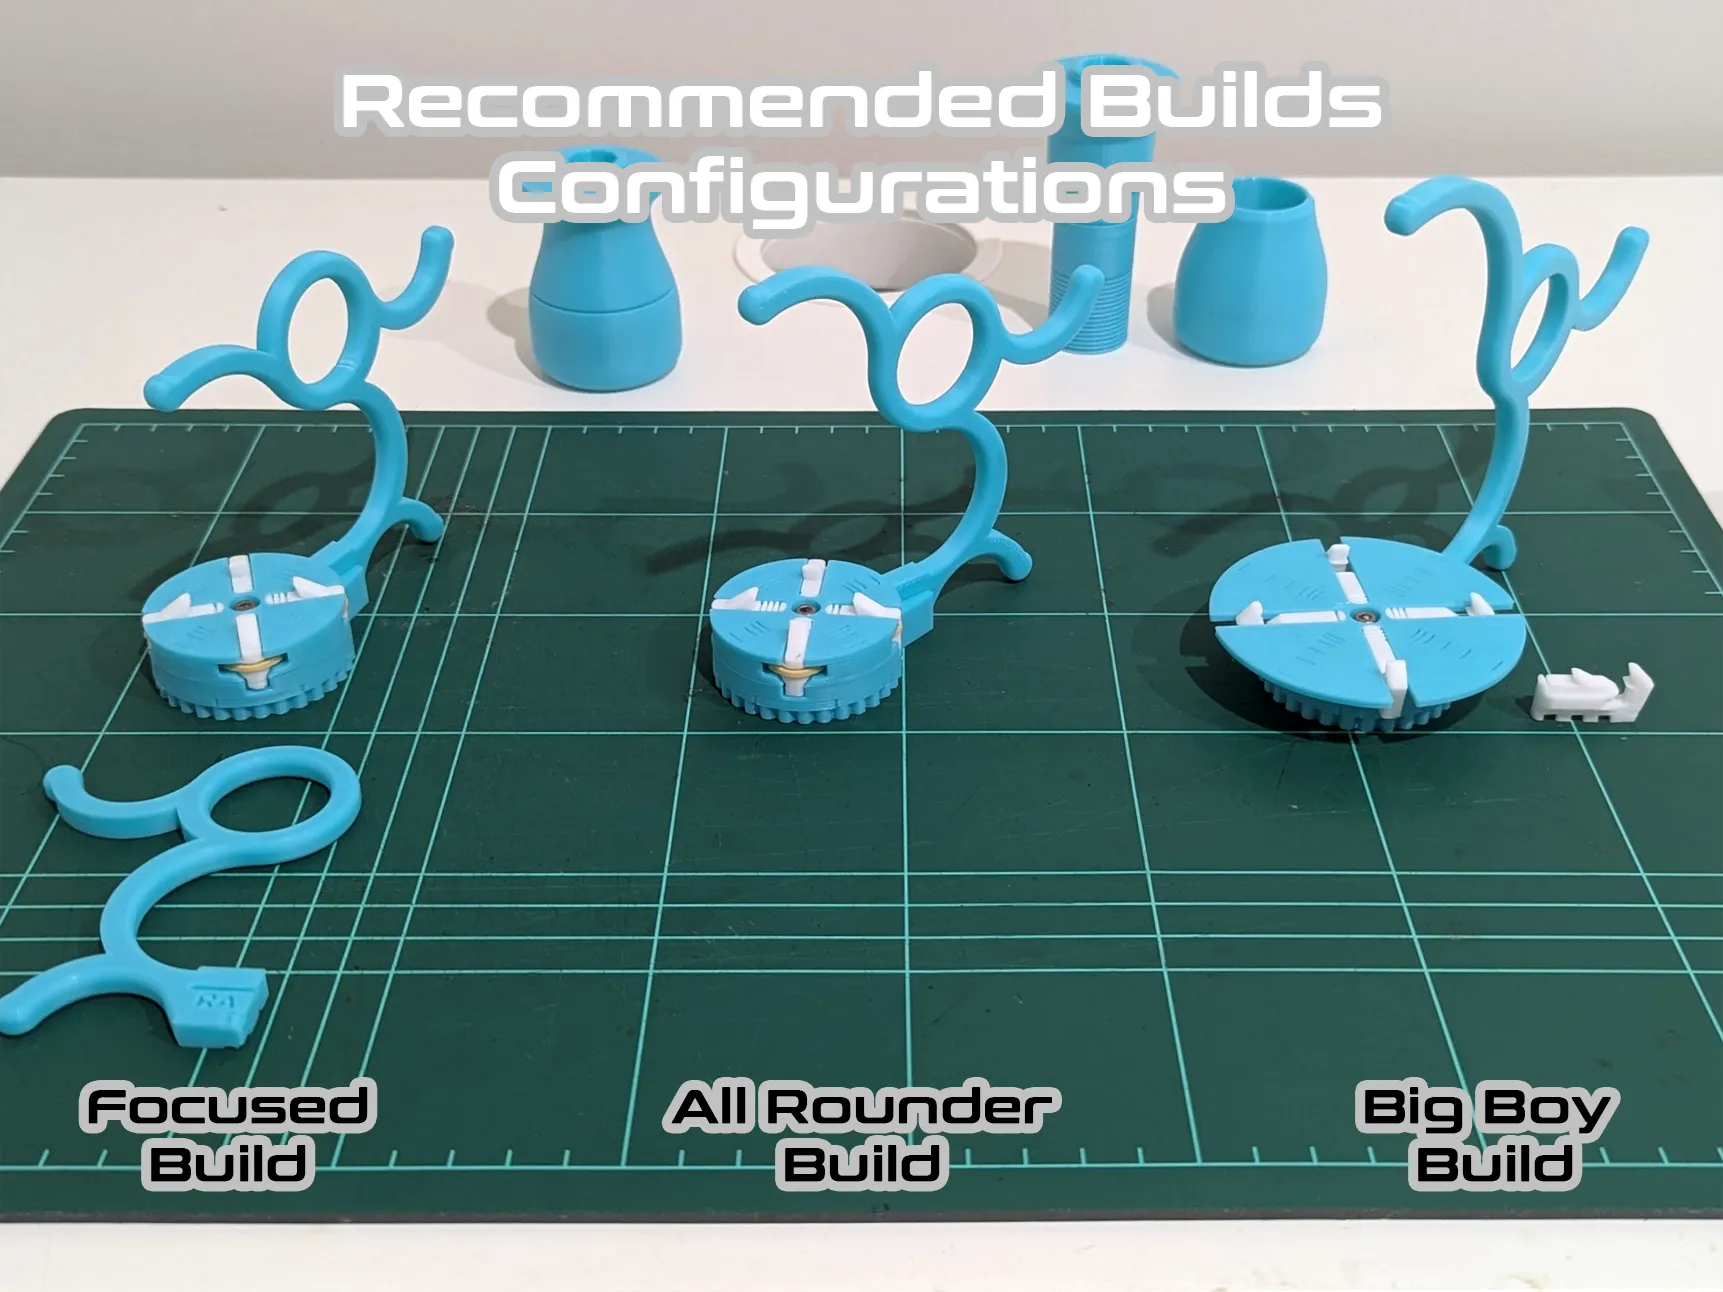
Focused Build
for mainly small minis on 25-40mm bases.
- Build the Base Chuck mentioned above
- For the chuck top use: chuck-top_cover
- For the jaws use: jaw_25-40__1, jaw_25-40__2, jaw_25-40__3 and jaw_25-40__4
- Handle use: handle_regular__small-50-RS (has a stablaising point) but if you dont need it then handle_regular__all-RA is a good option as it can work with small to large miniatures.
All Rounder Build
for small-medium minis on 25-40mm bases
- Same as Focused Build except for the handle, use “handle_regular__medium-70-RM”. You could use “handle_regular__all-RA” which is good for most situations and small to large minis
Big Boy Build
for tall-large minis on 50-65mm bases
- Build the Base Chuck mentioned above
- The chuck top use: “chuck-top_cover__large”
- For jaws use either:
- jaw_25-65-combo: these jaws are good for many sizes but they require the base to be hollow underneath.
- jaw_50-60: can't do as many sizes but if its a solid base or has magnets/weight under the base then this jaw type might be the only one you can use
- Handle use: Un sure which would be the best here and it might depend on the situation. But the wide ones are best for this size.
License



Comment & Rating (75)