
Integrated Adjustable Height Riser with Storage
Print Profile(1)

Bill of Materials
- Rubberized_Feet x 4: (Optional)
Description
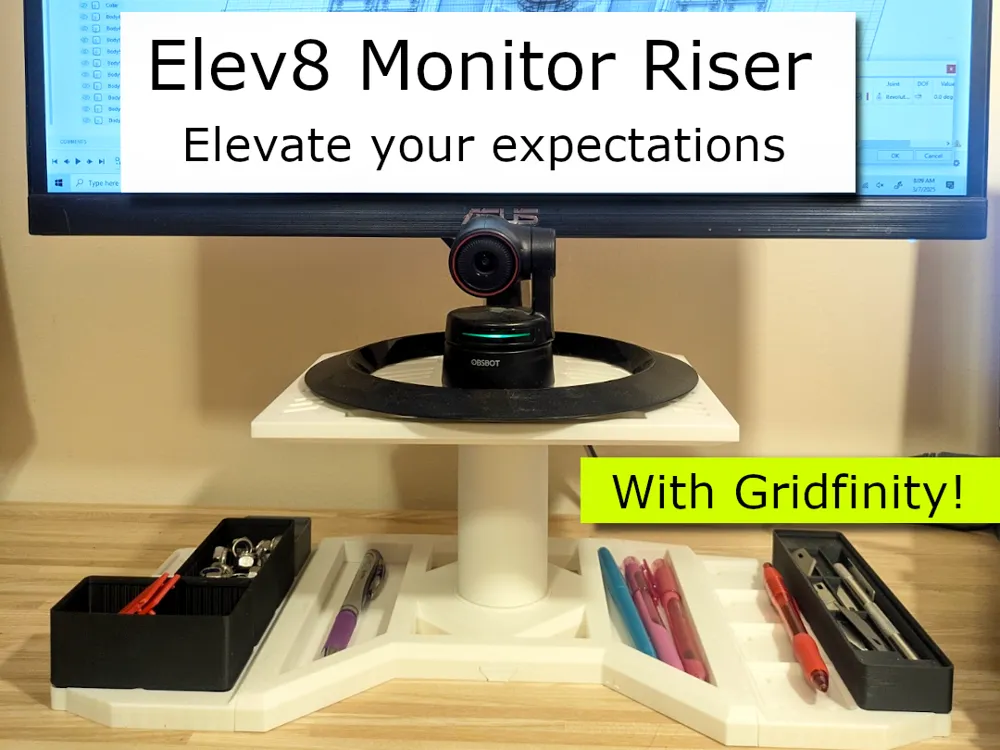
Introducing my premier original laptop and monitor riser: the Elev8!
Innovative Lift Mechanism
The Elev8 is an innovative monitor or laptop riser with a unique twist! You can raise and lower the monitor/laptop platform by twisting the neck of the riser. Thanks to a three-part screw mechanism, the platform stays facing forward while you raise and lower by up to 10cm. This mechanism took a lot of fine-tuning to get it smoothly operating without the need of ratcheting mechanisms or locks.
Goodbye Clutter!
Keep your workspace organized with the integrated pen trays built into the base. If that wasn't enough, the default profile comes with two modular Gridfinity modules in a 2x4 configuration, allowing you to customize your storage to your heart's content!
Cable Management
Say goodbye to unsightly spaghetti cords: the Elev8 comes with three cord management guides on the back of the riser platform to keep cords orderly and organized.
Printing the Elev8
This design is built strong, is 100% 3d printed with no extra hardware, and built to grow. The side modules couple to the platform with connectors that allow future upgradability. In addition, if you need even more height, a taller riser neck mechanism is coming soon.
The Elev8 uses approximately 610g of the filament of your choice. I used PLA, but the design should work great with PETG as well.
The print times for the default profile on my P1S are as follows using Bambu Basic PLA on normal speed:
- Riser platform: 5h5m
- Base Core: 3h36m
- Riser neck and trays: 4h44m
- Gridfinity Sidecars: 3h53m
The print time can probably be reduced somewhat if there is interest in a lite version, but this one is built to hold my 24" office monitors without risk of failure. If used as a laptop riser it can probably be printed with 10% infill to save significant time.
Assembly instructions:
The design isn't that complicated to figure out. There are five pieces to the neck riser mechanism that attach it to the base and the riser platform. The two large flat pieces need to be glued into the bottom of the base to form the pen trays. The Gridfinity sidecars just snap in place using the V notches.
In order to make the neck attach as firmly as possible to the base, there is a strip that slides into place after the male-threaded neck is inserted into the base. Make sure to thoroughly remove the support material before trying to connect them.
Once the male threaded neck is inserted all the way into the base slot, you slide the retaining wedge from the front of the base to pin it firmly in place.
A more detailed assembly guide and video will follow shortly.
UPDATE: 3/25/25 - I have put together three renders that show the assembly process. Hopefully this makes it clearer!
1) Firmly insert the threaded neck piece into the base with the inverse “v” notch lined up front to back along the bottom slot.
2) Slide the retaining rail down the slot on the bottom of the base from front to back, or back to front. If it is a little tight (because not every printer/filament combo gives perfect tolerances) you might need to sand it down a bit with some sandpaper. It should slide all the way to be flush with both the front and back of the base.

3) Assemble the top of the display by first slotting the Center Rail into the rail collar (the round piece with two pins sticking up on either side of a slot. It should fit snugly into place as seen below.
4) Next, insert (glue if it is a bit loose) the rail collar into the space on the riser platform.
5) Once the Center Rail assembly is in place, slide the outer threaded riser pillar over the Center Rail, and slide the Top Collar (the threaded ring) down over the riser pillar, threading it into place to hold the riser pillar. Don't over tighten, but it should hold firm. Again, if it is too tight of a fit, sand the threads a bit using some medium grit sandpaper.

6) Turning the riser assembly over, slide the bottom of the Center Rail into the rail guide in the male threaded riser pillar as in the GIF below.
7) Once the two risers make contact, tighten the Outer (female) riser pillar down over the male riser pillar. The threads are shallow so that friction will hold the whole thing in place even with a 20 lb. monitor on top.
8) Turning the whole thing over once more so that the riser is flat on the work surface, carefully glue the polyhedron panels into the slots to either side of the riser pillar.
9) If you opt for the Gridfinity sidecar modules, they should slot down with the dovetail joints to a snug position, flush with the bottom of the base.

10) You are done! Be careful not to raise the whole thing too high. I have noticed it gets wobbly at about ¾ maximum extension. An earlier prototype of the telescoping riser pillar had a retaining pin to prevent it from going too high, but I removed that to simplify assembly.
If you find this model innovative, useful, or just plain cool, please like and/or give me a boost to encourage further development of this and other cool projects.
The Gridfinity sidecar trays have slots for 2x6 neodymium magnets to hold down the compatible accessory trays/cups/etc. You can pick them with the link below to support my work.
Also, While Gridfinity is cool and all, it's not for everyone. if you have any particular ideas for other side-mounted modules, please give me a shout, and I can see what I can throw together!
Print Colorful, Print happily, and enjoy!
Enjoy!
License

You shall not share, sub-license, sell, rent, host, transfer, or distribute in any way the digital or 3D printed versions of this object, nor any other derivative work of this object in its digital or physical format (including - but not limited to - remixes of this object, and hosting on other digital platforms). The objects may not be used without permission in any way whatsoever in which you charge money, or collect fees.


Comment & Rating (6)