Radius / Fillet gauge R0.5 - R25 (multifunctional)


Print Profile(3)


Description
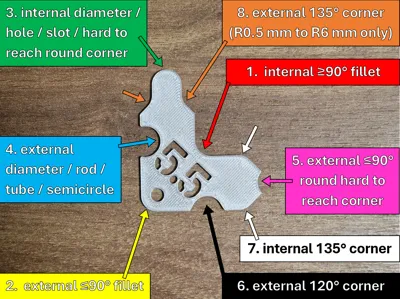
Radius / Fillet / Diameter gauge with 7+ measurement options.
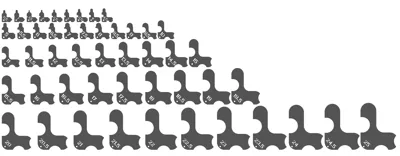
Metric sizes, from R0.5 mm to R25 mm. 0.5 mm steps (50 sizes).
Great for measuring / recreating / remodeling real world objects.
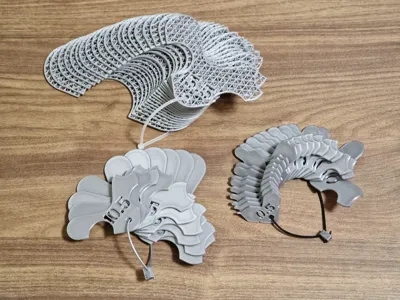
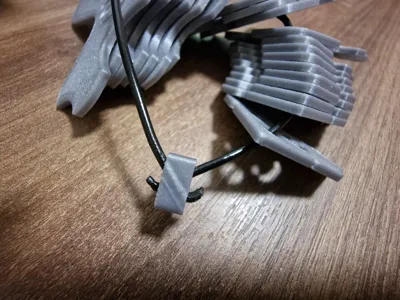
Can be stored on a piece of raw filament or string (cca 15 cm for 10 gauge pieces, bend the filament with pliers after it is put through the hole in the Filament joint).
Cost saving printing.
White or black color not recommended - it is hard to see gaps.
Sizer R0.5 and R1 mm needs a little bit of postprocessing with a knife - be careful.
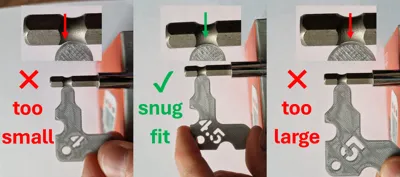
How to use? Just place the gauge to the measured object and find the gauge thats fits the best, without a gap.

What can be measured?
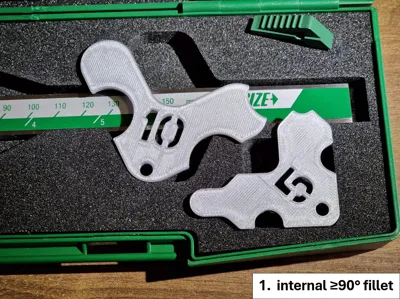
- internal ≥90° fillet
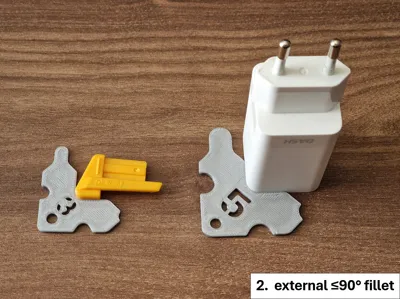
- external ≤90° fillet
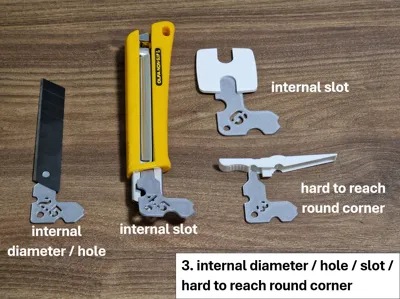
- internal diameter / hole / slot / hard to reach round corner
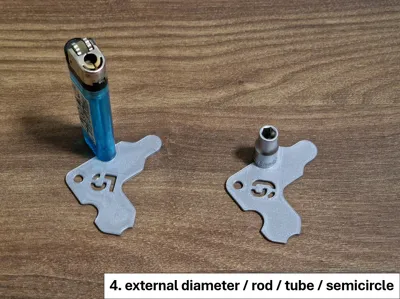
- external diameter / rod / tube / semicircle
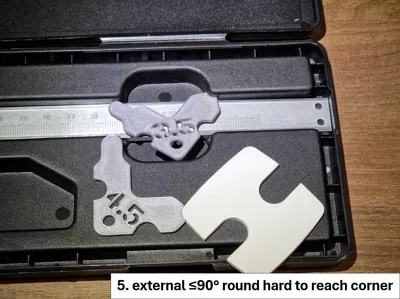
- external ≤90° round hard to reach corner (unavailable for R0.5 mm)
- external 120° corner
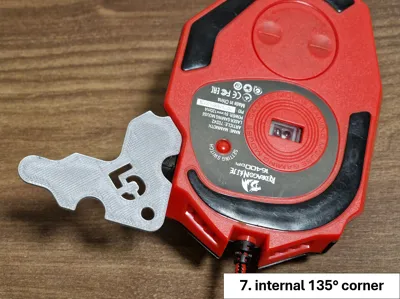
- internal 135° corner
- external 135° corner (R0.5 mm to R6 mm only)

Print profile info:
Print anything you need.
Sizes R0.5 mm to R10 mm are printed solid.
Sizes R10.5 are printed without top and bottom surface to save filament.
You can use per object settings to change this.
Small blocks with 2 holes (Filament joints) are used with raw filament - 15 cm of filament per 10 gauges. Bend the filament with pliers after it is put through the hole in the Filament joint.
Sizer R0.5 and R1 mm needs a little bit of postprocessing with a knife - be careful.
Solid gauge settings:
- 2 walls
- 5 top and 5 bottom shell layers
Perforated gauge settings (saves filament):
- 3 walls
- 0 top and 0 bottom shell layers


License
You shall not share, sub-license, sell, rent, host, transfer, or distribute in any way the digital or 3D printed versions of this object, nor any other derivative work of this object in its digital or physical format (including - but not limited to - remixes of this object, and hosting on other digital platforms). The objects may not be used without permission in any way whatsoever in which you charge money, or collect fees.
Comment & Rating (10)