


Print Profile(2)


Bill of Materials

Description
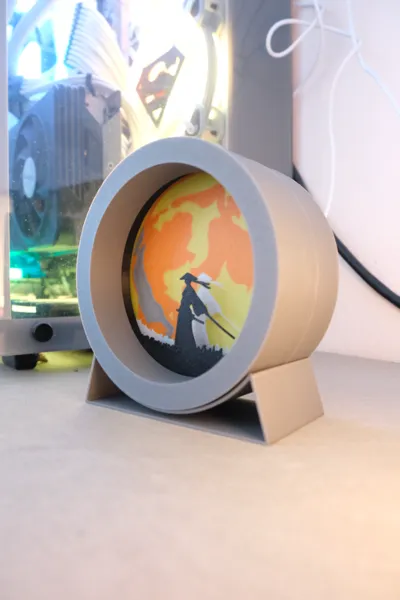
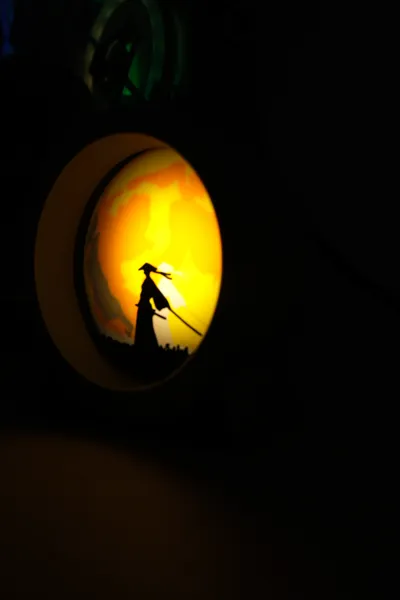
Samurai 3D Lamp - Round Design with LED Backlight
Description (English)
This exclusive 3D-printed lamp features the silhouette of a samurai wielding two katanas, set against a stunning lunar background with orange and yellow hues, creating a striking visual effect. The model is designed for 3D printing and consists of a cylindrical structure with an 11 cm diameter and a depth of 5 cm.
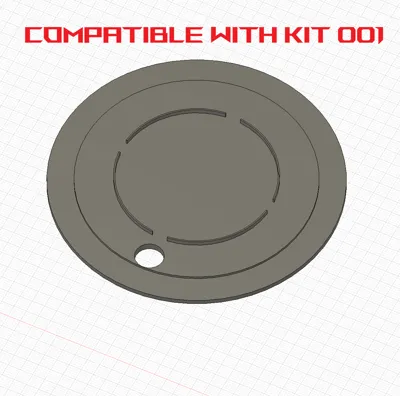
The lamp is fully compatible with the Bambu Lab Kit001, a USB-powered LED module, ensuring a soft and immersive lighting effect. Alternatively, you can insert a custom LED strip to personalize the illumination to your liking.
Its minimalist and modern design makes it an excellent choice for a desk decoration, home accessory, or a gift for enthusiasts of Japanese culture, samurai lore, and oriental art.
🔹 Key Features:
- 3D-printable design with raised details
- Round structure with an integrated stand
- Dimensions: Ø 11 cm x 5 cm depth
- LED Compatibility: Bambu Lab Kit001 or custom LED strips
- Power Supply: USB (if using Kit001)
- Perfect for gaming setups, desks, and artistic decor
Assembly Instructions - 3D Samurai Lamp
Follow these simple steps to correctly assemble your lamp:
🔹 Step 1: Print all parts of the model.
🔹 Step 2: Take the tallest component, the one with the female groove, and insert the moon background. Then, place the small ring inside the structure.
🔹 Step 3: Insert the disk with the samurai silhouette, ensuring it is aligned in the same direction as the background.
🔹 Step 4: Close the structure by attaching the top part, making sure all the slots are properly aligned.
🔹 Step 5: Place the light source onto the back cover and insert it into the rear of the lamp. If using the Bambu Lab Kit001, connect it to a USB port for power.
Once assembled, your lamp is ready to illuminate your space with a unique visual effect! ✨
Comment & Rating (3)