LED Lamp A Great Beginner Project in ESP Control


Print Profile(1)

Description
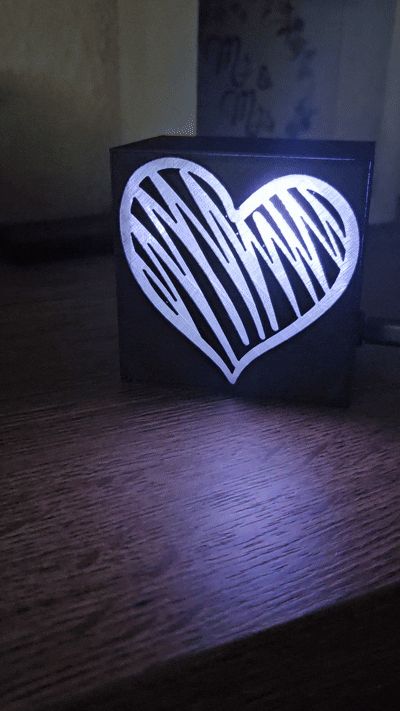
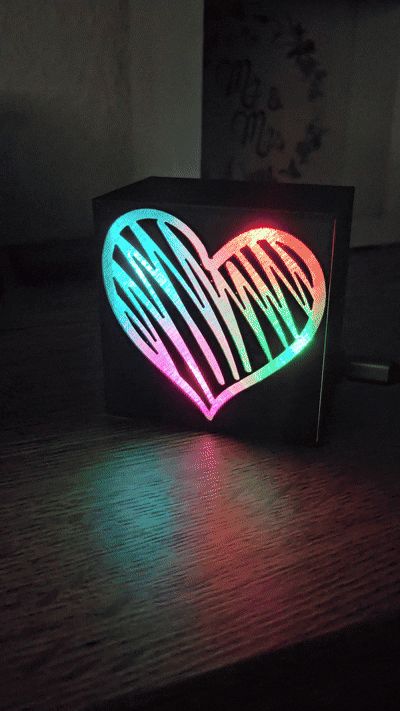
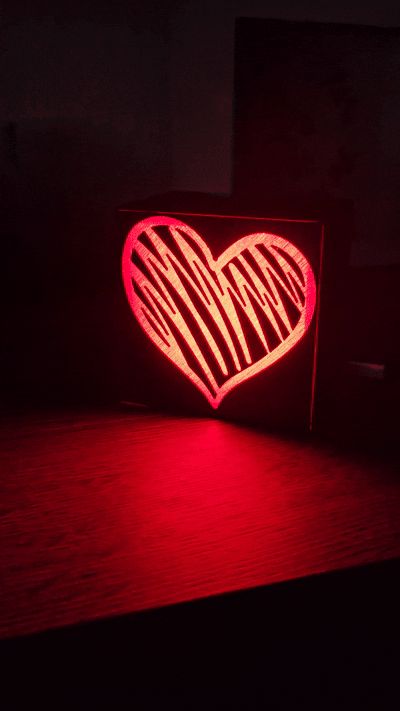
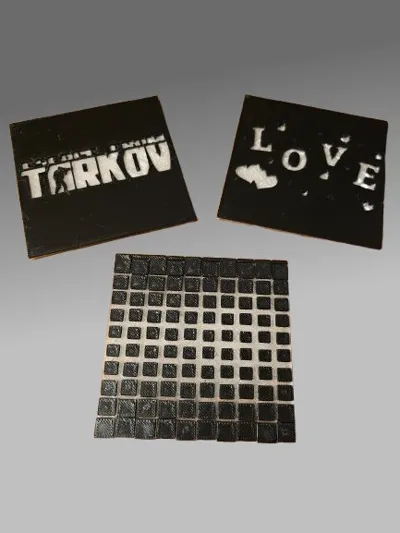
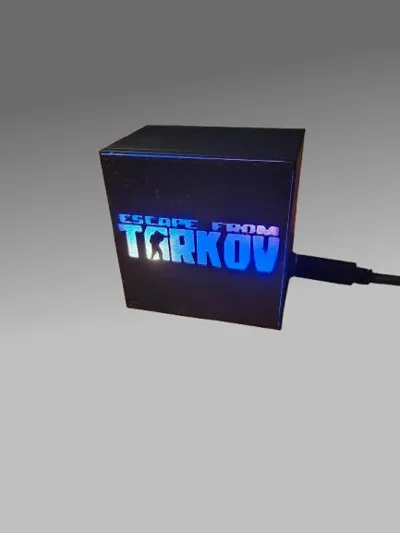
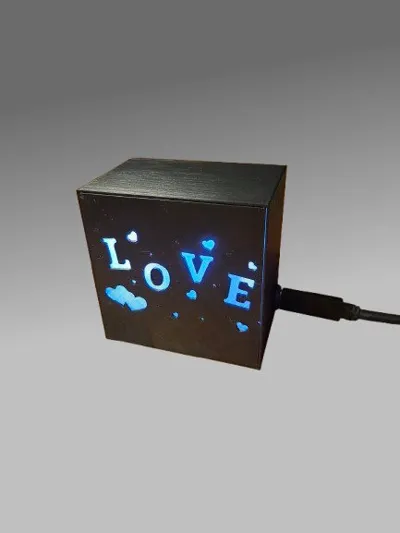
A minimalist LED matrix lamp with an interchangeable front panel.
An ideal project for gaining initial experience with an ESP32.
Simple to replicate.
Create your own front covers and effects.
Bill of Materials:
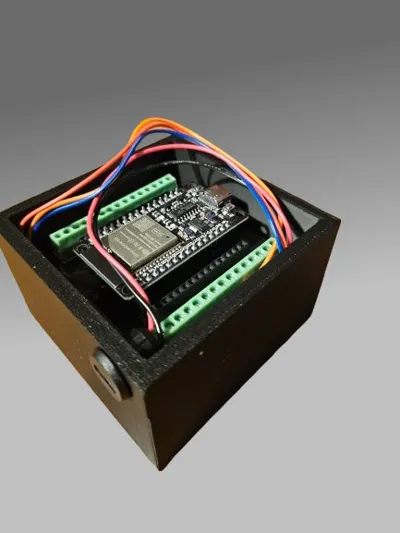
1x ESP32
1x Adapter for ESP32 (for screw terminals)
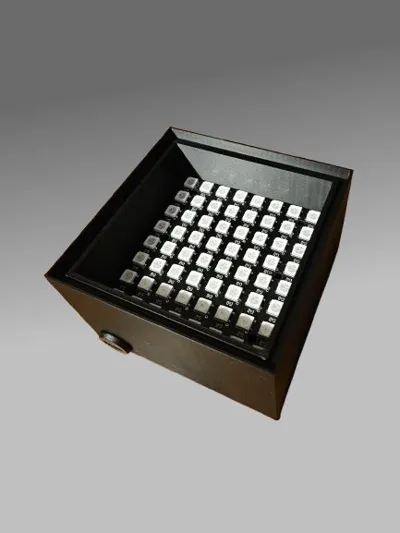
1x 8x8 LED Matrix (2812b LEDs)
1x Power supply (I use a USB-C connector)
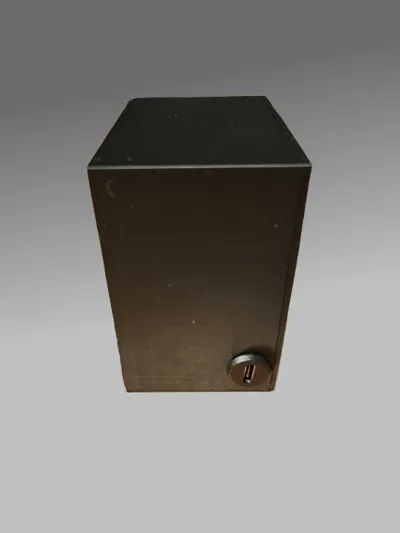
ESP32 + Adapter
8x8 LED Matrix
USB Connector
Connection is quite straightforward.

(+) of the supply and (V+) of the LEDs connect to the VIN pin
(−) of the supply and (V−) of the LEDs connect to the GND pin
In the following sketch, I use pin D27 for the signal, so (LED) DIN connects to pin D27
That's it for the connections.
Once everything is connected, the ESP must be flashed with the sketch. I use the free Arduino IDE: https://www.arduino.cc/en/software
Select the board and port and install the "Adafruit NeoPixel" library.
Then copy and upload the sketch.
The sketch includes approximately 60 effects. The one specified in the loop function is played.

The name of the desired function must be specified there.
The sketch is, of course, customizable and allows for many variations. For instance, my lamp operates via a dedicated app and Bluetooth connection. In this sketch, the lamp starts with the effect mentioned in the sketch as soon as it is connected.
A small tip for creating your own effects: ChatGPT is a great help when it comes to creating a sketch. Copy this sketch as a prompt into ChatGPT and describe your desired effect. Specify that it should be integrated into the sketch. This should work without problems even with the free version of ChatGPT.
Making your own covers:
The dimensions for the covers are, depending on the printer and tolerance: 77.8 x 77.8 x 3 or 77.9 x 77.9 x 3
I create them in Fusion 360 by creating a cuboid with dimensions 77.9 x 77.9 x 2. I then create a sketch on it and insert an SVG file. I scale it to fit my cuboid and then extrude the desired areas by 1 mm.
I then print the first two mm (layers 1-10) in transparent and the rest (layers 11-15) in black.
Boost Me (for free)
Boost for more such ESP beginner projects
Documentation (1)
License
You shall not share, sub-license, sell, rent, host, transfer, or distribute in any way the digital or 3D printed versions of this object, nor any other derivative work of this object in its digital or physical format (including - but not limited to - remixes of this object, and hosting on other digital platforms). The objects may not be used without permission in any way whatsoever in which you charge money, or collect fees.
Comment & Rating (2)