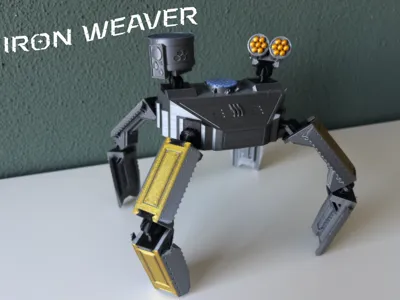
Iron Weaver


Print Profile(2)


Bill of Materials

Description
Iron Weaver
A Four-Legged Battle Bot for 3D Printing Enthusiasts
Introducing Iron Weaver, a battle bot. This design is all about versatility and creativity. Each part is completely modular and interchangeable, so you can experiment ( yes, you can double the leg length ) to suit your own style.
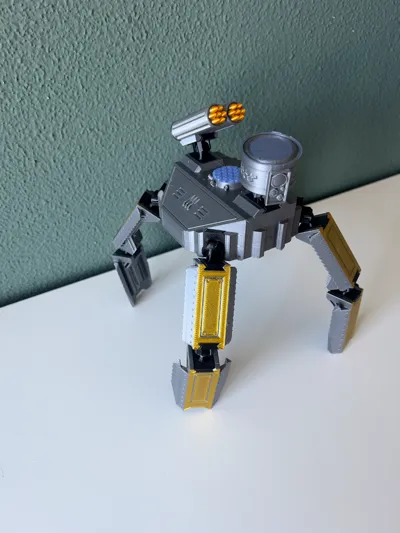
What's in the Print?
- Leg Assembly:
• 1x4 lower leg pieces
• 1x4 upper leg pieces - Core Components:
• 1 head
• 1 torso
• 1 rocket launcher (weapon) - Joints & Articulation:
• 20 total joints (10 ball joints and 10 corresponding sockets)
• Two sizes provided: 4.15mm and 4.2mm (to tackle any clearance quirks) (BallItself4_15 and BallItself42 accordingly )
• Improved, sturdy joints that are easy to swap around and hold their position
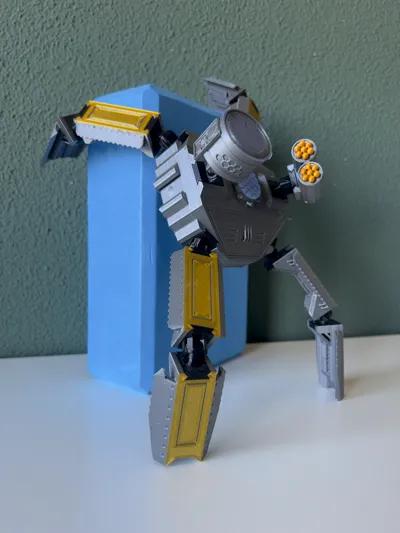
Printing Tips & Multi-Plate Strategy
To unlock the full visual flair of Iron Weaver, I recommend a three-plate printing approach—even without a multi-color AMS setup for Bambu printers, you can achieve amazing color variety with a little manual intervention:
- Plate 1 – Joints:
Print all the joints here in black. This ensures a solid, uniform foundation for all moving parts. - Plate 2 – Head, Legs, & Weapon:
• Print the head and both upper & lower leg pieces on this plate.
• Insert a pause around the 2nd–3rd layer (depending on your layer height) to swap the filament manually—start with yellow for the initial layers and switch to gray for the rest.
• The weapon (rocket launcher) is also printed on this plate. If you orient it vertically, add an extra pause during the “warheads” printing to switch back to yellow, creating a striking color accent. - Plate 3 – Torso/Main Body:
The torso, with its elevated hexagon pattern, benefits from a manual filament change too. For a standout finish, try using transparent blue for the top two layers—this adds a unique glow to the main body.
Pro Tip: If you’re using a Bambu printer and aren’t sure how to insert a pause, check out this forum post for guidance (click the plus next to the vertical slider): Pause at Height Guide.
Boost Me (for free)
If you enjoy this design, feel free to boost it. Your support gets me one step closer to buying a Bambu printer :)
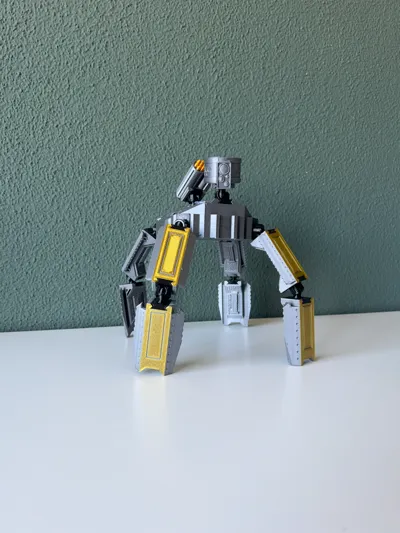
Assembling tips:
- Everything is easy. Click, clack, and done. Ball joints go into the sockets, and sockets slide into rails.
Material & Finishing
- Material: It is tested with PETG for extra durability, though PETG might be a bit trickier to paint compared to PLA (which hasn’t been tested yet).
- Layer Height: A 0.1mm setting is ideal for capturing all the fine details of this design.
Happy printing and customizing!
P.S. Parts orientation:

License
You shall not share, sub-license, sell, rent, host, transfer, or distribute in any way the digital or 3D printed versions of this object, nor any other derivative work of this object in its digital or physical format (including - but not limited to - remixes of this object, and hosting on other digital platforms). The objects may not be used without permission in any way whatsoever in which you charge money, or collect fees.
Comment & Rating (0)