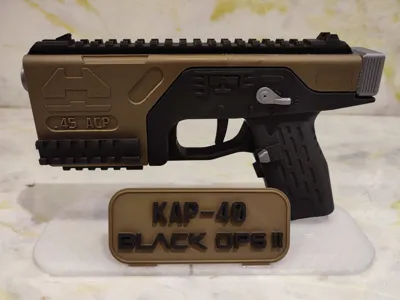
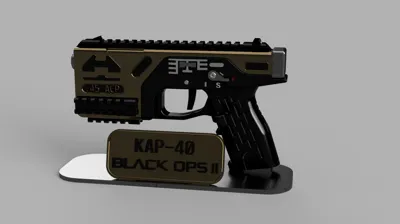
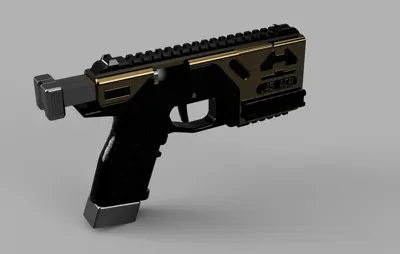
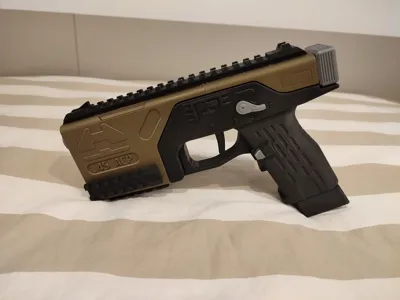
COD Black Ops 2 KAP-40 Pistol


Print Profile(1)

Bill of Materials


Description
This as a model from the automatic pistol of COD BO2 called KAP-40 , it was one of my fovorite guns to use in the game when i was a kid and a part of that is the gun used in the game mode “one in the chamber” that was also one of my favorite game modes, its also the most unique pistol in the game both in looks and in use.
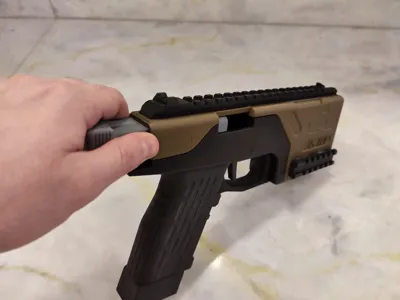
This model has a working trigger , a working mag release and a working slide/charging handle/bolt , it also includes an opcional stand.
For assembly:
First of all the things you are going to need:
- A fast glue with acelerant preferably.
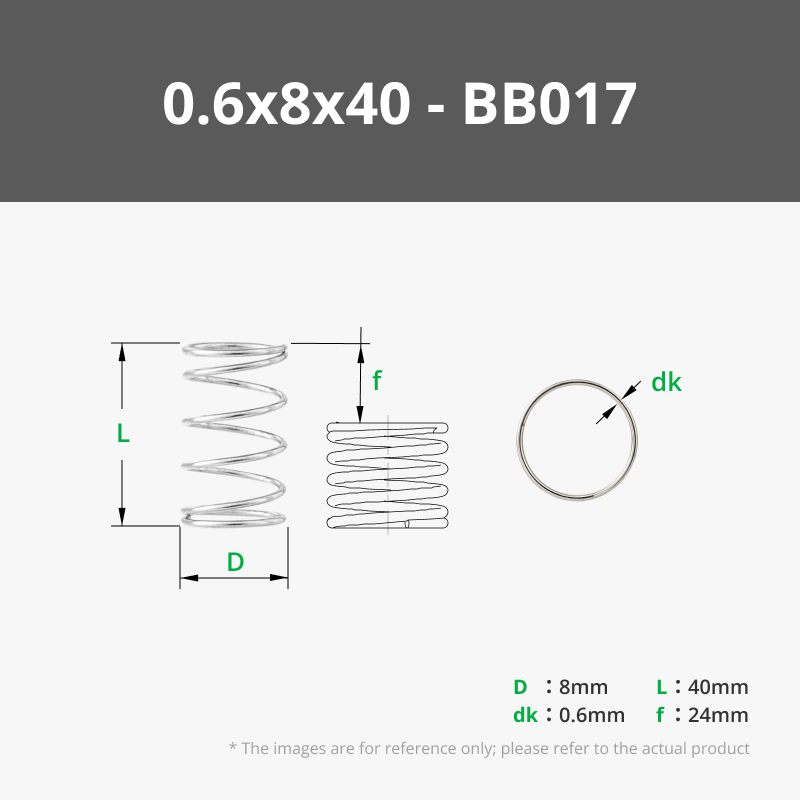
- x1 Spring 40mmx9mm or longer
- x1 Spring 36mmx5,5mm (A spring from a pen can do the work)
- x1 Spring 17mmx5,5mm (Another spring from a pen can work for this too)
- Some string from filament to make tiny cuts out of it.
You can also glue all the parts together if you dont have any of the springs.
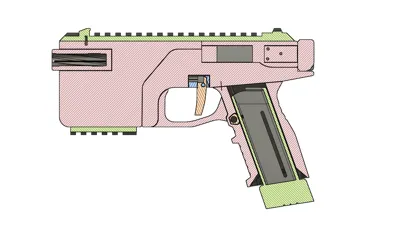
This model uses bits of 1,75mm filament to use as guides like in the image.

The first part that matters when should be assemble its the trigger/triggerguard and you should start by it , the 17mmx5,5mm spring goes in here, just put a drop of glue on the right side.

The second part its the mag weld and mag release , this is where the 36mmx5,5mm spring goes. You should introduce first the spring and then the magazine release into the hole , the you are going to press the magazine release and insert a mag , the mag release should stay in place holding the mag , then you can glue little side piece , after the glue as dried up you can press the mag release and take the mag out.


The lst part is the slide/bolt , this is where the last spring goes , first you need to introduce the longer part trough the hole once introduced you can glue the other blocky part to the side , it should make it so it can slide back and fort but it cant get out , afther that you can glue the charging handle , finally you can introduce the spring , it goes in the blue arrows, had to give in my spring to make it longer , it should be always in tension.


Ather that you can start gluing together the rest of non-funtional parts , if some parts dont fit perfectly dont doubt in using lime and sandpaper since some of the tolerances can be a bit tight.
If you have any problems with the model, doubts, or suggestions, feel free to leave them in the comments.
License
You shall not share, sub-license, sell, rent, host, transfer, or distribute in any way the digital or 3D printed versions of this object, nor any other derivative work of this object in its digital or physical format (including - but not limited to - remixes of this object, and hosting on other digital platforms). The objects may not be used without permission in any way whatsoever in which you charge money, or collect fees.
Comment & Rating (17)