Search models, users, collections, and posts

Enclosed/Windowed Magnetic Poop Chute

Remixed by

Print Profile(8)

All
H2S
A1
H2C
H2D
X1E
X1
P2S
H2D Pro
P1P
X1 Carbon
P1S

78mm Enclosed Embedded Logo 0.2mm layer, 2 walls, 15% infill
Designer
9.1 h
1 plate
5.0(9)

78mm Enclosed Engraved Logo 0.2mm layer, 2 walls, 15% infill
Designer
3.5 h
1 plate
5.0(10)

90mm Enclosed Embedded Logo 0.2mm layer, 2 walls, 15% infill
Designer
9 h
1 plate
4.8(31)

90mm Enclosed Engraved Logo 0.2mm layer, 2 walls, 15% infill
Designer
3.8 h
1 plate
5.0(8)
Click to see more

Open in Bambu Studio
Boost
126
318
96
55
645
398
Released 

Bill of Materials

Maker's Supply Kits and Parts
Select all
D10x3 mm Round Magnet (20PCS) - CA009
Bambu Filaments
Select all
Black (10101) / Refill / 1kg

Description

I recently discovered the excellent Silenced Magnetic Poop Shoot by ballinlike. While I appreciated the original design, I found it a bit too small for my needs. Unfortunately, the author did not provide the STEP files, so I decided to reverse-engineer the STL file, clean it up as much as possible, and implement my own modifications.

The STEP files for my version are now available in the “DOWNLOAD STL” section on Makerworld.


Update! 30/11/2025
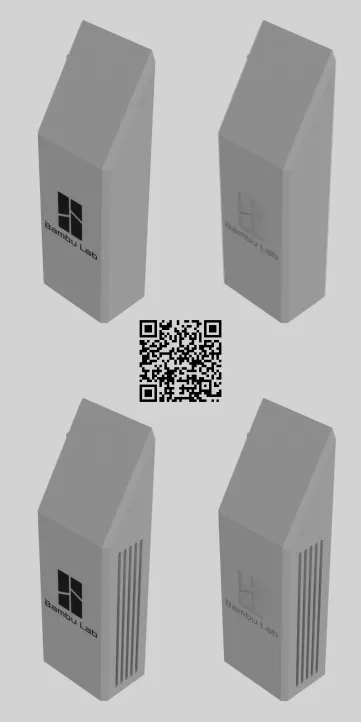
Based on user feedback, I have introduced a windowed lateral variant that allows you to visually check the fill level without removing the unit.
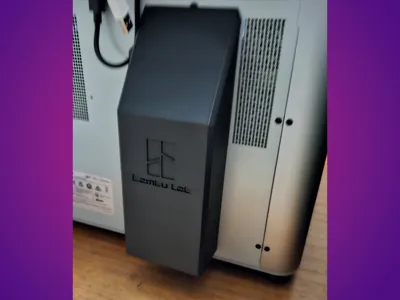
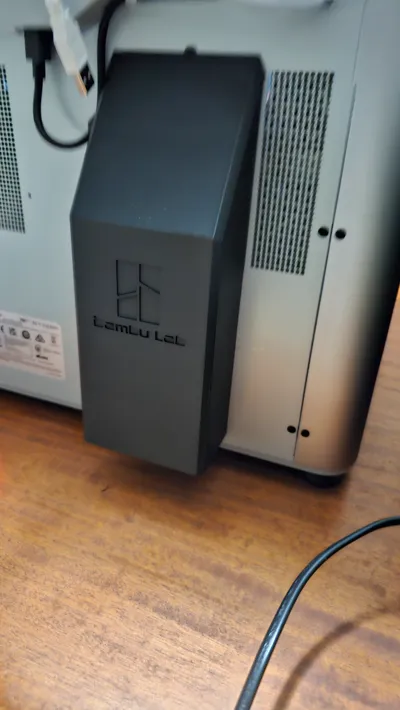
  • Enclosed Version:
    Ideal for reducing noise and maintaining the internal temperature of the printer enclosure.
  • Windowed Version:
    Provides quick visibility of the contents but sacrifices noise reduction and thermal stability.


Modifications Introduced

  • Increased the length to reduce the frequency of emptying.
  • Rounded the bottom section to prevent clogging.
  • Created two variants:
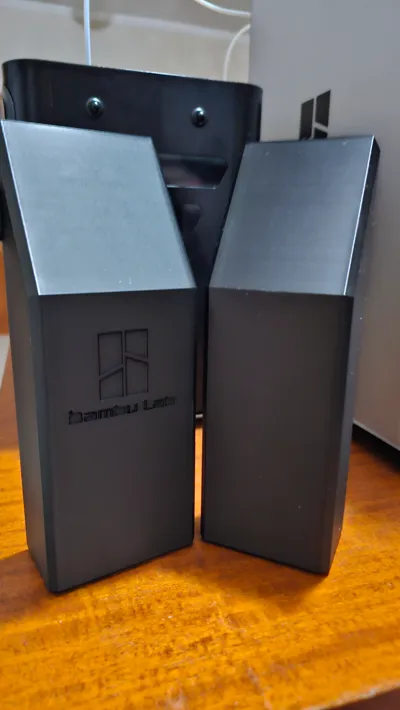
    • Smooth finish
    • Logo-embossed finish
  • Added two size options:
    • 90 mm width
    • 78 mm width
  • Maintained compatibility with the original design:
    • Requires 5 magnets (10×3 mm), which can be secured using instant glue.

You can “remove” the embed logo by selecting the same main body's color!

Boost Me (for free)

If you find my reverse engineering useful, please boost me!


Comment & Rating (96)

(0/1000)

Print Profile
90mm Windowed Engraved Logo 0.2mm layer, 2 walls, 15% infill
Not sure what happened here. This happened on both sides and at the same height and only on the rails. Is it my printer or bad file? 3mf file used was the 90mm Windowed Engraved Logo 0.2mm layer, 2 walls, 15% infill.
(Edited)
The profile uploader has replied
0
Reply
I am sorry for your bad experience. You can find other review on here with people successfully printing the rails-variant just fine. I didn't make any strnage setting on the 3MF file, just basic configuration. You can try yourself by downloading the STEP file and configure your own 3MF file
(Edited)
0
Reply
Replying to @LightDestory :
No need to apologize and I'm not blaming anyone. I'm just trying to figure if it's something wrong with my printer. I had just done a calibration and my filament is at 10% humidity in the AMS. I'm a new at this and I have printed for about 500 hrs. so far and this is my first failure. Just trying to see if it's the file or my printer?
(Edited)
0
Reply
Replying to @Frankyvee :
Unfortunnately I can't know, I can see that below a certain level everything was just fine. The file do not provide any specific level-based configuration. If the low side was successful I do not know what cause the bad high side.
(Edited)
1
Reply
Printed out nicely! I modified it from the STEP file to fit with my leftover magnets: 19x9mm (1pcs) + 8mm round magnet (4pcs). Additionally, added some windows at both side for easy grip and act as indicator when the poop is full.
(Edited)
The designer has replied
designer
1
Reply
Nice idea, but keep in mind that the fully closed design was selected to keep most of the chamber heat inside and to avoid ASA smell leaking out from the printer via the back door. Still nice, job!
(Edited)
1
Reply
Print Profile
90mm Enclosed Embedded Logo 0.2mm layer, 2 walls, 15% infill
I used 2 3x1,5 magnets per hole because I had these laying around works too
The profile uploader has replied
profile
1
Reply
Thanks for your feedback. I think that such magnets can be less strong compared to 10x3. During printing process the chute could slide off due to vibrations, let me know!
0
Reply
Thanks a lot LightDestory for this poop container :) Small and really sharp. It doesn't take a lot of space, that way, I'll be able to push my printer a little more against the wall... I've made it a little more colorful by adding some RED to the Bambu Lab Logo as well as some WHITE for the name ;)
The designer has replied
designer
1
Reply
Thanks for your feedback :)
0
Reply
Print Profile
90mm Enclosed Engraved Logo 0.2mm layer, 2 walls, 15% infill
Thank you! Running strong on my P2S. I did bore the holes out a bit to get bigger magnets in (that was before I learned how to use a negative modifier to add magnets 🤣). Solid, holds the heat in, & works great in Bambu Translucent PETG.
(Edited)
profile
1
Reply
Print Profile
78mm Enclosed Embedded Logo 0.2mm layer, 2 walls, 15% infill
works great, helps cut down on noise, especially when combined with a muffler for the fan. Thanks!
profile
1
Reply
Print Profile
78mm Enclosed Engraved Logo 0.2mm layer, 2 walls, 15% infill
clean print thank you for sharing
profile
1
Reply
Print Profile
90mm Enclosed Engraved Logo 0.2mm layer, 2 walls, 15% infill
Printed with no issues and is very strong would highly recommend.
profile
1
Reply
Print Profile
90mm Enclosed Embedded Logo 0.2mm layer, 2 walls, 15% infill
perfect print, works great!
profile
1
Reply
Print Profile
90mm Enclosed Embedded Logo 0.2mm layer, 2 walls, 15% infill
my p1s arrives in the next few days I’m really excited to try this out!
profile
1
Reply