


Print Profile(2)


Description
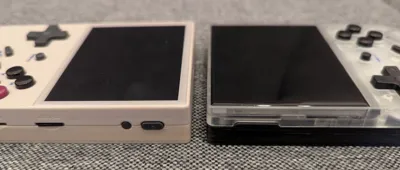
I designed a new back shell with a more classic design for the RG35XX. I have 2 versions, one for the original RG35XX and one for the RG35XX+/PLUS.
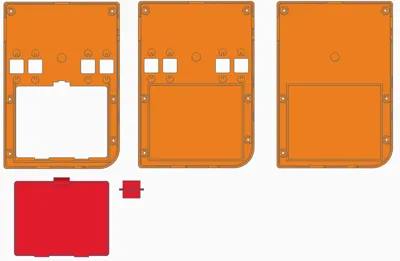
Currently there are 3 options & plates:
- 4 buttons and battery cover
- 4 buttons
- no buttons (if the buttons in the front are enough for your games)
Please be very careful when removing the battery from the original shell! If you are unsure what you are doing, please stop and do not continue with the modification.
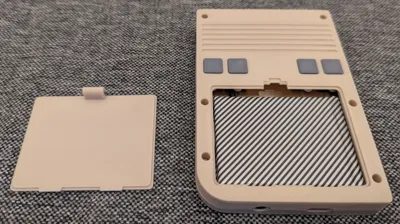
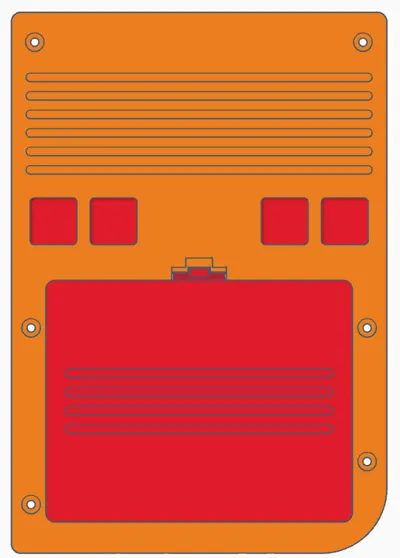
The back shell with the battery cover is for an even more classic look and allows to open the cover and easily remove the battery by unplugging it from the board and replace it with a charged one. Be aware that the electronics are not covered when opened!
If you are not using the version with the battery cover, make sure to reuse the tape or use new tape to secure the battery.
This is a first version and I did not invest much time for testing, so please allow little mistakes. Also the closing mechanism of the battery cover might be too brittle. I did some tests and also modifications, but we have to see how long it lasts. Please report any defects or imperfections in the model.
More remarks:
- Some parts of the model should be printed with support and others not. I used the paint tool to select the supported regions. Make sure that you do not lose the settings.
- The Plus model has the Wifi antenna as a sticker which is on the original back shell. If you want to keep Wifi, remove it very carefully. I used a hairdryer to soften the glue and it worked. Wifi is still working with the new shell.
- You might want to enable a brim for the shell to avoid warping. I did not enable it in the project file and it works with a clean plate.
- I decided against round edges and have a better result with a little sanding.
- You might want to reduce the layer height for more quality, but I am happy with 0.20mm for the shell. The buttons are printed with 0.12mm and ironing on the top.
- Be careful with the screws and do not apply much force, the device is not made for many openings/closings.
- I have good results with PLA and PLA+. I did not try any other material.
- You might want to change the settings in the emulators and remove the mappings first, before installing the version with no buttons.
- I did not try to remove the display from the front yet, so no new front cover for now.
I am always happy to receive feedback and comments to improve! It would be great if you post your unique color combinations.
Please respect and follow my license.
Enjoy and happy gaming!
Comment & Rating (7)