


Print Profile(2)


Bill of Materials

Description
Model Overview:
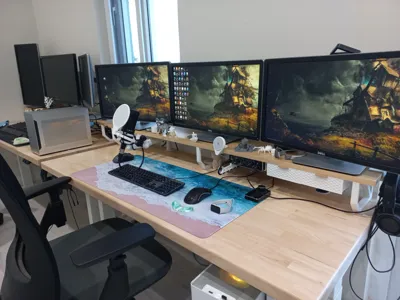
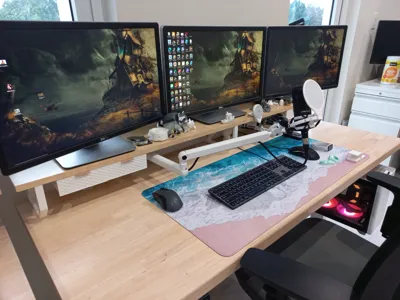
I needed the perfect monitor riser for our computer setups, but was struggling to find a riser both deep enough to support my monitors, and also shaped in a way that my desk mat could lay flat without being sandwiched by the riser. I couldn't quite find what I wanted, so I decided to make one myself. This is my first-ever 3D modeling project and the first print that I've designed from scratch, so if you notice anything that I could have done differently, please let me know via message.
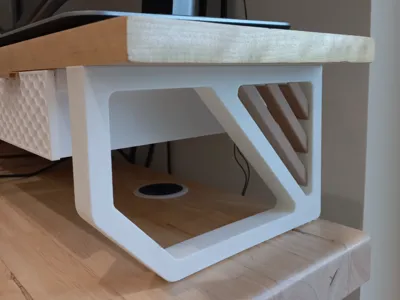
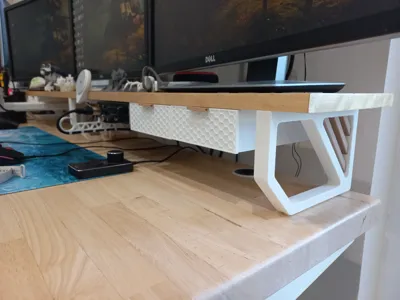
The risers are a 2-tone print and 5" (127mm) tall by 8" (203.2mm) deep and 0.75" (19.05mm) thick with 2 countersunk screw holes (#6 screw @ ¾" to 1" in length or an M3.5x20mm equivalent) to attach a board. The board I used is a strip of Baltic Birch plywood that was cut to be 8" deep and 61" wide (the width of my desk).
I took HEAVY inspiration from 3DVJModels Mid-Century Modern riser. Since this was my first time using Fusion or any other modeling software, I couldn't do anything as fancy as his inserts, so I opted for individual parts which I think turned out alright, and hides one of the screws.
I didn't add screw holes at the bottom of my model for the screwdriver since they don't look great, the riser is 5" tall so it was tall enough to use a screwdriver at an angle to install the countersunk screws, or you can use a 45 degree offset connector like I bought from Amazon a while back.
Print Details:
- Nozzle Size: 0.4mm
- Layer Height: 0.2mm for strength or 0.16mm for a smoother appearance (default)
- Supports: Not required
- Infill: 20% gyroid is what I used and it can support 3 monitors without any flex
- Material: PLA or PETG would be adequate, I've used PLA and it is plenty strong
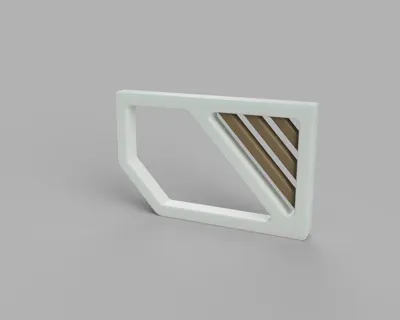
The model prints a single support on one plate and is set to print in two colors with a single color change. I've added two profiles, one for an AMS with a single color change mid-print or the supports on a separate plate. The slats aren't at a perfect 45-degree angle because they are parallel to the overhang, so they will only slot into their spaces at a single orientation, match the textures of the slats to the riser frame if you are struggling to get them into place.
I also made sure to design these in a way that allowed you to use some of the drawers that people have created for this riser competition such as the drawers from Frank3D's riser submission here. I've also created a collection of a bunch of useful prints that I've either used in my setup or think are neat here.
Assembly:
I ripped a sheet of plywood into 8" x 61" boards before edge banding and giving them a few coats of polyurethane. I also attached a 3" wide board to the rear for cable management using THESE printed clips which worked out great in PETG. Make sure to pre-drill pilot holes for all of the legs, I used 3/32" for the legs, a full list of sizes can be found here if you choose to use anything other than a #6 screw.
Additional Prints Shown in Photos:
I have a number of additional prints in my photos, here's the links to their models:
Printing on A1 Mini:
It's possible to print on an A1 Mini, but the part would need to be positioned diagonally and in a vertical orientation which would require a decent amount of support material. You could potentially print multiple legs side by side to offset the support material usage.
Boost Me (for free)
Boosts are appreciated and would help motivate me to learn how to use 3D modeling software since this is my first attempt at designing anything. Maybe next time I'll watch a tutorial or two before starting instead of floundering around teaching myself as I go.
Comment & Rating (24)