Search models, users, collections, and posts

Greek Temple w/ USB tomb

Print Profile(1)

All
P1S
P1P
X1
X1 Carbon
X1E
A1
H2D
H2D Pro
H2S
P2S
H2C
X2D
A2L

0.1mm layer, 2 walls, 15% infill
Designer
31.8 h
6 plates
4.0(2)

Open in Bambu Studio
Boost
462
1061
12
24
579
62
Released 

Description

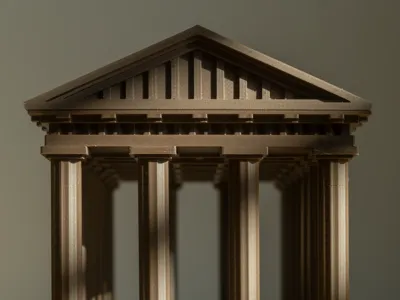
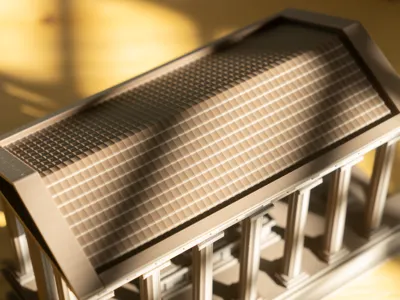
I have created a miniature model of a Greek temple. I needed a place to store my USB stick, which holds valuable and cherished files. Instead of letting it gather dust in a drawer, I decided to give it a worthy resting place—one that also looks great on a shelf!
 

The .3MF file includes two options for the temple's ground floor: one with a USB stick tomb and one without. You should choose one of the two.
 

The USB stick tomb is compatible with the following USB stick:

Kingston DataTraveler Micro USB Flash Drive 128GB 200MB/s Metal USB 3.0 Gen 1 - DTMC3G2/128GB

Below this description, you will find instructions for assembling the temple. Super glue is not necessary, though a bit of force (and occasional brute strength) might be.
 

Instructions:
 

Start with the base of the model
Grab the four longest pins and insert them into the holes
Place the following element on top of the base
This is what you should have until now for this element
Repeat this step 14 times…
…to get 14 columns
repeat this step 4 times…
to get 4 corner columns
insert 14 pins into the following holes, make sure you dont put any pins into the corner holes
Insert the bottom of the columns on top of the pins, make sure you dont use the corner columns
This is what you should have until now for this element
Now combine the two elements by placing one on top of the base element
This is what you should have until now, halfway there!
Insert the corner columns on top of the corner pins

If you have chosen for the tomb option, now is the best time to place it on the base before heading onto the next step.

Now place the ceiling plate on top of the corner columns, make sure the side with the ornaments is facing down
This is what you should have until now
Place the ornamental frame on top of the ceiling plate
Like this
Take the last four connection pins and insert them into the slots of the ornamental plate
Now grab the two facade elements and insert them into the wide slots of the ornamental plate
Last but not least, place the roof on top of the ornamental plate
Done!

Comment & Rating (12)

(0/1000)

License

This user content is licensed under a Standard Digital File License.

You shall not share, sub-license, sell, rent, host, transfer, or distribute in any way the digital or 3D printed versions of this object, nor any other derivative work of this object in its digital or physical format (including - but not limited to - remixes of this object, and hosting on other digital platforms). The objects may not be used without permission in any way whatsoever in which you charge money, or collect fees.