Search models, users, collections, and posts

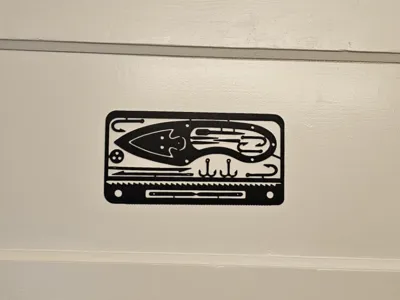
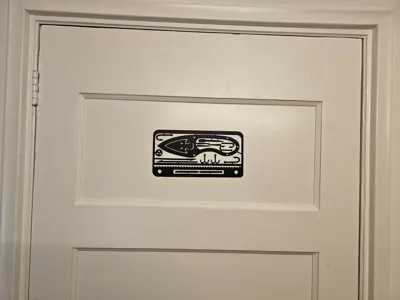
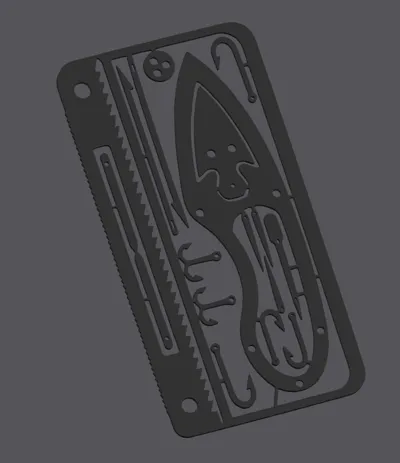
Hunter survival kit card

This model is created by Image to Keychain
Make Your Model

Print Profile(1)

All
P1S
P1P
X1
X1 Carbon
X1E
A1
H2D
H2D Pro
H2S
P2S
H2C
X2D
A2L

0.2mm layer, 2 walls, 15% infill
Designer
2.3 h
1 plate
4.6(22)

Open in Bambu Studio
Boost
769
1878
60
8
619
307
Released 

Bill of Materials

List other parts
  • Fishing line x 1:
  • sandpaper x 1:

Description

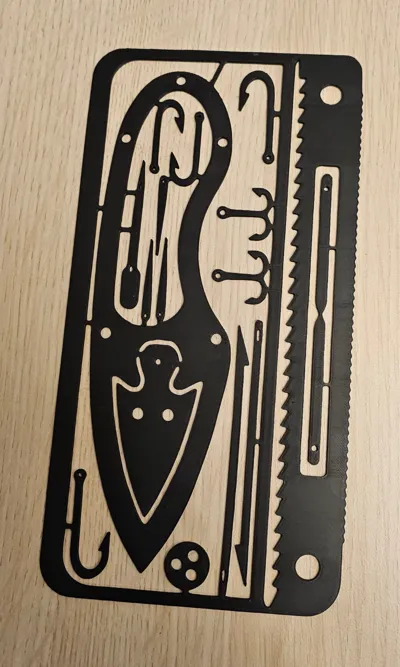
This kit card does not only look cool as a decor piece but can be sharpened with sandpaper for a sharp edge and real world use. 


The kit card contains: 

  • 1 knife;
  • 1 arrowhead;
  • 6 fish hooks (2 double and 4 single);
  • 3 needles;
  • 1 finger drill;
  • 1 pair of tweezers;
  • 1 trap buckle;
  • 2 small spears;
  • 1 saw;

Printed with 100% infill and ironing for the best result!

Comment & Rating (60)

(0/1000)

please make an a1 mini profile 🙏🙏
designer
7
Reply
it’s not that hard man I don’t own a mini myself but just make one in Bambu studio
0
Reply
Replying to @bnbtk :
but I’m a kid and my dad won’t let me use the Bambu studio on his computer
2
Reply
Replying to @user_3246153675 :
oh rip
1
Reply
Print Profile
0.2mm layer, 2 walls, 15% infill
super easy print
The profile uploader has replied
profile
2
Reply
great picture, the orange looks cool 😁
0
Reply
very nice! printed perfectly 😀
designer
1
Reply
Print Profile
0.2mm layer, 2 walls, 15% infill
I made it and tested it and it really works, printing in pet g would be better but for my bug out bag it now has a home.
profile
1
Reply
so I’m pretty new to printing and all, I printed mine in black PLA and I love it but what filament would you all recommend for something more rigid and strong? petg cf? anything stronger out there?
The designer has replied
designer
1
Reply
thank you so much for the kind words and the boost! depending on your needs please refer to these two guides: for an easy overview please use this one: https://bambulab.com/en/filament-guide for a more in depth guide based on your specific needs use this one: https://bambulab.com/en/filament/collections I hope this will help you on your way. Happy printing!
0
Reply
(p.s. depending on your printer do or do not use carbon fiber, the material is very abrasive and will damage the nozzle. only a hardened nozzle should be used for CF materials. The X1C comes equipped with the hardened nozzle, other models should get a hardened nozzle first or you might damage/ clog your non hardened nozzle)
0
Reply
Replying to @BetterBrain :
ok ya I have a hardened nozzle ordered but is CF going to be what I’m looking for ?
0
Reply
This is really cool, I've been looking into a desktop cnc machine this would be awesome to do in aluminum.
The designer has replied
designer
4
Reply
that is a really cool idea, would love to see the end result if you make the card on a cnc machine!
2
Reply
Print Profile
0.2mm layer, 2 walls, 15% infill
Caught a fish
The profile uploader has replied
profile
2
Reply
a picture with the fish and the cardkit tool would be awesome!!
(Edited)
1
Reply
unfortunately I didn’t have my phone when I caught this fish but it was a decent sized bass on a worm
(Edited)
1
Reply
Print Profile
0.2mm layer, 2 walls, 15% infill
profile
1
Reply
any chance of building a handle for the knife so it doesn’t flex so much
The designer has replied
designer
1
Reply
Thank you for your comment! It is a welcome suggestion and i will look into it. The only downside will be that i cannot integrate the handle into the kit card. Any recommendations on how to make this work will be highly appreciated!
1
Reply
Replying to @BetterBrain :
would also be useful for people who have the metal kit
0
Reply
Replying to @fat.general1977 :
The metal kit is really tiny and thin/fragile. maybe 50% scale compared to this one and 0.4mm high. I made this kit larger for 3D printing and thicker (2mm) to give a chance to sharpen your 3D printed card. Any add-ons for the 3D printed card will unfortunately not be compatible with the metal version.
0
Reply
hallo, wat zijn die 2 streepjes tussen in de zaag?
The designer has replied
designer
1
Reply
The holes in the saw are there to hang the kit card or to make a handle for the saw so it is easier to use :)
Show original
0
Reply
I see now you didn't mean the holes :') the stripes are the tweezers when these are broken off and sharpened you could use them as tweezers to remove a splinter :)
Show original
0
Reply

License

This user content is licensed under a Standard Digital File License.

You shall not share, sub-license, sell, rent, host, transfer, or distribute in any way the digital or 3D printed versions of this object, nor any other derivative work of this object in its digital or physical format (including - but not limited to - remixes of this object, and hosting on other digital platforms). The objects may not be used without permission in any way whatsoever in which you charge money, or collect fees.