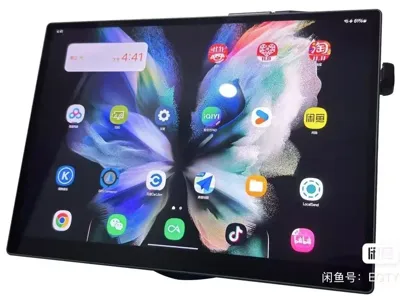
Fold3 Tablet Case


Print Profile(1)
Description
First, let me state that this model is not for commercial use.
Related video introduction: 【Fold3 Modified Tablet Case, Set-top Box】 https://www.bilibili.com/video/BV1dTHyeaERC/?share_source=copy_web&vd_source=cac13e677c7d9aea0798952c3653b664
Printing this model isn't difficult; the challenge lies in sourcing parts and the assembly process. Beginners without prior mobile phone disassembly experience or basic soldering skills should proceed with caution.
This model is suitable for users who want to modify their phones for tablet use. Models with and without SIM card slots are available.
After printing the model, you will need the following accessories:
1. Taobao: Copper foil with double-sided conductive adhesive, purchase 0.1mm thick, 100mm wide, 1m long, 1 piece
2. Taobao: T2 Phosphor bronze disc, purchase 2 pieces of 2x35mm copper sheets
3. Taobao: Heatsink magnetic sheet, purchase 2 pieces of 9cm patches and 1 piece of 6cm patch
4. Taobao: Mobile phone screen bezel adhesive, 1 piece
5. Taobao: Purchase 10 studs, m1.6 x 3.0 length x 3.0 edge (standard tooth 0.35), unit: mm
6. Taobao: Purchase screws, m1.6 x 3, unit: mm
7. Taobao: Tablet magnetic ring, 1 piece
8. Taobao: Insulating thermally conductive grease
9. Taobao: Purchase a heatsink that can cover 35mm (heat dissipation round hole) or a mobile phone semiconductor heatsink
10. 1 bottle of 502 glue
11. Hot melt glue + hot melt glue gun
Installation process:
1. Attach one 6cm and one 9cm magnetic sheet to the two holes on the mainboard base.
2. Attach one 9cm magnetic sheet to the hole inside the lid.
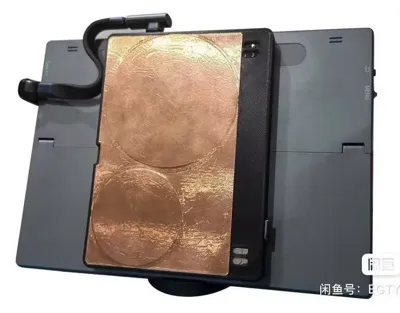
3. Neatly apply the copper foil to the outside of the mainboard base and the outside of the lid.
4. Place two 2x35mm copper sheets inside the mainboard base and the lid.
5. Before inserting the studs, apply a small amount of 502 glue around each stud before pressing them into the 10 holes.
6. After connecting the phone's mainboard (apply a suitable amount of thermal grease to the black SOC area) and the sub-board bare, place them in the case and tighten the screws (the sub-board's speaker and SIM card slot have corresponding holes).
7. Install the power button and charging port. The battery bottom can be bonded using double-sided tape or screen adhesive.
8. Use a small amount of 502 glue (depending on your skill) to adhere (match correctly) the contact holes of the lower speaker of the sub-board.
9. Fix the lower speaker using hot melt glue.
10. Apply mobile phone screen bezel adhesive around the case, close the lid and let it sit for 2 hours.
11. Use a semiconductor heatsink (best) or a heatsink for heat dissipation.
Thank you for downloading this model. More models will be open-sourced in the future. Thank you for your support.
License
You shall not share, sub-license, sell, rent, host, transfer, or distribute in any way the digital or 3D printed versions of this object, nor any other derivative work of this object in its digital or physical format (including - but not limited to - remixes of this object, and hosting on other digital platforms). The objects may not be used without permission in any way whatsoever in which you charge money, or collect fees.
Comment & Rating (0)