
Ultimation Filament Storage Rack (2 orientations)
Print Profile(12)


Description
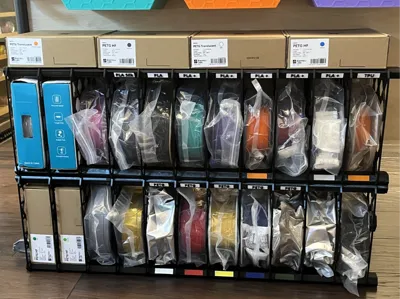
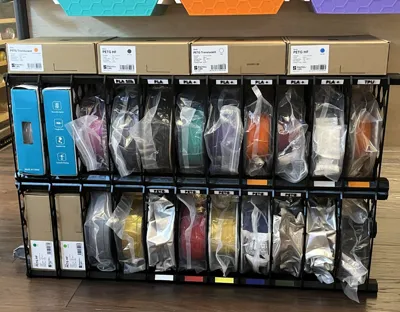
The Ultimate Filament Storage System: Your Modular, Minimalist Solution
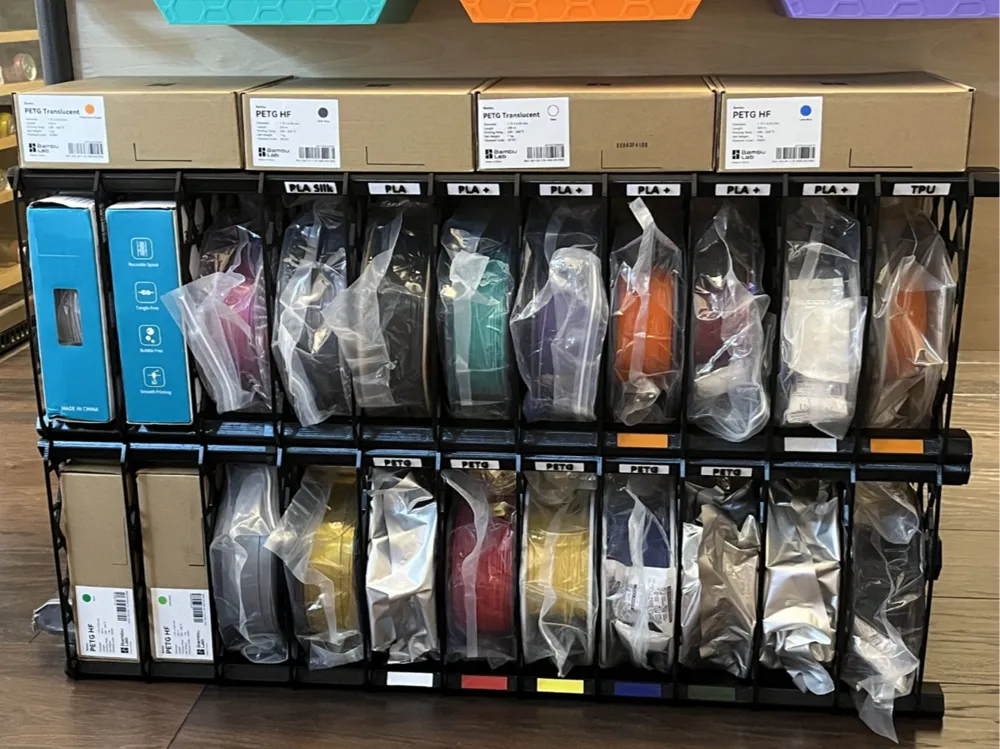
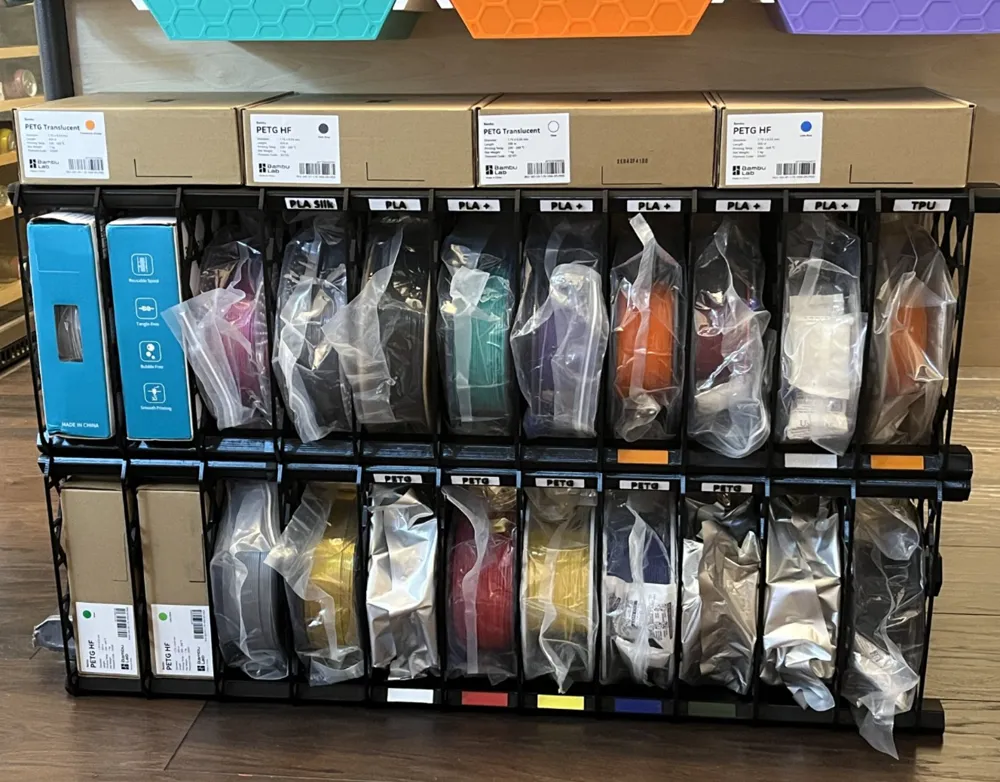
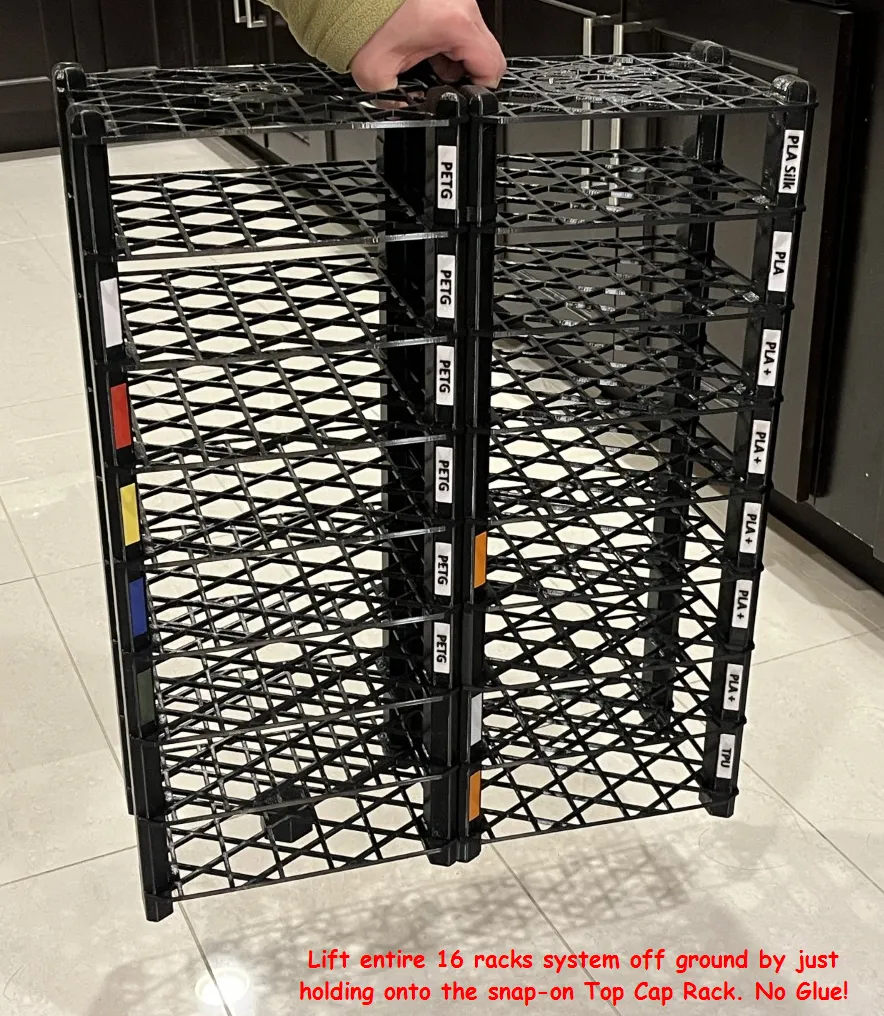
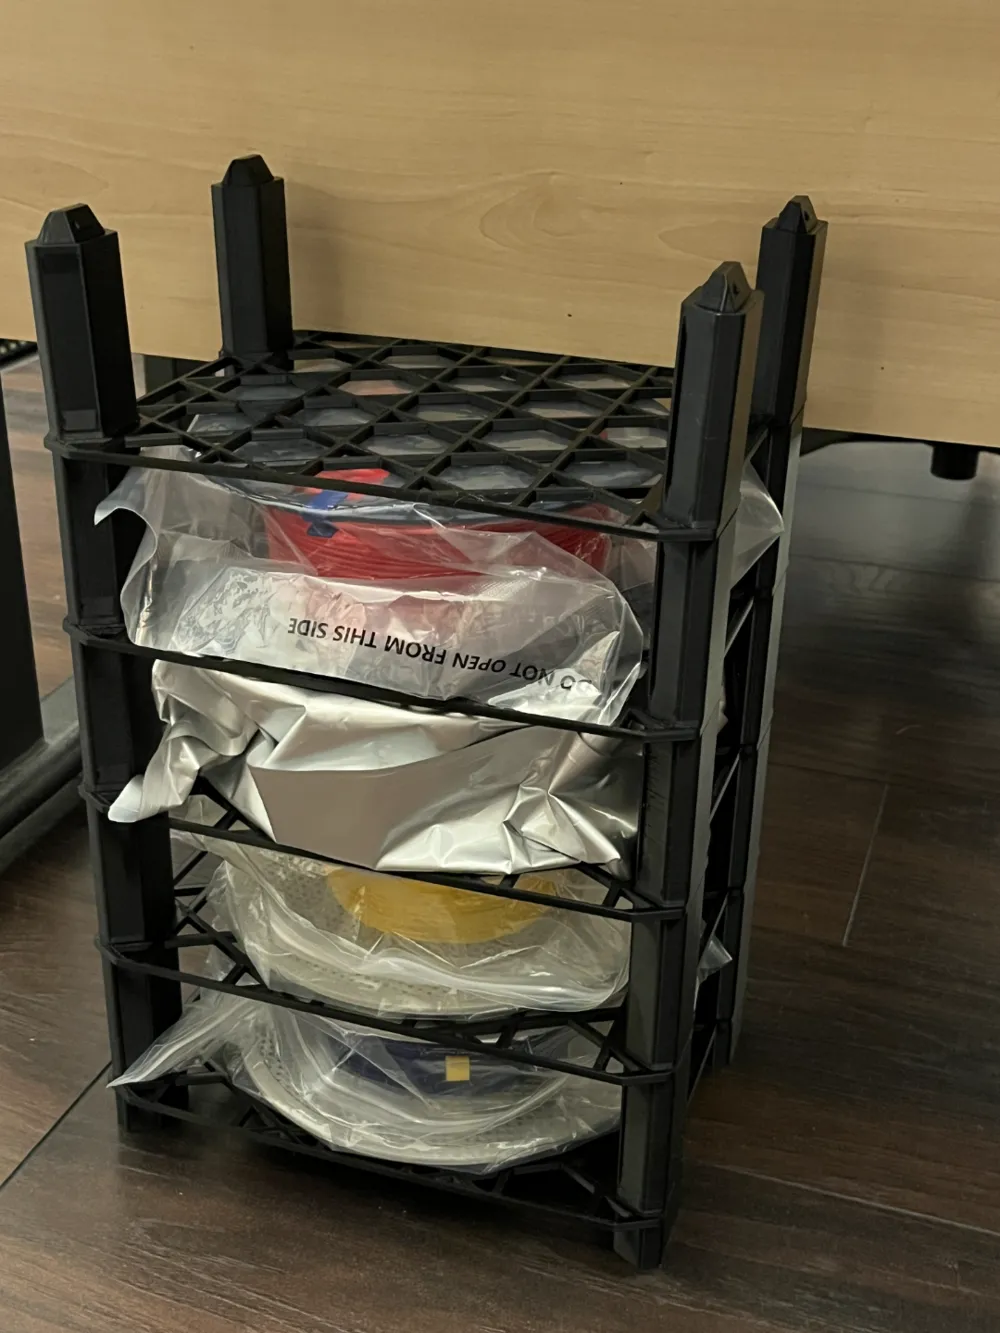
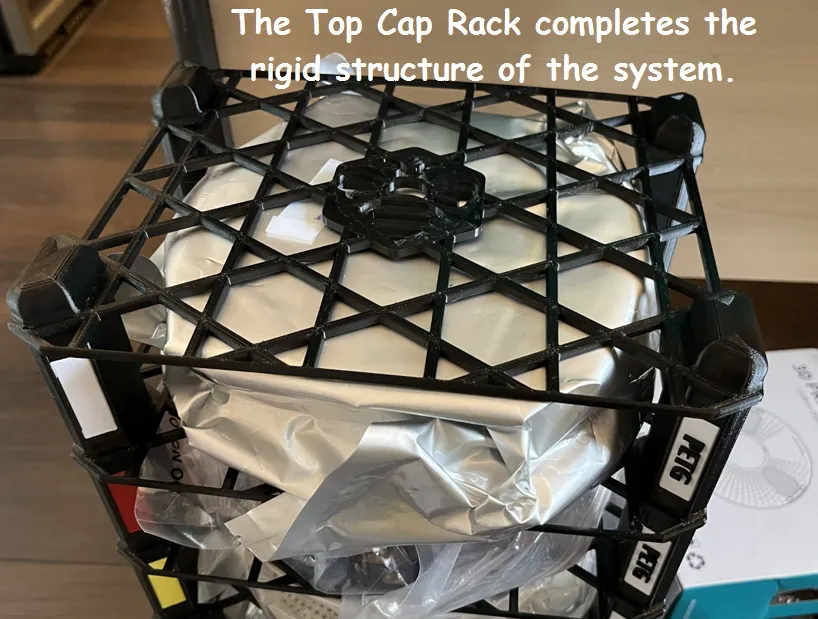
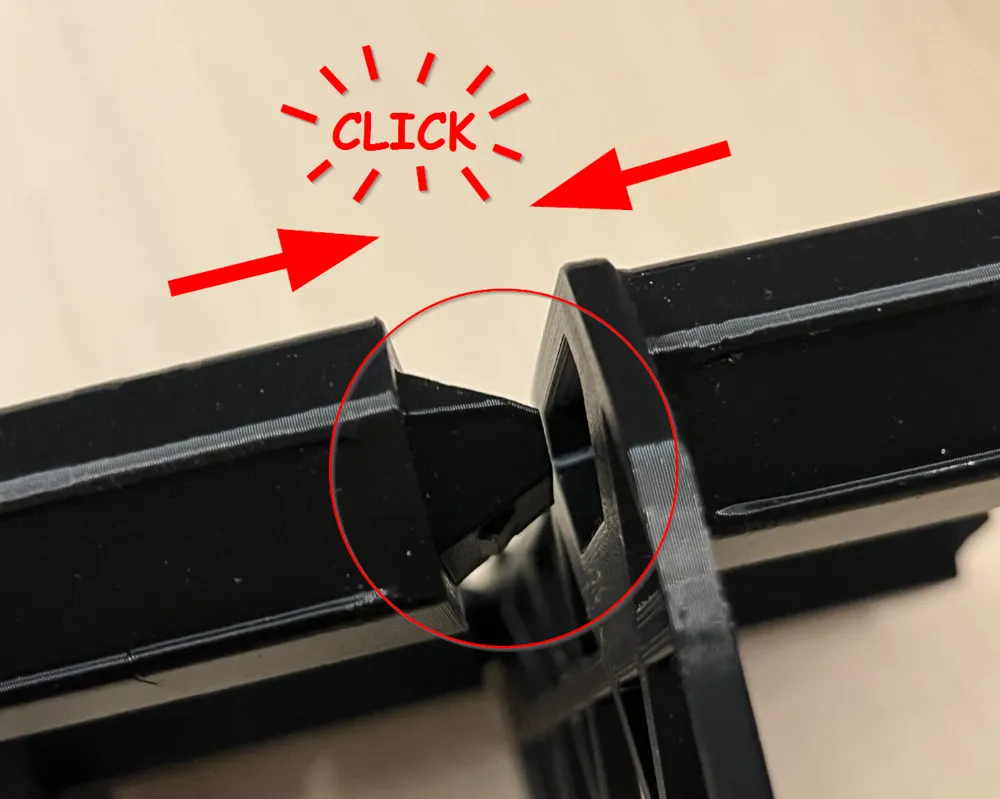
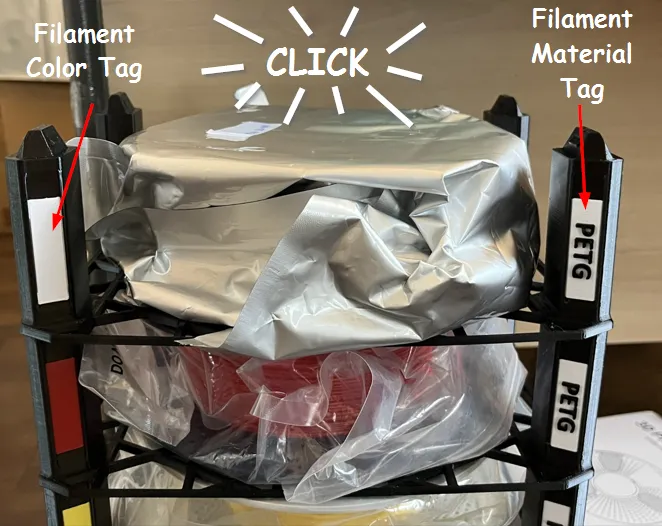
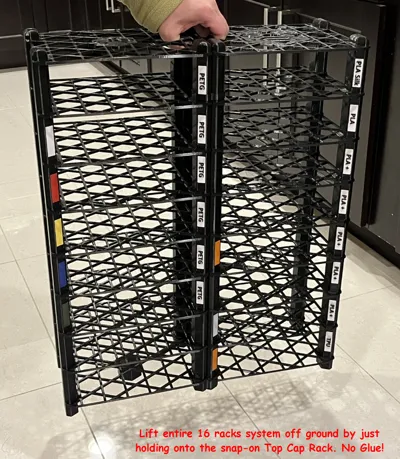
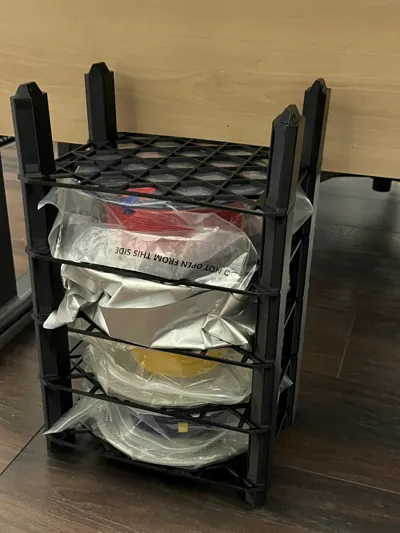
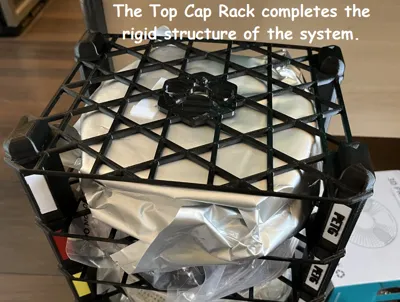
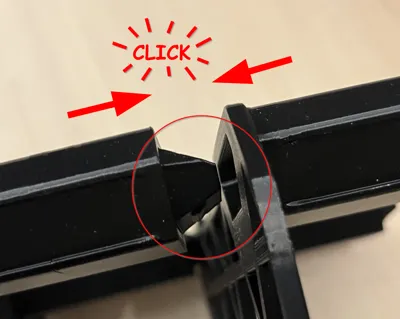
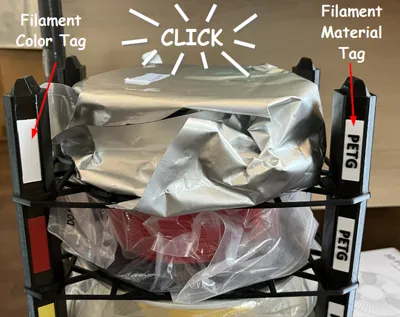
Introducing the ultimate filament storage system, engineered with a minimalist and modular design. Print only what you need as your filament collection expands. Individual trays seamlessly stack using hidden joints—no glue required! Simply push the joints together for satisfying “clicks.” Add more trays or rearrange them to suit your current and future storage layout. Finally, don't forget to add the Top Cap Rack to complete the racking system. It helps to maintain the rigidity of the structure.
Key Features:
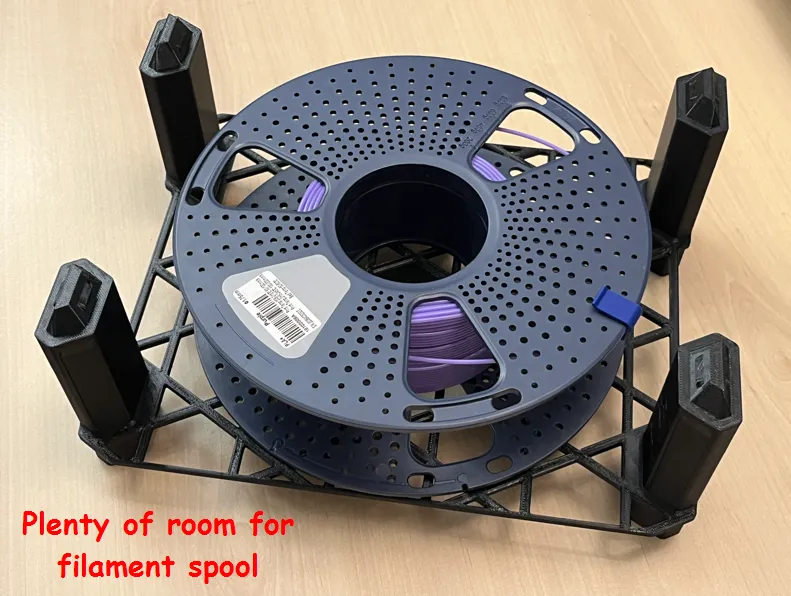
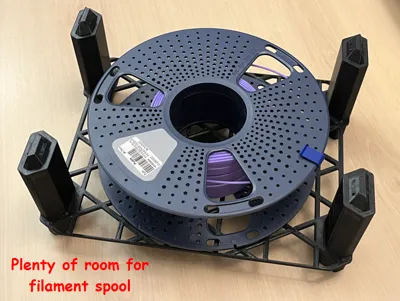
- Large Full-Size Spool Storage: Spacious envelope 256mm x 200mm x 70mm which accommodates entire spool contained in large zip bag, and with desiccant jar loaded in center hub.
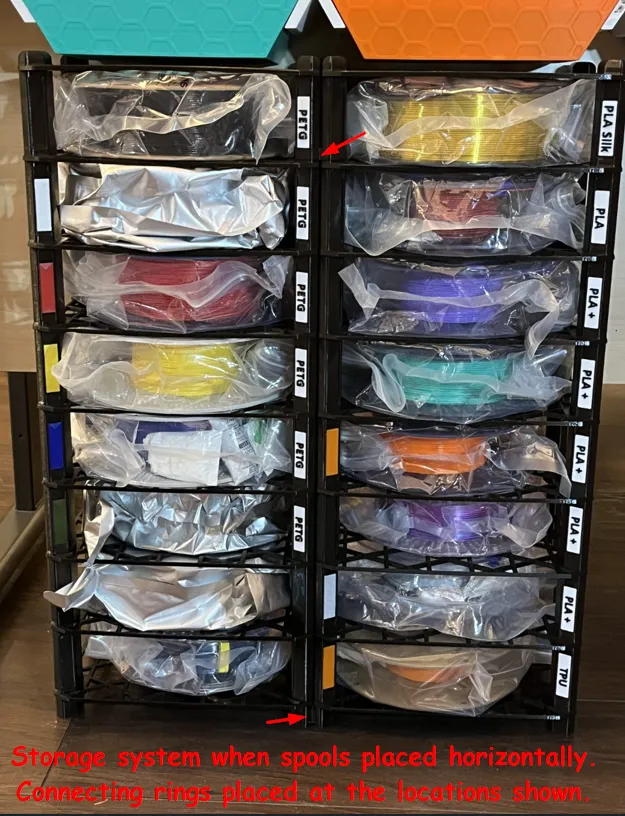
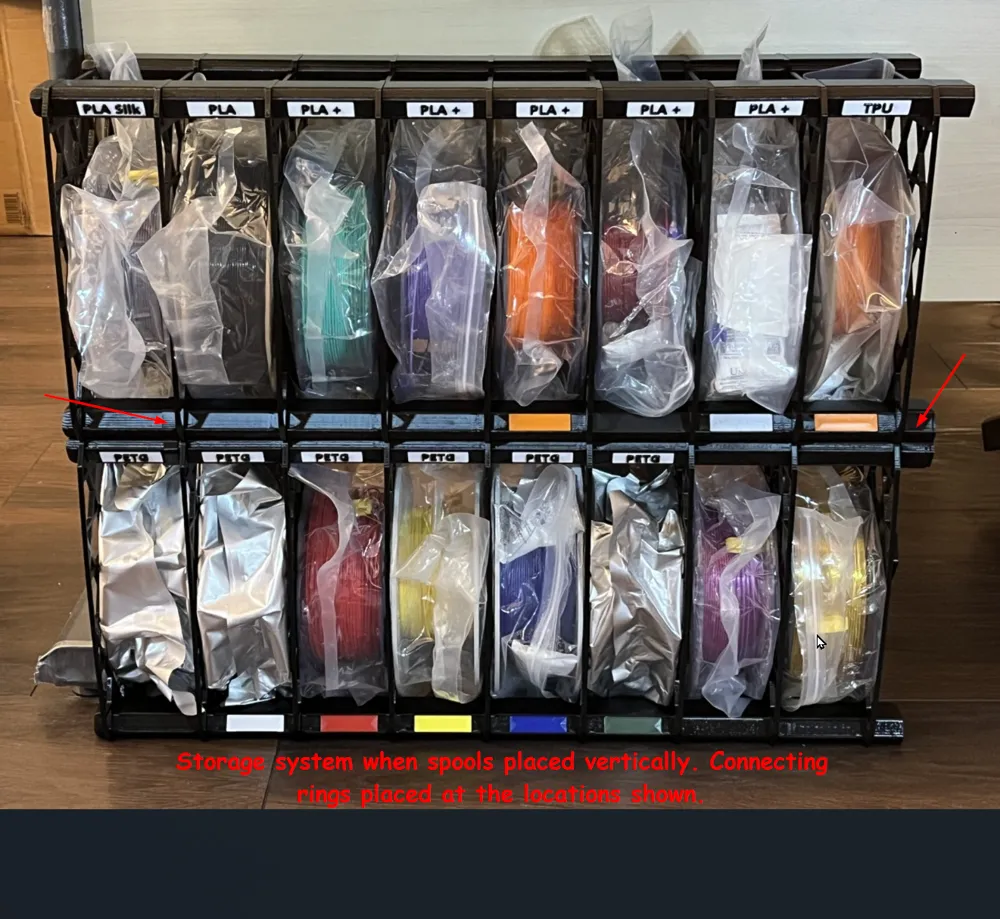
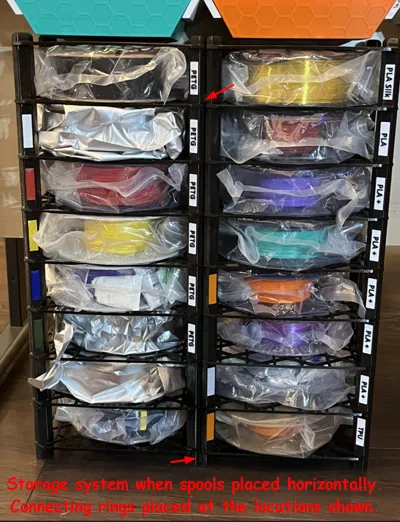
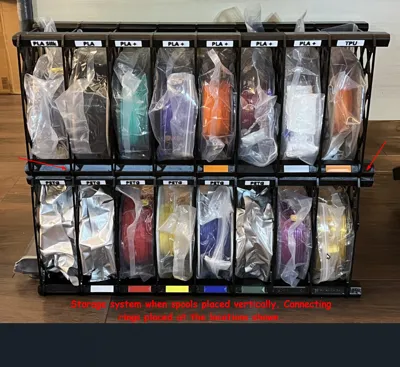
- Dual orientation setup: Rack can be used either vertically as towers or laydown on their side.
- Material Efficiency: Each tray uses only 100 grams of material, significantly less than many similar systems on the market.
- Tri-Hexagon Pattern: Platform employs a tri-hexagon pattern for superior strength-to-weight ratio.
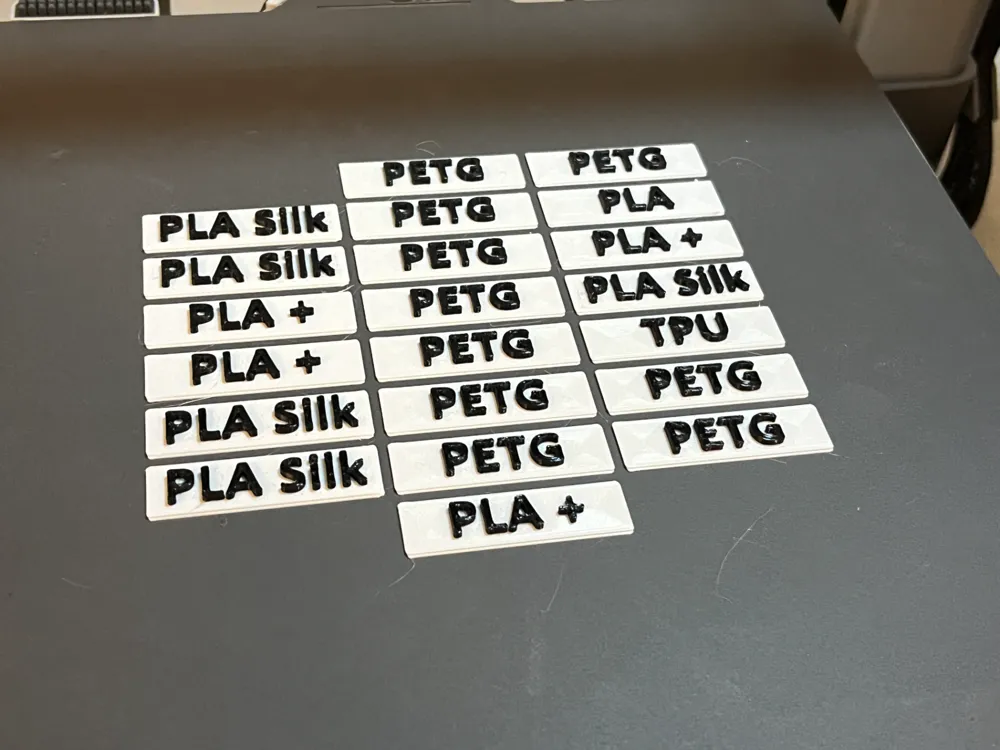
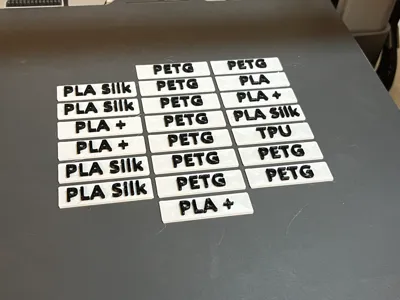
- Easy Filament Identification: Front poles reserved for “Snap-On” material name and color tags, which are easily replaceable for future changes.
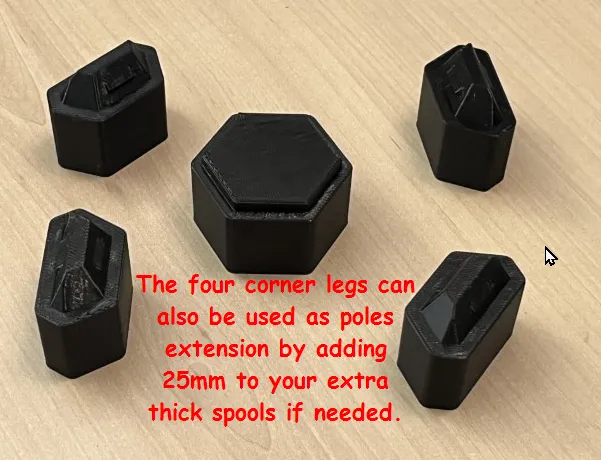
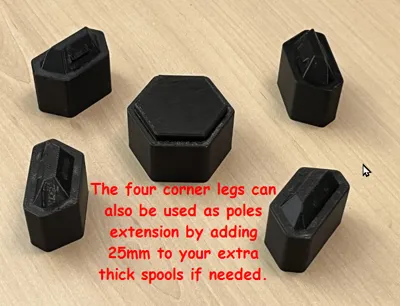
- Extension for Extra Thick Spools: The 4 corner legs can be used as pole extenders. Each can add an extra 25mm.
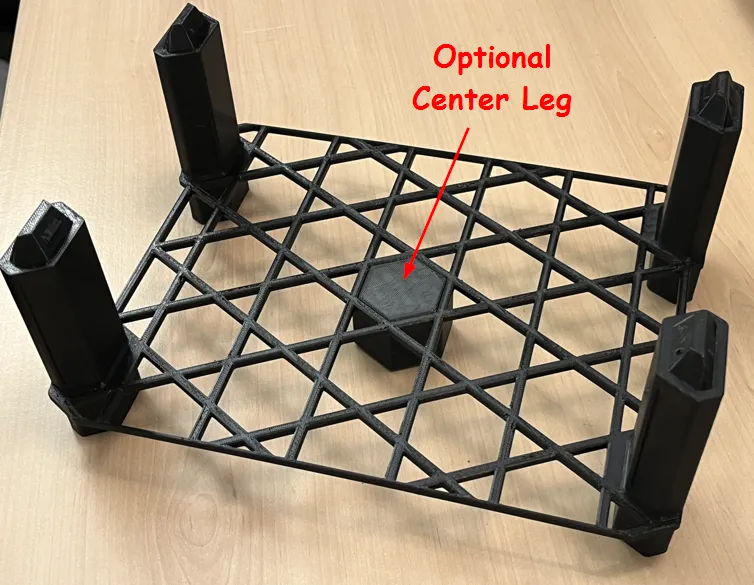
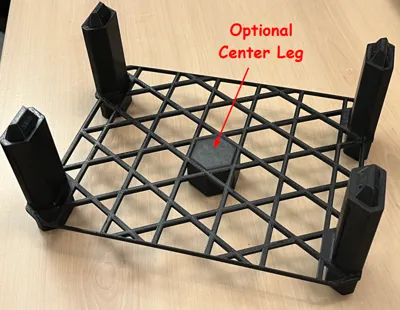
- Optional Center Leg Support: Extra center leg support for heavy, metal powder-filled filament at the bottom rack. Not required for standard 1kg filament.
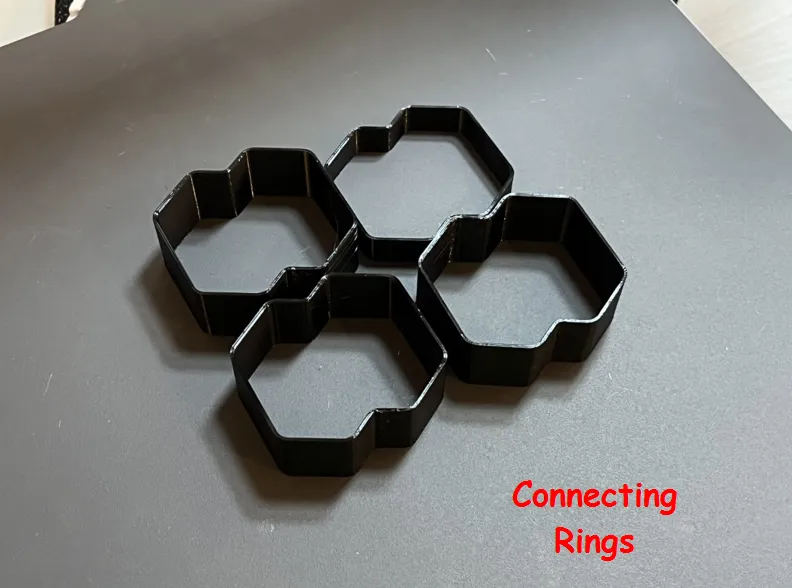
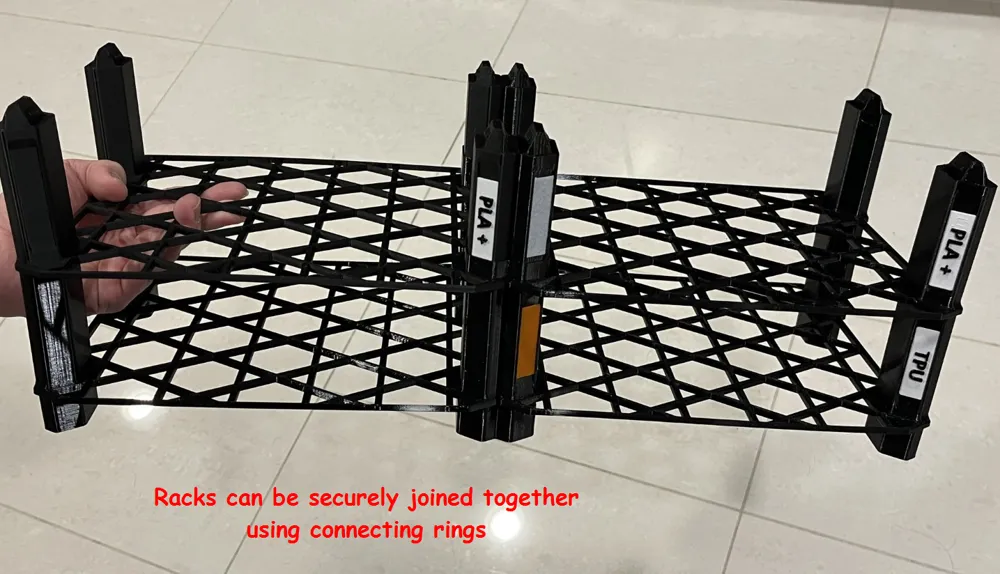
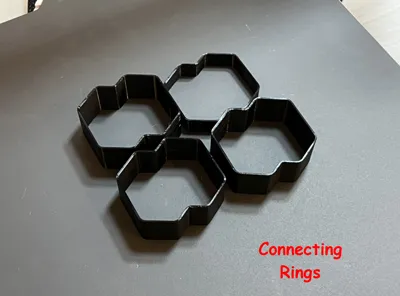
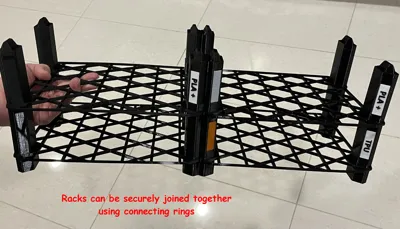
- Expandable Connectivity: Racks can be jointed together using “Connecting Rings” to form a wall storage system. Use “Fasten Straps” to secure tall racks to a wall with screws and prevent tipping hazards.
- Optimized Print Profile: Fine-tuned print profile balances print time and strength.
Joining racks together by “Connecting Rings”:
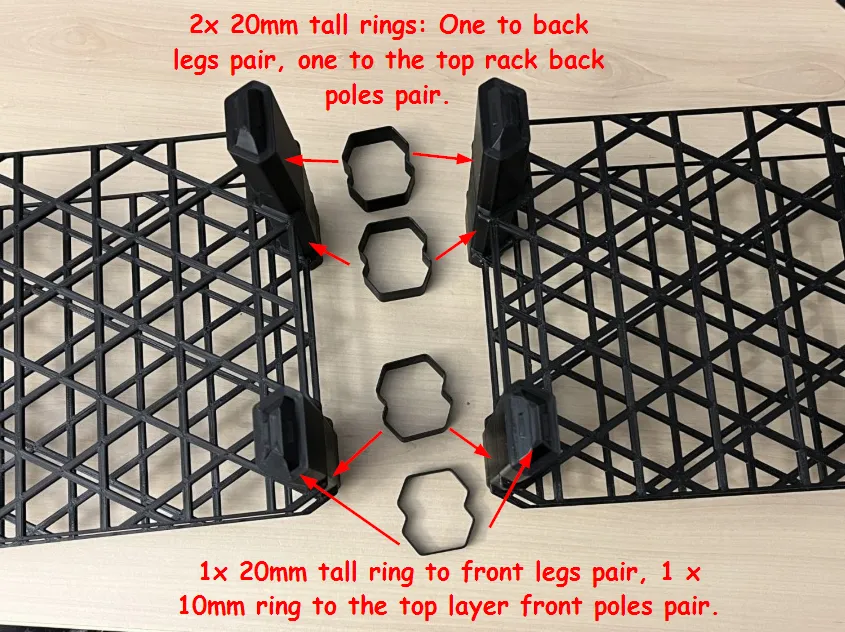
- Put two racks side-by-side and align the legs and poles.
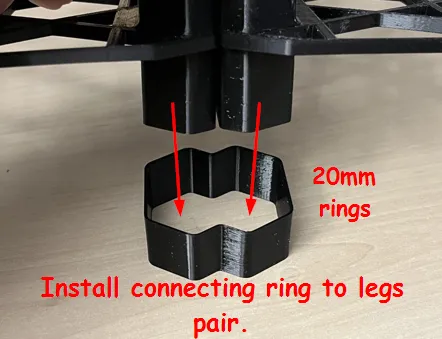
Slide tall connecting rings (20mm) to each of the front and back paired legs.
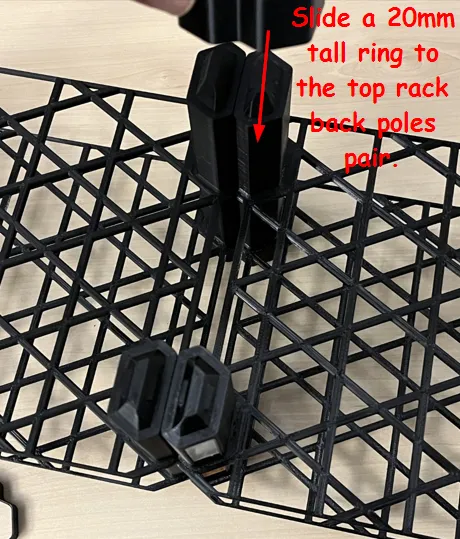
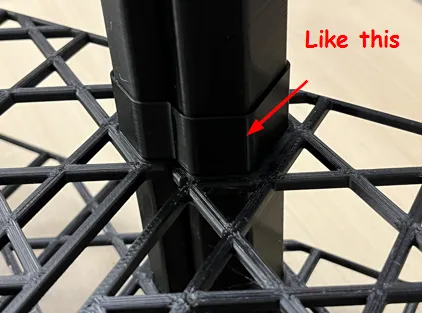
Slide a tall connecting ring (20mm) to the top rack's back poles pair.
Slide a short connecting ring (10mm) to the top rack's front poles pair before clicking in the material ID tags or the protruded text on the tag will prevent the ring from sliding into the correct place.
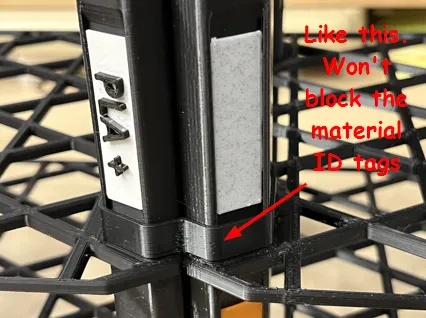
After the Connecting rings are installed correctly, the racks are securely jointed together.
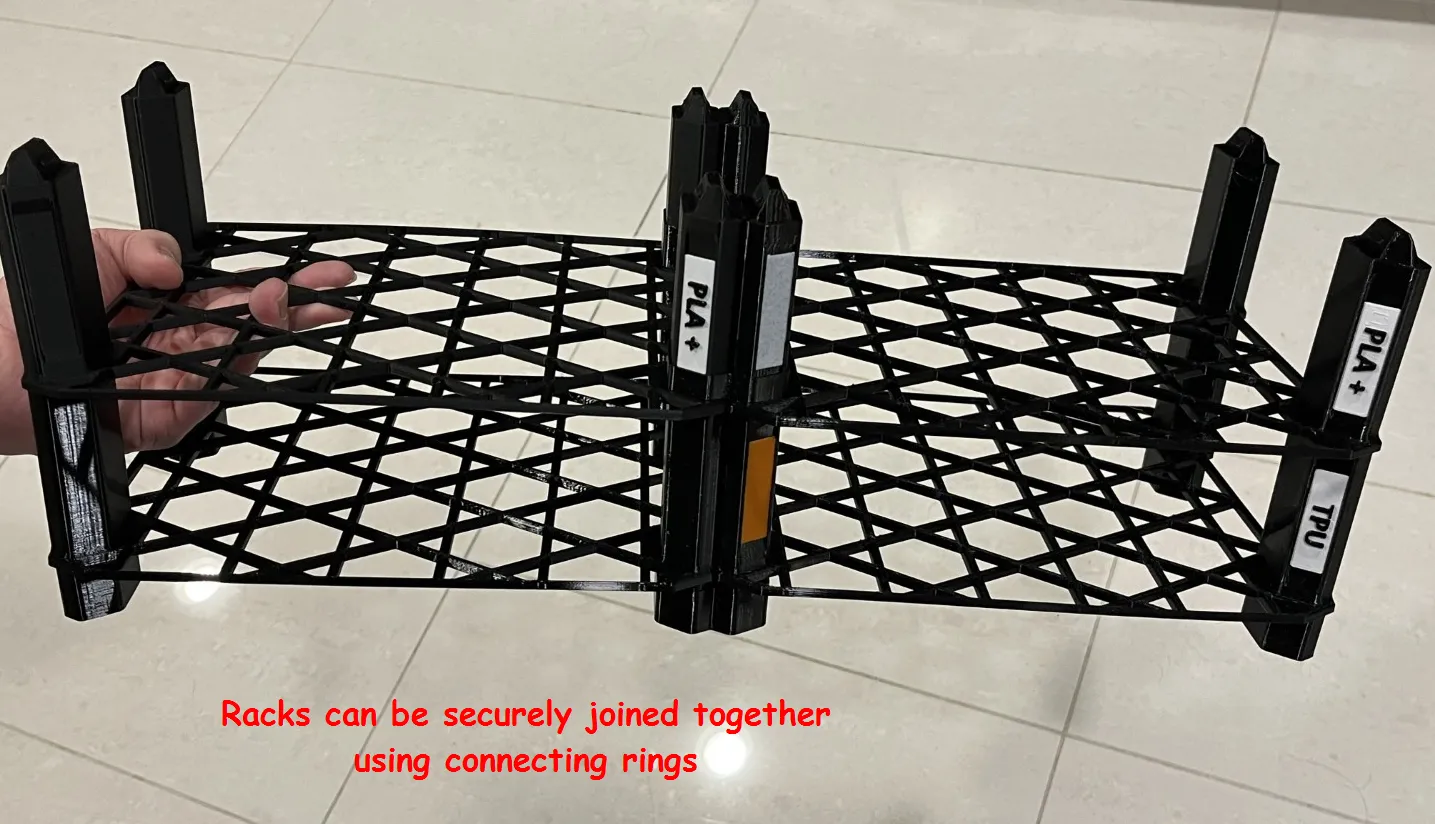
- Depending on the height of the rack system you build, more connecting rings may need to be installed to ensure all racks are securely joined together in a wall of filament storage. For example, you might add a pair of connecting rings to the back and front poles every 5 racks in height to get the rigidity you desired.😉
For added stability and safety, use a Fasten Strap to secure the rack system to a wall to ensure it stay firmly in place whether they're upright or laid on their side.
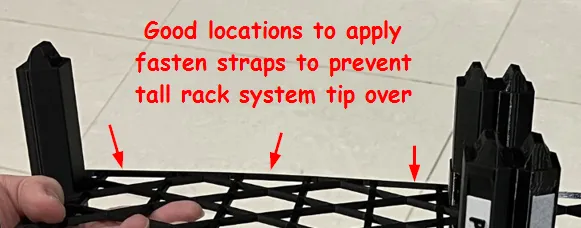
- The same connecting method applies when you build the rack system by laying the racks on their side.
Print Performance:
Printed racks perform excellently with the following materials and speeds:
- PETG Basic: Max speed of 100 mm/s
- PETG-HF: Max speed of 250 mm/s
- PLA: Max speed of 300 mm/s
This design allows me to organize my filament collection effortlessly and neatly. I trust you'll find it just as useful! 😊
Tips for Successful 3D Printing:
- Build Plate Preparation:
- Clean your build plate with dish soap and hot water to ensure good print adhesion and prevent warping issues.
- Specialized Build Plate:
- If you have a Supertack cool build plate, use it when printing large models with PETG. This combination has yielded excellent results for me.
- Print Removal:
- If prints aren't removed while the bed is still warm, PETG parts can adhere too strongly. To easily release parts from the build plate, heat the bed to around 45°C and flex the plate. This method has consistently worked for me.
- Stringing Issues:
- If you notice excessive stringing in the tri-hexagon grids, the filament might be too "wet." Dry the filament and review your retraction settings.
- Calibration:
- Different filaments can behave differently. Calibrate to find the optimal Factor K and Flow Rate for premium quality prints.
Boost Me (for free)
Your support and feedback are incredibly valuable to me. Thank you so much in advance. 😊
License

You shall not share, sub-license, sell, rent, host, transfer, or distribute in any way the digital or 3D printed versions of this object, nor any other derivative work of this object in its digital or physical format (including - but not limited to - remixes of this object, and hosting on other digital platforms). The objects may not be used without permission in any way whatsoever in which you charge money, or collect fees.


Comment & Rating (181)