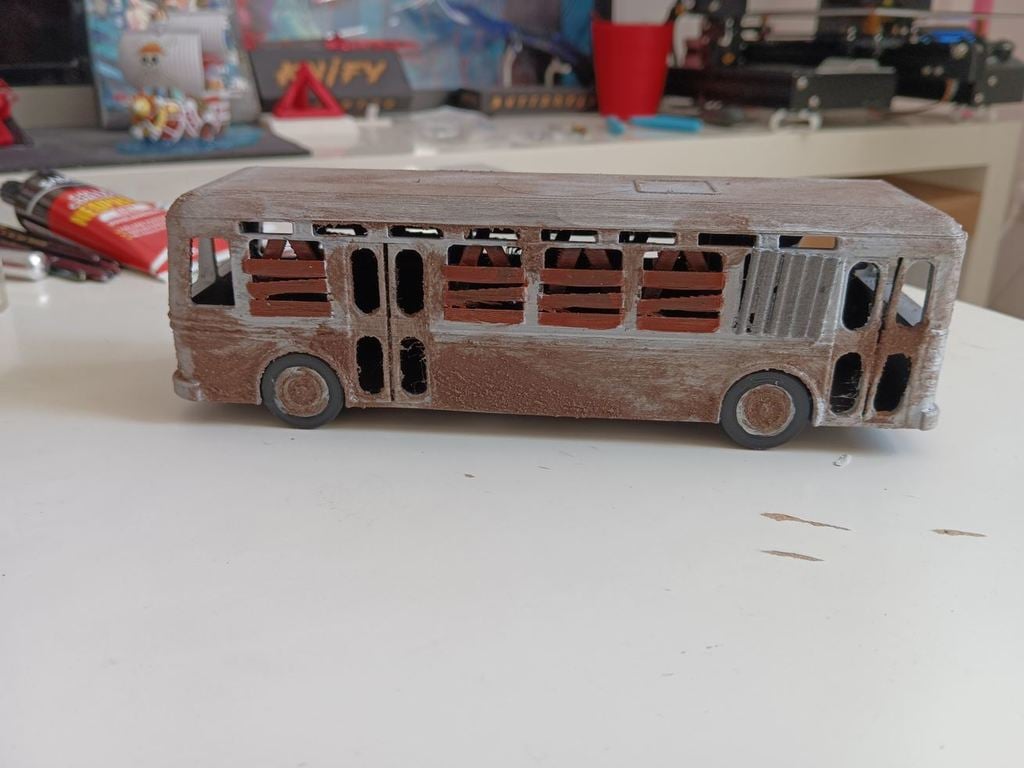
TranZit Bus from Call of Duty: Black Ops 2


Print Profile(1)

Description
This is the TranZit bus from Call of Duty: Black Ops 2
This is an art print. I do not intend to maintain or modify this further.
A friend asked me to make this model for them and I felt it needed a little extra.
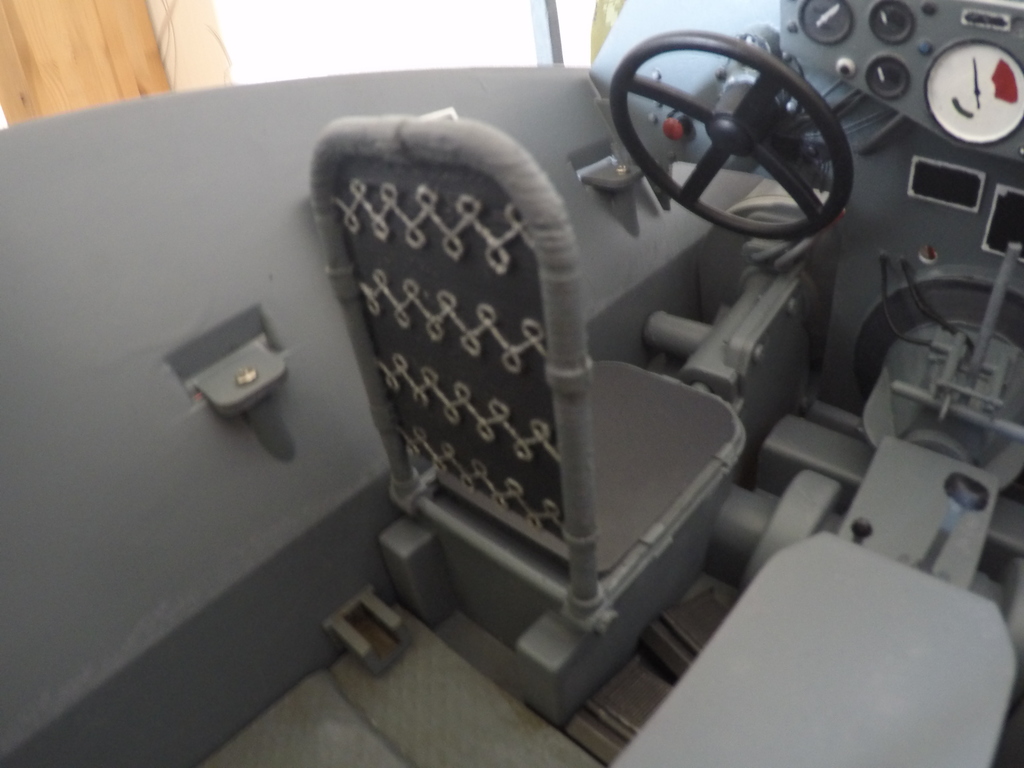
I remixed this by painting the bus, adding a driver seat, spinning wheel axles, a removable roof and I included 4 zombies I remixed on bases that fit inside the bus and have been cut for printing.
To get the look in the photos, when I originally printed this I tweaked my purge values on the bus plate so that:
- from brown to silver would mix a lot
- from silver to brown would mix a bit
- from silver or brown to black would mix only a tiny bit
- from black to silver or brown would mix only a tiny bit
- from anything to yellow would purge completely
- from yellow to anything would purge a lot
This does purge a lot so i recommend that you add model(s) of your choice to the bed and set them to “purge into this object” to save on waste.
It takes a long time to print and has a lot of purge even when using minimized purge values for mixing. If I were to print this again, I would likely print the bus entirely in silver both for speed and purge waste and then just paint it by hand.
I also went back with paint pens and painted the wood planks and shutters as well as the zombies.
This was printed on a Bambu A1 with Textured plate using the 0.4mm nozzle in Bambu Basic PLA and Kingroon Basic PLA in silver, brown, black, yellow (for the bus) and tan flesh (for the zombies).
The axles were a close fit. I did sand them a tiny bit so they'd spin in the hole easier.
When I glued on the wheels, I glued one side on and waited for it to dry, then inserted it in the bus and put glue in the opposite wheel, with the wheel laying flat on the table and placed the bus on its side with the axle going into the wheel so that it never actually touches the side of the wheel well. It wasn't that hard, just fiddly and now both axles spin freely.
The bus has a removable roof which is held on with the smallest magnets I have which were ~3x1mm but they might actually be more like 3.5x1.5mm or something cause i ended up having to dig out the holes a little more so in the final model I made the negative part for the magnets a bit bigger.
The removable roof, magnet holes and axle holes are all using negative parts so you are welcome to modify their sizes or remove them altogether and print it as a static model.
/https://fbi.cults3d.com/uploaders/13747311/illustration-file/f944ba36-e73c-436a-b8e5-286be18b9fec/50f0e53f88fdd1d74925ca60a3304925_display_large.jpg)
/https://fbi.cults3d.com/uploaders/23173180/illustration-file/cd7f654b-2063-4789-88e3-bd316e6ff155/zombie.png)
Comment & Rating (0)