Anbernic RG353v/s Protective Grip Case/Phone Mount


Print Profile(2)


Description
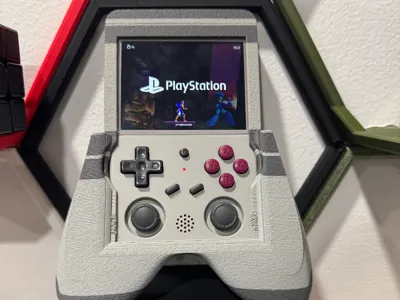
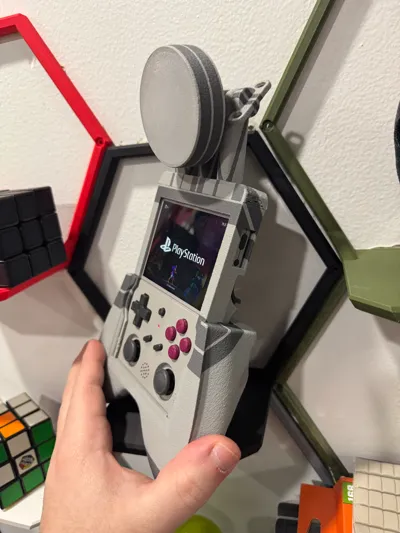
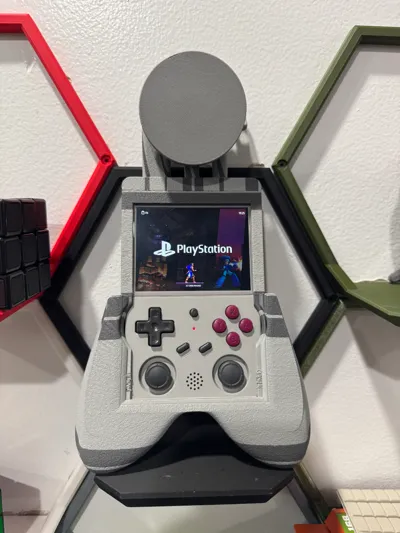
RG353v/vs Protective Travel Case and Grip w Accessory Rail System + Magnetic Phone Mount/Locking System
TLDR:
- Plate 1 prints all pieces in one color. The rest of the plates print the individual parts with two colors.
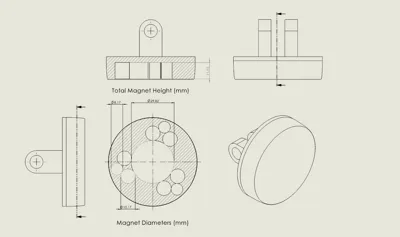
- You will need 58 magnets for the phone mount. 4x N52 (29.5mmx2.75mm). 36x (10mmx1.75mm). 18x (8mmx1.82mm). One stack of four. Six stacks of six. Three stacks of six.
- PAY ATTENTION TO MAGNET POLARITY!!! The center magnet should line up with the center of your phones magnet. Use that orientation on the plate (the plate is your phone). The 10mm magnets reverse polarity, and the 8mm magnets share the same polarity as the center.
- DO NOT force the rails to connect with the accessory or cover. Things are stiff at first, so take it slow and repeatedly pull and push the two sides of the rails together until things start to flow smoothly. They will eventually become smooth and easy to operate after a minute or two. If you force the rails to connect, they will get stuck. You have been warned. (If they get stuck, pull apart with pliers).
There's a separate print profile for the A1 mini. The main “All Parts” plate is split onto two mini plates.
Summary:
Well this was a fun 6 day journey. Learning how to design a real thing that I can hold in my hand is cool man. Calipers are my new favorite tool. If you haven’t figured it out by now, this is the first thing I have ever designed, printed, and shared. It took me a few tries to figure out the right feel for everything, but I think I got the theory behind it solved.
There’s a rail system for the magnetic phone mount and outer protective case. I like my tolerances tight; like around 1 or 2 layers tight. I still haven’t figured out clips, springs, or release mechanisms yet, so I’m relying mostly on friction to hold things together on this project. If things are too tight with your PLA, run the rail cover and phone mount across the rail repeatedly to smooth it out. The prints leave the rails a bit rough, so just take it slow and keep moving the pieces back and forth until everything starts flowing smoothly. DO NOT force the rail cover totally on until after everything gets smoothed out, or else it will get jammed with fibers from the prints, and you won’t be able to get it off again. When you feel it start to get stuck, stop and smooth the area out before you go in deeper.
The magnetic mount was a pain in the @$5 to figure out. Breaking into PLA to retrieve magnets on failed prints is harder than you think. The good news for you is that this project will automatically pause at the layer you need to insert your magnets, and they should just slide right in, so you won’t have to find out what it’s like to break into this thing. MAKE SURE YOU ORIENT YOUR MAGNETS PROPERLY!!!! Your big magnet should sit in the center of your of your phones magnet. The middle sized magnets reverses polarity. And the smallest magnets have the same polarity as the center magnet.
I used three different sized magnets and 58 magnets total. I know. I hate it too. I wish I could’ve found one magnet to do the job. Unfortunately it takes quite a few to make a field large and strong enough for my phone to not come crashing down on my nose when I’m playing in bed. The first four magnets are the large N52 magnets at 29.50mm diameter x 2.75mm height. This is where your magnetic field will get all its power. Next up are the 36 mid sized magnets at 10mm diameter x 1.75mm height. And finally 18 small magnets at 8mm diameter x 1.82mm. These 10mm and 8mm magnets tune the field by spreading it out and helping them grip the ring in your phone.
I’m not sure if all magnets come in standard sizes, but this is what I had around the house. I’m assuming those 1.75mm and 1.82mm values just mean 2mm when you’re buying them. If you need me to redo the sizes for the magnets, just let me know. The hinge works with standard tension. Just screw in to tighten.
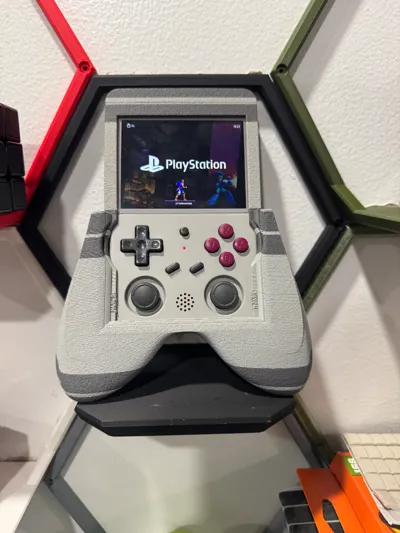
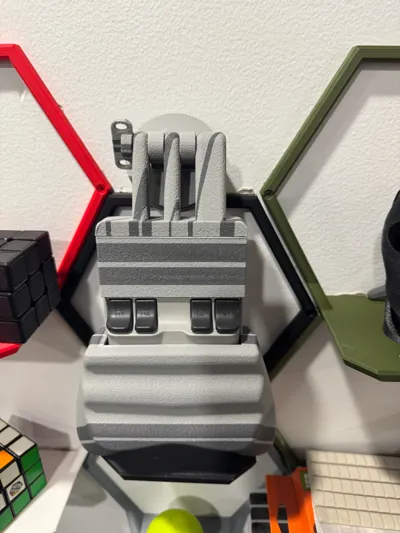
Next up, we have the outer protective case. Made to size. Should protect the console in a backpack. I wouldn’t say it’s shock resistant, so definitely don’t go dropping it, but it is absolutely travel worthy. Maybe I’ll try using an inner TPU layer to add shock resistance in a future design, but for right now, please don’t drop it and then blame me if it breaks.
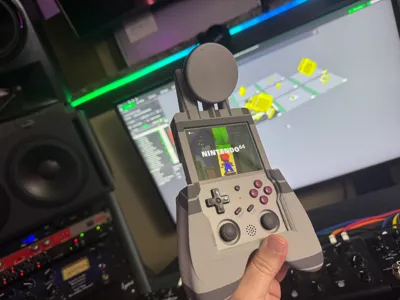
I also designed the magnetic phone mount to double as a locking mechanism for the protective case. I wanted a spot to secure the rail cover while playing, and to secure the magnetic mount while stowing, so I ended up discovering that the magnetic mount fits perfectly between the handles of the grip, and put the rail right where it needed to go to turn the mount into a crude locking mechanism.
I made sure to use fuzzy skin for better gripping, and shaped the grip for average hand sizes. I tried to create a textured grip in solidworks, but they just don’t come out right when sliced in Bambu, no matter how I tried to orient the pieces. The fuzzy skin setting just works. It’s also great for creating tension in tight spots.
And finally the coloring. I HATE filament changes. I hope Bambu comes out with a multi-extruder device, so I never have to deal with poop again. Or hopefully those scammers at Loop3D aren’t scammers and can actually deliver on their promises of a poop recycler, but I digress. Angling your prints at 45° is a great way to paint by layer and waste very little, so that’s what I did here. Feel free to remix, repaint and waste all the poop you want, but if you’re printing my 3mf, we’re gonna be focusing on conservation and saving money where we can.
I hope you guys enjoy. Even if only 2 people find use for this, I’ll be happy. I can’t wait to figure out what I wanna tackle next! Feel free to give ideas in the comments! If you know how to design a lighter magmount system, PLEASE let me know!!! Oh and post your pictures!!!!!!
License
You shall not share, sub-license, sell, rent, host, transfer, or distribute in any way the digital or 3D printed versions of this object, nor any other derivative work of this object in its digital or physical format (including - but not limited to - remixes of this object, and hosting on other digital platforms). The objects may not be used without permission in any way whatsoever in which you charge money, or collect fees.
Comment & Rating (6)