Search models, users, collections, and posts

RouterPack Template Bushing Kit

Print Profile(1)

All
P1S
A1
X1E
H2D
X1
P1P
X1 Carbon
A1 mini
H2D Pro
H2S
P2S
H2C
X2D
A2L

0.2mm layer, 2 walls, 15% infill
Designer
7 h
4 plates
5.0(26)

Open in Bambu Studio
Boost
121
435
44
17
379
211
Released 

Description

Membership

Want to sell these? Join my commercial membership!

Join

RouterPack – Template Bushing Kit

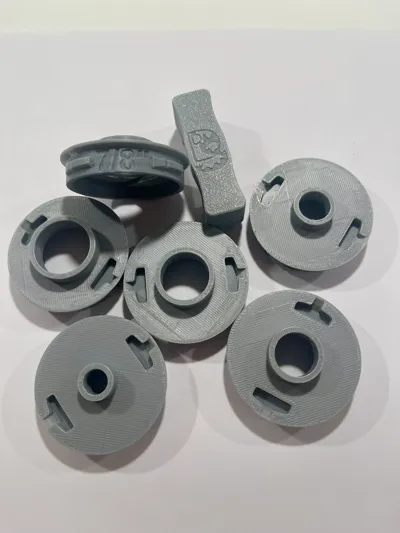
This is the RouterPack Template Bushing Adapter. A fully 3D printed set of template bushings to fit into your RouterPack base plate.


Note: If you prefer to use an set of standard metal template bushings with your RouterPack base plate, see the RouterPack Template Bushing Kit (here)

RouterPack – A modular router accessory system

The RouterPack base plate

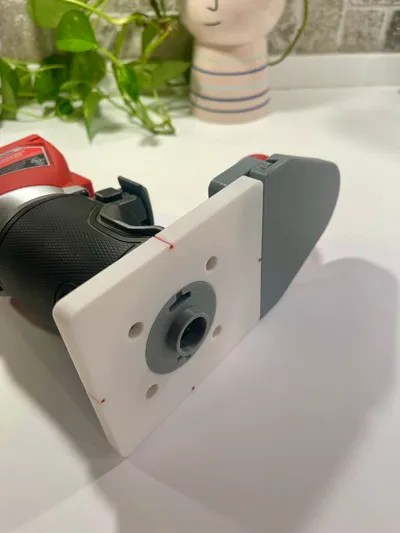
The RouterPack concept is based on a router plate custom designed to fit most popular compact routers and allow quick connection to multiple accessories. Guide rail adapters, offset handles, circle jigs, and more attach at the dovetail slots and secure with a thumbscrew. Dust extraction options attach with a ¼ turn system to the bottom of the plate.


No more hunting for an accessory fit your router and swapping base plates. If there's a RouterPack baseplate for it, RouterPack accessories will fit it. 


The current RouterPack lineup:

more to come…


Ways to center your plate and bushing:

Loosen the screws on your router plate, center it using one of the methods below, and then tighten the screws.

  1. Don't worry about it. Just try to keep your router in the same orientation
  2. Eyeball it. Put in a bushing with an ID slightly larger than ¼", install a router bit, and adjust the plate position so that the spacing is even

    ½" from the RouterPack Template Bushing Kit


  3. Use a ¼" dowel or a router bit. You will need to ream out the centering tool to fit (They always come out too small. IDK)


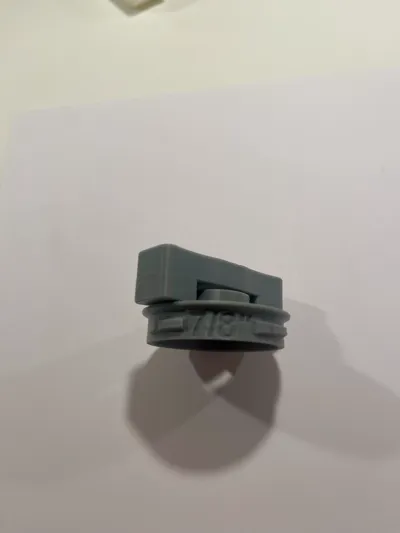
  4. Use a centering tool. There are several different types…


Please take a look at my other woodworking prints

Guide Rail Holders  


Guide Rail Holders for Minis  

Guide Rail Caps  


Comment & Rating (44)

(0/1000)

Boosted
All fits perfect! I was impressed at how well the engineered supports worked! Also the installation tool was a nice touch. Now I just need something to hold/store all the various pieces ;D hah! i'll probably model something up for own needs...then again you might release more stuff D:!
(Edited)
The designer has replied
2
Reply
Thanks. I honestly did think about a case or gridfinity bin, but I figured I’d do that when I get around to organizing my shop.
1
Reply
Boosted
Hello, is it possible to add metric version? E.g. 14, 16, 18, 20, 24 en 30 mm The model (and the idea) is extremely valuable but lack of metric sizes is somewhat disappointing
The designer has replied
2
Reply
I’d be happy to. I just don’t know what the standard metric sizes are. I’ll look into it this evening.
1
Reply
I've added them, but now I see the set I used as an example had different sizes than the ones you listed. I added 13, 17, 20, 24 and 27. Let me know if I missed a size.
1
Reply
Boosted
Replying to @dStego :
Thanks for the quick reaction. I'm not sure either. Googled for few copper sets available online to buy and they all have sizes of 10, 12, 14, 16, 18, 20, 24, 30 mm. Since 24mm is usually bundled with routers, 30 might be already too big, and 10 seems to be too small to for the bit, I'd stick to sizes 12-20mm with 2mm step. Hope this helps.
1
Reply
Hi, is there a 3/8'' or 10mm size by any chance? :)
The designer has replied
0
Reply
No. The walls get to be too thin. You’ll need to use a metal bushing. There is an adapter set to use metal bushings though.
0
Reply
Replying to @dStego :
@dStego thank you very much for the reply and the suggestion! that would work! :)
1
Reply
Replying to @dStego :
thank you :)
1
Reply
Great parts. I printed the imperial set and am wondering if it’s possible for you to add a 3/8” OD bushing to the set or offer separately.
The designer has replied
0
Reply
Thanks! Unfortunately, 1/2" is about as small as you can go for a 1/4" bit. To keep even a 1mm clearance on a 1/4" bit, the wall thickness can only be 1mm -- too thin for a 3D printed plastic bushing.
1
Reply
thanks for your quick response. I will use your clever bushing holder and a brass busing
0
Reply
Boosted
Great design!
The designer has replied
1
Reply
Thanks!
0
Reply
Boosted
Awesome print. Still need to test it in real work but I like the modularity and how versatile you can be
The designer has replied
1
Reply
Thanks!
0
Reply
Print Profile
0.2mm layer, 2 walls, 15% infill
good idea, good design. Printed ok in PLA. Lets see in practice.
profile
1
Reply
Boosted
thank you.
1
Reply
Print Profile
0.2mm layer, 2 walls, 15% infill
excellent print. before assembling, I recommend letting it cool down a lot and cleaning the contact surfaces. one of my first prints (perhaps damp and not recent filament) attached itself to the router base and could no longer be removed. so don't rush to try to mount it
Show original
0
Reply
Boosted
Print Profile
0.2mm layer, 2 walls, 15% infill
good set of sizes, fit wih base plates good
0
Reply

License

If you want to use this model commercially, please join my membership.
Join Now
This user content is licensed under a Standard Digital File License.

You shall not share, sub-license, sell, rent, host, transfer, or distribute in any way the digital or 3D printed versions of this object, nor any other derivative work of this object in its digital or physical format (including - but not limited to - remixes of this object, and hosting on other digital platforms). The objects may not be used without permission in any way whatsoever in which you charge money, or collect fees.