DartORT der Dartsholder !AMS ONLY! Dartlampe Lamp


Print Profile(3)


Bill of Materials
- LEDstripe x 1:
Description
Boost Me (for free)
Hey Dart-Meister! If you appreciate my creative work and want to give me a little boost, that would be a real “bullseye”! 🎯
IMPORTANT… The DARTSHOLDER LAMP is only printable with AMS. FROM MARCH 29, 2025, I HAVE CREATED MY OWN VERSION FOR PRINTERS WITHOUT AMS: YOU CAN FIND THIS AT THE FOLLOWING MAKERWORLD LINK: https://makerworld.com/de/models/1262052
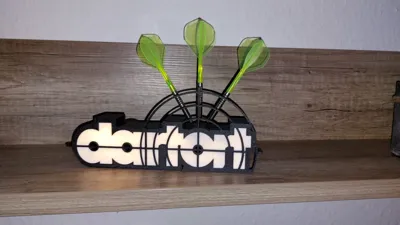
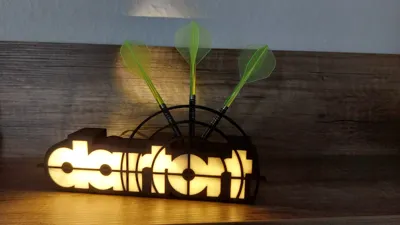
Illuminated dart holder “DartORT”. The must-have for all dart enthusiasts!
Features:
- LED Lighting: The inscription “DartORT” is impressively highlighted by an integrated LED strip. For everyone who likes to aim in the dark! 🌟
- Multicolor 3D Printing: Print the holder with your multicolor 3D printer, as the inscription is part of the first six layers. This makes your “DartORT” a real eye-catcher! 🎨
- Practical Use: The letter “O” of the inscription serves as a holder for your darts. A set (3 darts) finds its stylish place there. 🎯
- Flexible Applications: With or without lighting – this holder is always a highlight! ✨
Perfect for anyone who wants to express their passion for darts in their home decor. Be the star of your own dart cave and make your friends green with envy. Get the file now and transform your dart cave into the ultimate “DartORT”! 🌈
Have fun printing and playing darts! 🎉
If you have printed the holder, I would also be thrilled about likes, pictures and comments. Let’s illuminate the dart community together! 😄
IMPORTANT NOTE:
It is best to download the template as a .3mf file, because the lettering is already assembled in the correct position there.
With the .stl files you have to do it yourself. Proceed as follows:
- Load the main body into your slicer
- Pull it, as it is, just below your print bed
- Load the lettering into your slicer
- Position the lettering so that it fits
- Pull the main body back onto the print bed
- Under Objects you can now change the colors
Under Objects, select both bodies and rotate them 180 degrees about the transverse axis. Make sure that the lettering and body now lie flat on the print bed. Check that the body is mirrored on the print plate.
Under Objects, select both objects and click on “merge” or “assemble”
- Download your matching lid into the slicer. I have created 2 lids that only differ in that the inner edge is 0.2mm smaller. Why? So that printers that don’t hit the exact measurement can also print it. Those who can print very precisely can take version ENG.
- Now you can slice and let’s go!
- Don’t forget to boost me… this part really annoyed me XD
License
You shall not share, sub-license, sell, rent, host, transfer, or distribute in any way the digital or 3D printed versions of this object, nor any other derivative work of this object in its digital or physical format (including - but not limited to - remixes of this object, and hosting on other digital platforms). The objects may not be used without permission in any way whatsoever in which you charge money, or collect fees.
Comment & Rating (289)