The Trolley Problem- Philosophy Train Track Set


Print Profile(1)

Bill of Materials

- m4_Screws x 4:
Description
The Trolley Problem Train Track Set
Description:
Dive into the world of philosophy and ethics with the Trolley Problem Train Track Set—a unique and thought-provoking model that brings the famous ethical dilemma to life.
What Is the Trolley Problem?
The trolley problem is a famous ethical dilemma that challenges participants to make a difficult choice:
• Do you let a runaway trolley continue on its path, leading to the loss of five lives?
• Or do you intervene, diverting it to a track where one person will lose their life instead?
Do you let 5 people die due to inaction or do you act and kill one person to save 5?


This set takes this moral question and brings it into the tangible world, allowing you to explore this classic thought experiment in a fun and engaging way.
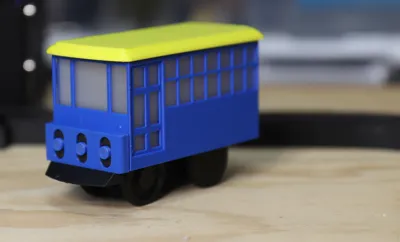
Unique Train Design
At the heart of the set is a sleek, minimalist train crafted to reflect the gravity of the trolley problem. With its clean lines and functional design, this train isn’t just eye-catching—it’s also compatible with standard Brio tracks, making it a versatile addition to your collection.
The design also incorporates components from the Endless Loop train set, available at the Maker Supply Store.
What’s Included:
• Custom Ttolley: A minimalist train that fits perfectly on the tracks.
• Switchable Tracks: A dynamic track layout that mirrors the famous fork in the trolley problem, complete with a functional switching mechanism.
• Compatibility: The Trolley is Fully compatible with standard Brio train tracks.
Why Build This Set?
The Trolley Problem Train Track Set is perfect for:
• Philosophy Enthusiasts: Engage with one of the most famous moral dilemmas in a tactile way.
• Train Lovers: Expand your collection with a unique, functional, and interactive addition.
• Educators and Parents: Introduce ethical concepts and critical thinking in a fun, visual format.
Instructions:
This kit uses the Endless Loop Express Kit 016
Printing Notes:
I would print the motor top and motor bottom pieces with PETG. Otherwise, everything else can be printed with PLA. The Front Wheels are Print in place. You should be able to remove supports with a blade.
You may want to drill the screw holes a bit. Additionally, sanding “Switch Box 1” a little might make for smoother movement.
Step 1- Build the trolley
- Glue Trolley Front and Trolley Frame together
Attach the AAA Battery Spring Connectors to Trolley to “Motor Top.” I would use a bit of hot glue to secure them in place.


- Place the N20 Motor into Motor Bottom as shown in the photo. Make sure the wire is facing the direction in the photo.
Carefully place the Front wheels onto the square pegs on “Motor Bottom” Connect the Rear wheels to the N20 Motor.

- Connect the wire to the N20 Motor and slide the wire through the opening to the top.
Connect the motor to the battery connector.


- Snap Motor Top and Motor Bottom together.
Screw M2 Screws at the front and back.

Attach the Self Locking Switch to “Trolley Frame.” (You can use screws or Hot Glue)

- Connect the battery to the Self Locking Switch.
Connect the carriage to the frame with 2 M2 Screws.

Step 2- Set up the switch
Screw M2 Screws to “Lever”

Use Hot Glue to connect magnets to “Switch Box 1”

Connect “Lever” to “Switch Box 1”
- Connect “Switch Bottom” to “Lever”
- Carefully attach “Switch Box 2” and secure using 4 M4 Screws.
- Slide the extended part of “Switch Bottom” into “Switch Track”
Attach “Box Secure” to keep the switch in place.


- Attach the 2 “trackswitchinserts” onto the switch.
Test the Switch.

Step 3- Set up the tracks
- The bottom of each track has letters. All you need to do is match the letters to complete the track.
- Once the track is set up, please the figures into the small slots and you are all set.
License
You shall not share, sub-license, sell, rent, host, transfer, or distribute in any way the digital or 3D printed versions of this object, nor any other derivative work of this object in its digital or physical format (including - but not limited to - remixes of this object, and hosting on other digital platforms). The objects may not be used without permission in any way whatsoever in which you charge money, or collect fees.
Comment & Rating (5)