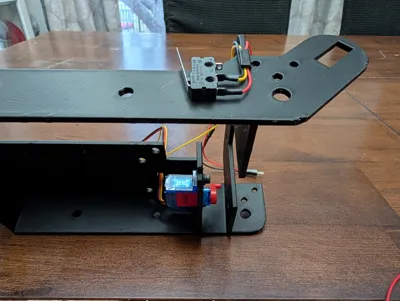
HackPack Domino Robot Frame


Print Profile(1)

Description
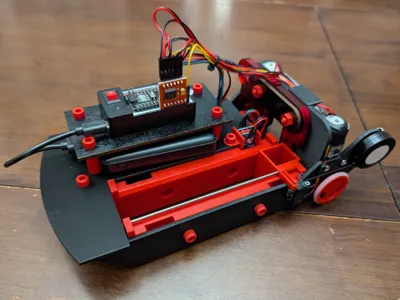
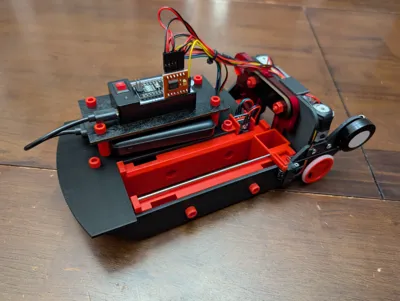
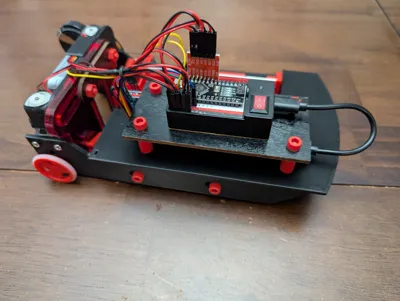
Tired of your HackPack Domino Robot's wobbly frame? Upgrade it with this 3D printed chassis!
Inspired by Mark Rober's Crunch Labs HackPack Domino Robot, this robust 3D printed chassis is designed to replace the original kit's flexible wooden frame, dramatically improving the robot's reliability. Like many, my family (especially my son!) loves Mark Rober and his creations. However, we've experienced firsthand the frustration of the Domino Robot's sometimes finicky performance due to the original design's tolerances and flex. This often leads to disappointment, particularly for younger builders who might not be as gentle during assembly.
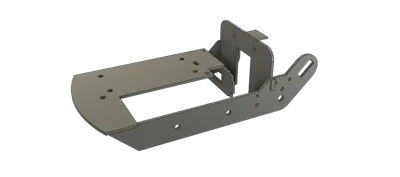
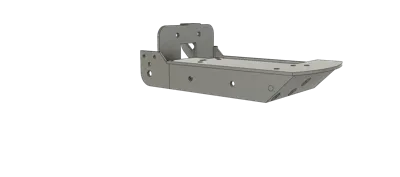
This upgraded chassis solves that problem! By creating a single, rigid piece with integrated cross-member support, this 3D printed frame eliminates the flex that can cause the robot to malfunction. We've found it makes a world of difference in the robot's consistent performance, allowing us to finally enjoy the domino-laying action as intended.
This project wasn't just about fixing a toy; it was a fantastic bonding experience with my son. He was the one who encouraged me to share this design on MakerWorld so that other families could also experience the full potential of their HackPack Domino Robot.
Key Improvements:
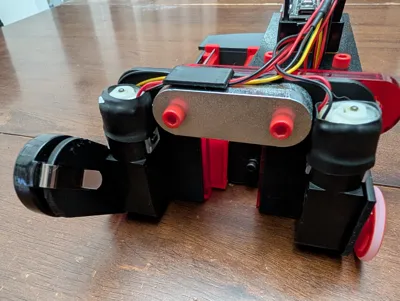
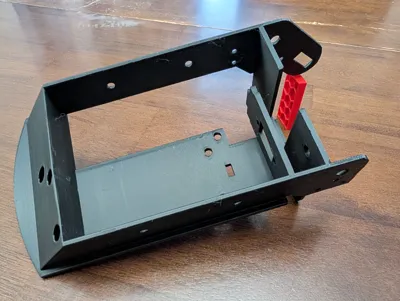
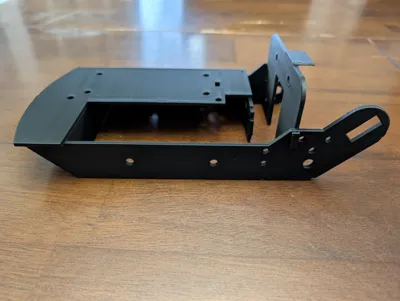
- Increased Sturdiness: The rigid, one-piece design with added cross-member support eliminates flexing and improves overall reliability.
- Front Support: Added support in the front section enhances stability.
- Wire Guides: Integrated wire guides near the limit switch and above the weights protect the wires from the wheels and keep them neatly organized.
- Screwdriver Access: A cutout in the back plate allows easy access for a small screwdriver when attaching the servo.
Assembly:
- Start with the servo and limit switch
- Next, attach the right-side domino guide (when looking at the robot from the rear)
- Assemble the rest in any order you prefer
- When attaching the left-side domino guide, the limit switch screw heads should sit down inside a groove in the guide. I have the screw position a little off making the fit tight but I was able to make my guide fit. Since it did end up fitting, it didn't seem worth the effort or filament to change it but I thought you may want to know.
Note: We had an issue where the gate wasn't moving over far enough to consistently pick up a domino. I solved this by placing an M4 washer between the left domino guide and the frame. However, I noticed that the servo is not rotating to the maximum potential angle so this could also be fixed by updating the code to make the servo push the gate a little further.
Included Files:
- 3MF file for 3D printing.
- Fusion 360 source file (Please note: This file was created with a focus on achieving the desired result quickly, not on perfect project organization. Consider it a "working draft" and apologies in advance for any messiness!).
Licensing:
This model is shared under a non-commercial license. You are welcome to use, modify, and share your own versions. However, commercial use is prohibited. Any derivative works should also be shared under the same licensing terms.
We hope you enjoy this upgrade as much as we do! Happy building (and domino toppling)!
Boost Me (for free)
Did this model help save you or your child from frustration like it did me with my child? If so, please consider boosting me.
Comment & Rating (2)