


Print Profile(1)

Bill of Materials
- Pen Spring x 1: 20x4.5mm
- Neodymium Magnet x 2: 20x5mm
Description
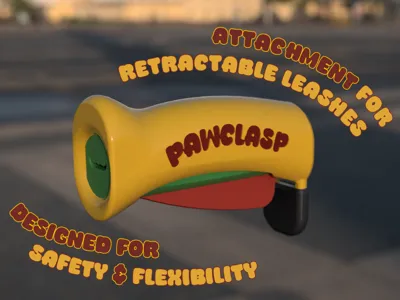
PawClasp: More Control for Your Retractable Leash
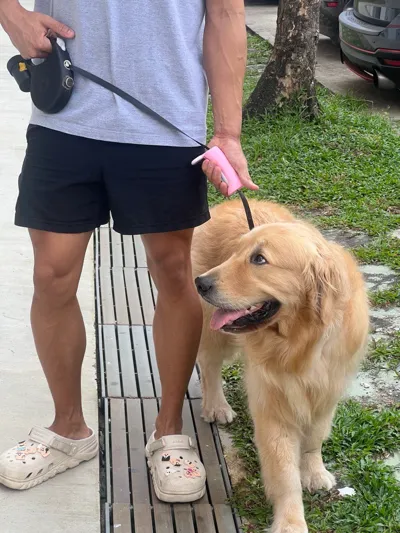
The PawClasp is an attachment that enhances retractable leashes by giving you the control of a rope leash. Standard retractable leashes have only one brake, meaning you can't shorten the leash when your dog pulls. The PawClasp acts as a second braking handle, allowing you to bring your dog closer when needed, while keeping the flexibility of a long retractable leash.
Key Features of the PawClasp:
✅ No more rope burns – Avoid grabbing the thin retractable leash directly.
✅ Hands-free convenience – Wear the leash around your waist while maintaining quick access to control. (Perfect for long walks!)
✅ Gentle guidance – Adjust the braking resistance to subtly cue your dog without sudden tugs.
✅ Best of both worlds – The flexibility of a retractable leash with the control of a rope leash.


Printing:
- Materials: Highly recommend TPU for AMS (68D) for the Handle, Lever, and Magnet Sleeve. PLA for core and magnet casing. However, fully PLA parts work fine as well!
- Supports: Minimal (one tree support on the handle).
- Clean your print bed before printing for the best results!
Additional Non-Printed Parts
- A flat-taped retractable leash
- 2x Neodymium magnets (20x5mm) (Use BambuStudio Cylinder primitives for smaller sizes.)
- 1x Pen spring (~20x4.5mm)
- Your preferred glue (Hot glue, super glue, etc.)
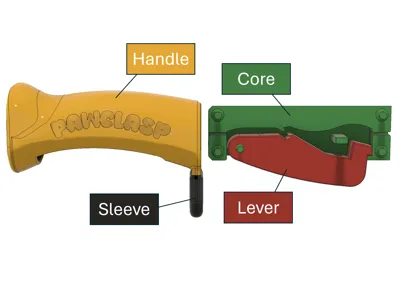
Assembly Instructions:

1️⃣ Place the Spring into the Lever and fit it into the Core. Test for smooth movement.
2️⃣ Slide the leash through the Core, with the Lever positioned at the bottom.

3️⃣ Fit the leash end through the Handle and snap it into place.

4️⃣ Test the braking power and determine the best position for the Magnet.
5️⃣ Attach the Magnet to the leash using a hair dryer / heat gun to mold the Magnet Casing to the leash, then gluing it on.

6️⃣ Insert the Magnet into the Handle, ensuring proper polarity for correct attachment.
7️⃣ Slide on the Sleeveto secure and protect the magnet.

💡 Need to disassemble? Use a soft hammer / screwdriver / metal leash head to gently knock the Core out of the Handle.
Designed for Dog Owners by Engineering Students
Created by students from NUS, Penn State, and BYU – Matthew Lee, Nate Cosme-Ortiz, Natalie Monahan, Taylor Owens, and Nina Chao – the PawClasp makes walking your dog safer, easier, and more enjoyable! 🐶
License
You shall not share, sub-license, sell, rent, host, transfer, or distribute in any way the digital or 3D printed versions of this object, nor any other derivative work of this object in its digital or physical format (including - but not limited to - remixes of this object, and hosting on other digital platforms). The objects may not be used without permission in any way whatsoever in which you charge money, or collect fees.
Comment & Rating (5)