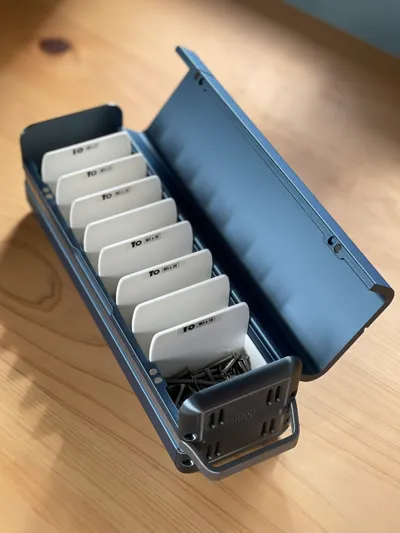
Space capsule Parts Organizer


Print Profile(2)
![[M size]0.2mm layer, 2 walls, 15% infill](https://makerworld.bblmw.com/makerworld/model/US6a0892f8eee1aa/216704569/instance/2025-01-25_7adcd0db0b146.jpeg?x-oss-process=image%2Fresize%2Cw_100%2Fformat%2Cwebp)
![[S size]0.2mm layer, 2 walls, 15% infill](https://makerworld.bblmw.com/makerworld/model/US6a0892f8eee1aa/218480181/instance/2025-02-03_198c0f055ffb2.jpg?x-oss-process=image%2Fresize%2Cw_100%2Fformat%2Cwebp)
Bill of Materials


Description
2025/02/01 Add a smaller version for A1 mini users. Since I don't have an A1 mini, I can't test it. If you encounter any issues, please make sure to let me know.
2025/01/26 Add a front panel with labels.
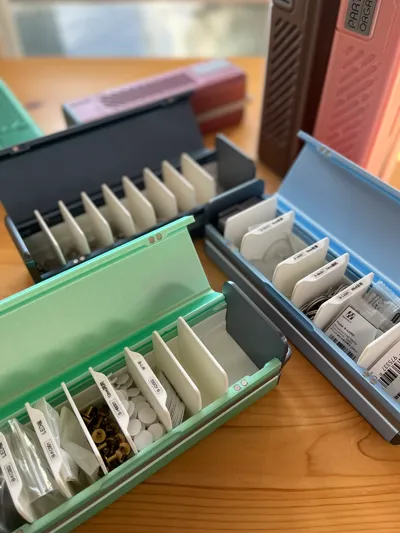
This is a super practical parts storage box, and each box has adjustable internal dividers.
This means you can customize different-sized compartments according to your needs, to store various small parts like screws, nails, electronic components, and more.
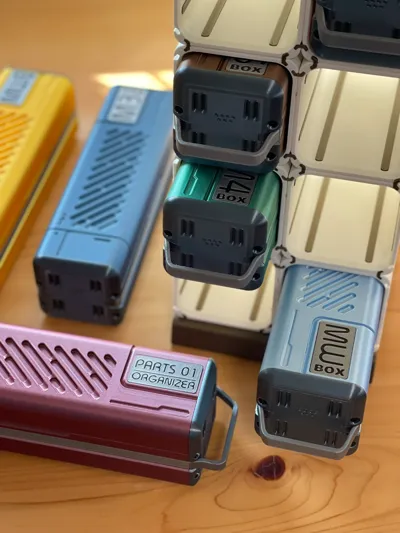
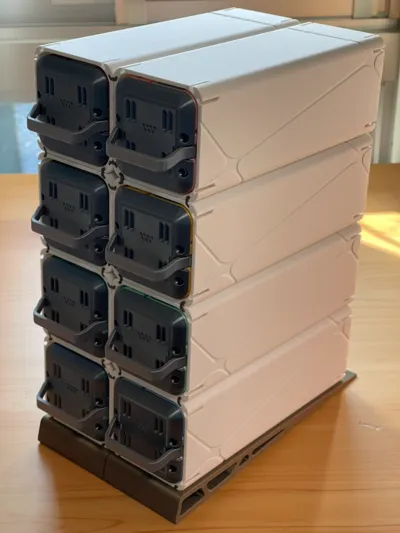
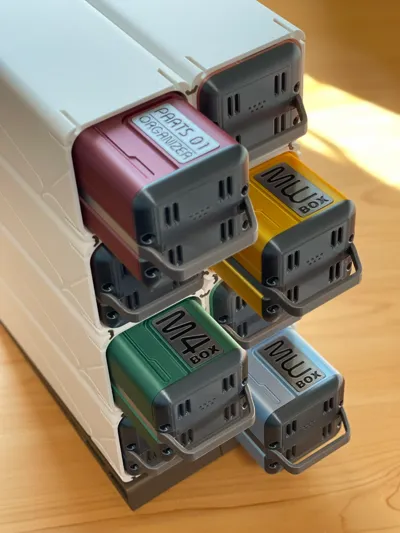
I also designed a modular rack that allows you to freely combine the number of storage boxes needed, keeping your workbench neat and making storage even easier!
Additionally, these storage boxes have a special space capsule design. Not only are they practical, but they also add a touch of futurism and tech style to your workspace.
Size Information.
The internal space is approximately 55x58x220(A1 mini is 174), with each partition having a spacing of approximately 19.4mm
Most of the tolerances of the model are 0.3, with some parts being 0.2mm. Based on my experience, 0.3mm is a good balance point. I only tested with materials from Bambu. If you want to use materials from other manufacturers, it is recommended to test a small portion first to avoid significant waste.


Assembly Steps
1.Slide the internal modules and side decorations into the grooves of the main body.

2.Use screws to secure the side without handles into position (you can freely choose the left or right side).

3.Install the metal shaft and the top cover into position (you can also cut a small piece of filament to use).
The magnets are 4x2 round magnets, and you can choose to use either 4 or 8 of them depending on your needs.

4.As shown in the picture, first position one side of the handle into place, then firmly press down the other side to complete the handle installation. Finally, screw it securely in place.

5.Use double-sided tape to secure the label (you can also create your own label in MakerLab based on the data, with a thickness of 2mm).

6.The modular rack uses a fully symmetrical design concept, so there is no difference in orientation (up, down, left, or right). The pins and guide rails are designed with foolproof features, so you only need to assemble it intuitively!

7.If you need two sets side by side, the base has reinforcing pins that you can choose to use as needed.

Additional explanation.
If you need a front panel with labels, it is on the final plate. The labels also support MakerLab and have a thickness of 2mm.

Thank you for reading till the end! Happy printing!
Boost Me (for free)
Creating and testing this model took me quite a bit of time and materials. If you like it, please give me a little support.
License
You shall not share, sub-license, sell, rent, host, transfer, or distribute in any way the digital or 3D printed versions of this object, nor any other derivative work of this object in its digital or physical format (including - but not limited to - remixes of this object, and hosting on other digital platforms). The objects may not be used without permission in any way whatsoever in which you charge money, or collect fees.
Comment & Rating (85)