Razer Deathadder V2 Mini - Ultralight Shell


Print Profile(1)

Description
Behold my latest creation. Obviously inspired by optimumtech (go look him up on youtube, he's awesome), I managed to create an ultralight version of a Razer Deathadder V2 that I had lying around the house and whose exterior was pretty beat up.
Que a couple of hours and many many versions/test prints later, as well as a lot of thinking about how the clicking mechanism would look like (I think that was the hardest part), and here we are.
 These are a couple of test prints. You can see that I went from barely nothing, to slowly building something that looks decent. The last one has no triggers as the supports failed.
 I have it one more try with 0.08 layer height, and support for the triggers, but once again, it failed as the support were not coming off without the triggers. This is where I started thinking about changing some things.
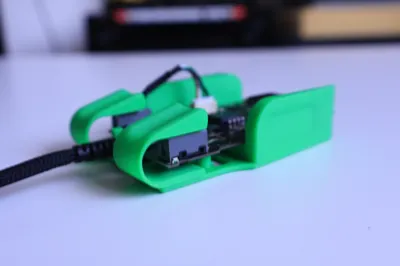
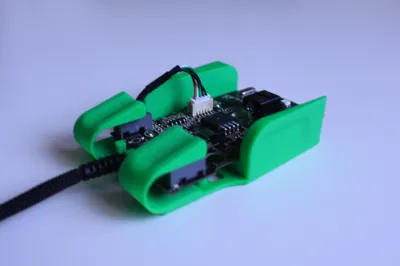
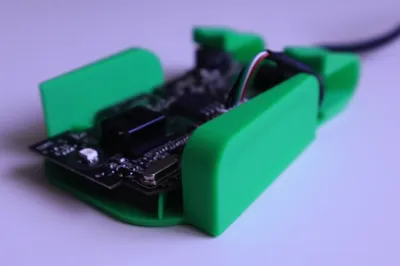
 And these are the last 2 versions. I went from trying to print everything at once, to a more simple-minded approach - print the triggers separately, use some superglue, and you got yourself a working ultralight mouse.

Now, I started the process with the idea that if my mouse breaks, it is what it is, as I already have another one, so if yours is the only one that you have, proceed on your own risk.
I also removed/desoldered most of the things that I felt were not useful and that would make it lighter. I removed: the scroll wheel, the side buttons and the DPI button, so I was left with a bare bones PCB. Again, my main goal was to go light and to only use it in shooters where I don't really need all the buttons.
You can certainly try leaving them on and see if everything fits, and start removing things that do not fit.
The assembly is pretty easy. After you dissassemble the mouse, you'll need to use the 3 small screws that were holding the PCB in place, and have them hold the PCB in place on your new shell. The screw holes do not align perfectly - I wanted to fix that, but I figured that this way they actually hold the PCB in place a lot better, so I left them like this.
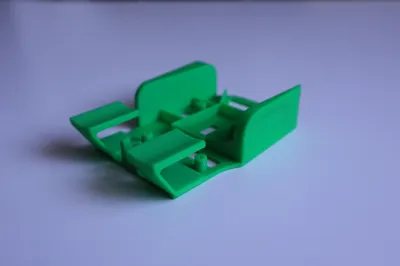
Last but not least, why are there 2 sets of triggers? Because from my experience, they are different because the pivot point and shape are different.
The angled one is for a more fingertip style grip, where you hold you fingers perpendicularly on the triggers. They are very snappy.
The more rounded ones can be used with the fingertip style grip, but given that they are also at an angle, they are a little bit more comfortable for longer use.
That was about it. If you have any questions, I'm happy to help, so let me know.
Boost Me (for free)
Why not boost this as well?
License
You shall not share, sub-license, sell, rent, host, transfer, or distribute in any way the digital or 3D printed versions of this object, nor any other derivative work of this object in its digital or physical format (including - but not limited to - remixes of this object, and hosting on other digital platforms). The objects may not be used without permission in any way whatsoever in which you charge money, or collect fees.
Comment & Rating (11)