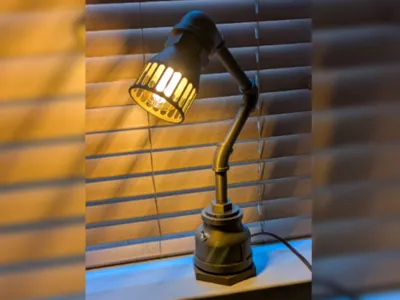
Steampunk Desk Lamp


Print Profile(2)


Description
Boost Me (for free)
"Keep the change, ya filthy animal." – Johnny, "Home Alone" (1990)
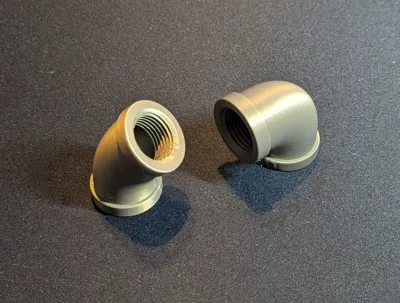
Do you like steampunk. but not the price of steel pipe? Me too, so I created this desk lamp to solve the problem. I used PLA and expect it to hold up well. Be cafeful in your choice of bulbs to avoid too much heat. I'm using a 60W equivalent LED bulb. The threads on the individual parts of the lamp are standard ½", 2" and 3" NPT. You should be able to use actual pipe threaded parts with them if you want to get creative, but Ive only tested with a couple that I have on hand.
Assembly
I'm not an electrician and don't assume any liablility for your building of this project.
That said, here are some tips:
- Start on the bottom and establish how much wire you will need to reach the socket. Leave a little extra just is case.
- Push the wire through the hole in the base. Tie a knot in the wire inside the base to provide strain protection. Be sure to allow extra length of wire for the knot.
- Cut one of the two wires and attach to the screw terminals of the switch.
- Install the switch in the base. There is a recess on the inside that the rectangular base of the switch should fit into to both give clearance for the nut and prevent it from turning.
- Run the wire through all the pieces of the lamp, assembling them as you go. Do it one piece at a time to avoid twisting the cord too much.
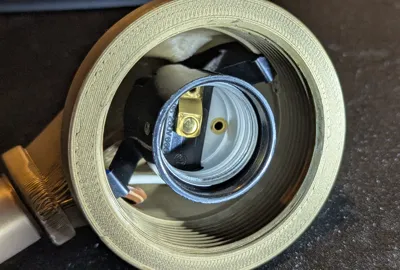
- Once you've assembled all the pieces other than the shade its time to wire the socket. I trimmed the wires to length and used small wire nuts. If you do it this way leave enough wire on the socket that you can tuck the wire nuts into the pipe so they don't get in the way in the next step. I also wrapped the wire nut connections in electricians tape just to be extra cautious.
- Insert the socket into the head. There are a couple small slots a the bottom of the threads for the socket to clip into. I found that those were not really necessary for mine as the threads provided enough grip, but they are there if you need them. (They may need to have support materal cleaned out of them).
- Time to test you lamp!
- If your lamp seems tippy you can add some weight inside the base. Rocks? Bolts? If you use something metal be sure to isolate it from the exposed wires at the switch. I used some old nuts and bolts in a baggie.
- Sit back and enjoy another successful project.
Here is a list of what you will need other than the 3d printed parts:
These are the ones I used, but there are others available that are esentially identical. I purchased these at Lowes.
Light Socket
Hillman 427664 Phenolic Light Socket (I've also seen these listed as Jandorf 60539 and Satco 90-541.)

Toggle Switch
Gardner Bender GSW-17 Medium Duty Toggle Switch

Lamp Cord
I used one salvaged from an old lamp.

Wire Nuts
Two small wire nuts appropriate for the lamp cord wire gauge. I also wrapped them in black electricians tape.
The Unfortunately Necessary Disclaimer
Important Safety Disclaimer for 3D Model:
PLEASE READ CAREFULLY BEFORE USING THIS 3D MODEL
This 3D model is provided "as is" and is intended for use as a design aid.
Limitations:
Key limitations of the 3D model include that its accuracy and scale are not guaranteed. If the model is of a functional part, it is not guaranteed to withstand mechanical, thermal, electrical, or chemical stress.
Safety of Printed Items:
Users who 3D print this model are responsible for testing and validating the printed item and selecting the correct material for its intended use. The creator is not liable for any issues resulting from the use of 3D-printed components made from the model. If printing small items, be mindful of choking hazards for children. All resulting items should be handled responsibly and according to applicable regulations. Be aware of potential hazards during post-processing and take necessary precautions like wearing gloves and eye protection.
Disclaimer:
By using this model, you accept all risks. The creator disclaims liability for quality, performance, merchantability, and fitness for a particular purpose.

License
You shall not share, sub-license, sell, rent, host, transfer, or distribute in any way the digital or 3D printed versions of this object, nor any other derivative work of this object in its digital or physical format (including - but not limited to - remixes of this object, and hosting on other digital platforms). The objects may not be used without permission in any way whatsoever in which you charge money, or collect fees.
Comment & Rating (23)