Toy Fighter


Print Profile(2)


Bill of Materials


Description
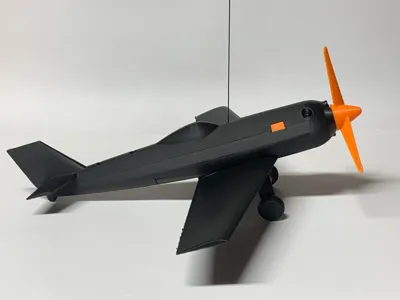
This Toy Fighter construction kit is designed to be a fun & intuitive project to create and use either as a desktop fan or roof mounted fighter. Bringing you a pleasant breeze as you work at your desk or the thrilling enjoyment of watching your creation zip around and around the roof in circles. The Toy Fighter is powered by a 030 DC Motor and constructed from parts that all come from the Makers Beginner Kit - ZC002 (the specific parts used from the kit are outlined below in the Parts List). This motor enables the fighter to be powered by the 3D printed propeller producing thrust in both forwards and backwards directions depending on the orientation of the 030 Motor and its polarity which is easily interchangeable as per the user's discretion. The steps to reverse the motors polarity and directions of thrust are detailed below in the assembly guide video, however this process is made very simple and user friendly thanks to the wireless design of the fighter.
Main Features
Wireless Design (No Wires Needed) - Eliminates the hassle of routing cables and reversing polarities the hard way by clipping and unclipping cables whilst running the risk of shorts and other annoyances as shown by the (Assembly Video). The need for wires has been completely wiped away within the Toy Fighter due to the fact that it uses two 8mm Steel Balls to bridge the contacts of the motor and battery terminals enabling current to flow around the circuit without the need for wires!
True Air Foil Wing Design - To add more realism to the design of the Toy Fighter and make it look more like a real aircraft with wings designed to produce lift.
High Efficiency Easily Printable Propeller - Designed to be easily printed with minimal supports and is designed around an efficient airfoil design and true to a reference Propeller to account for angle of attack of the blades along their length to produce extra thrust and minimise wasted energy.
Drill Style Slide Switch - Makes the whole experience of the Toy Fighter more seamless and ergonomic due to the way that it makes switching the Fighter on and off easier and a process that can be achieved with only one hand.
Cord Fastening System - Enables easy threading of 0.6mm nylon cord through the body of the Toy Fighter to the roof mount demonstrated in the (Assembly Video).
High Strength Landing Gear Struts - Printed separately on its face so that layer lines add strength to the part and is designed to be mounted solidly onto the Battery Door & Wings with only one screw.
Press Fit Wheels and Disk Brakes - Adds a nice aesthetic touch to the fighter and is easily assembled and pressed together.
Battery Door & Wings (One Part) - Designed to be printed on a 45 degree angle to increase detail on the leading edge of the wing along with the top and bottom faces. Also acting as a sturdy mounting point for the landing gear.
Fuselage Top and Bottom Sections - Designed separately for ease of construction, enabling the drill slide switch to be placed within the centre of the fuselage and making it easy for the cord to be threaded and fastened within the top section which is later on fastened to the bottom section with four countersunk screws.
Recommended Tools
The recommended tools for this project include the generic Bambu Labs Bed Scraper, The 2.0mm Allen Key from the Bambu Labs Printer Accessories Box and a pair of Needle Nose Pliers.

Parts List
There are thirteen 3D printed parts in total including the roof mounting Hook which is optional depending on if you want to mount your plane on the roof or not. The Non 3D Printed Parts outlined below include the (0.6mm Black Nylon Cord, AAA Battery Terminal Kit, 030 Micro DC Motor, 8mm Stainless Steel Balls and BT 3x8 SHCS Self Tapping Screws) All from the Maker's Beginner Kit. Batteries are not included within the Maker's Beginner Kit along with the 20x20 Double Sided Foam Mounting Tape which is optional for roof mounting.

Assembly Video (Linked Below)
https://drive.google.com/file/d/14BQK3SPh_XFLmXj3yUuUdx05Kn4ZD1jy/view?usp=sharing
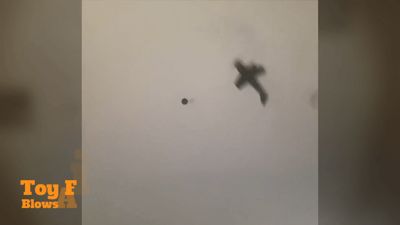
How To Launch Fighter When Roof Mounted
The best way to launch the fighter when roof mounted is to stand up on a chair, turn it on and throw it in a circular ark in the fashion that you would throw a paper plane. Important notes (It can help to keep throwing the plane in one direction so that the twisting of the cord aids the circular ark). To stop the fighter it is easy to catch it by the string and then turn it off, however you may try to catch it by the body if you like as the blades don't hurt much if they make contact with your hand.
Bill Of Materials Explanation
It is cheaper and more effective to buy the Maker's beginner kit in whole instead of a selection of individual parts because on their own the parts for the Toy Fighter total $20.04 AUD and aren't the exact parts that it was designed for. Whereas the Maker's Beginner kit costs $19.85 AUD providing all of the parts that the Toy Fighter was designed around and a plethora of other great bits of hardware that can be used in various other projects. This is excluding the extra $4.95 AUD for the mounting tape which is optional.
| Individually Buying Parts From Maker World | Makers Beginner Kit |
Total Cost: $20.04 AUD
|
Total Cost: $19.85 AUD |
| Excluding: Rectangular Double Sided Foam Tape X10 - $4.95 AUD | |
Boost Me (for free)
Thanks For The Support!
License
You shall not share, sub-license, sell, rent, host, transfer, or distribute in any way the digital or 3D printed versions of this object, nor any other derivative work of this object in its digital or physical format (including - but not limited to - remixes of this object, and hosting on other digital platforms). The objects may not be used without permission in any way whatsoever in which you charge money, or collect fees.
Comment & Rating (45)