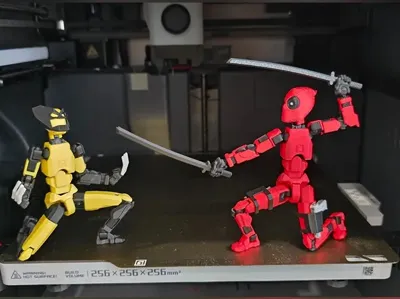
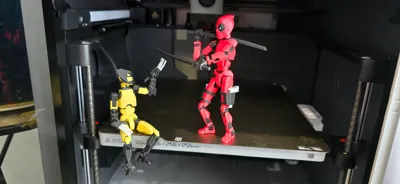
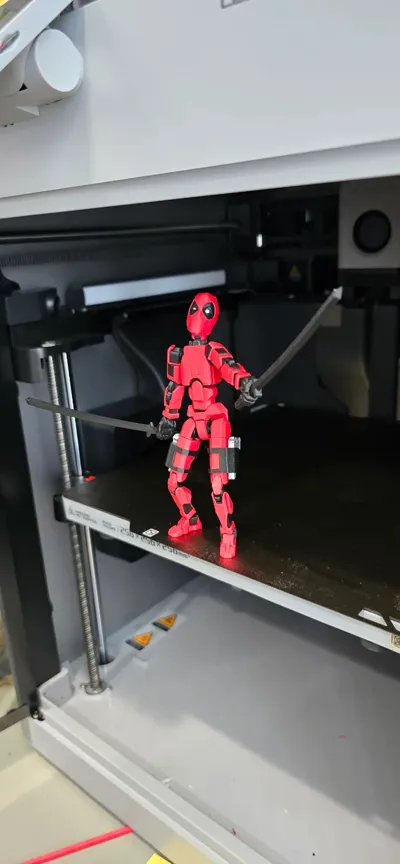
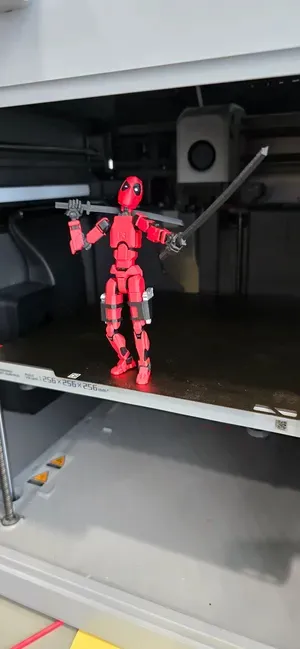
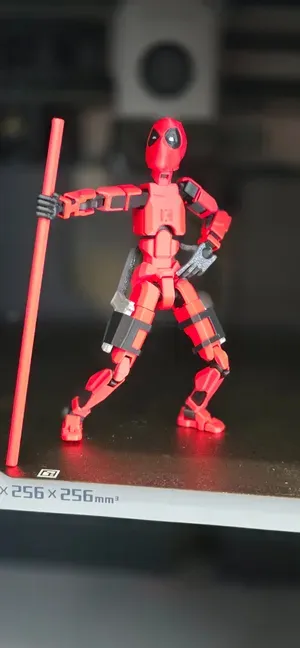
Deadpool Dummy 13 Model V1.0


Print Profile(3)


Description
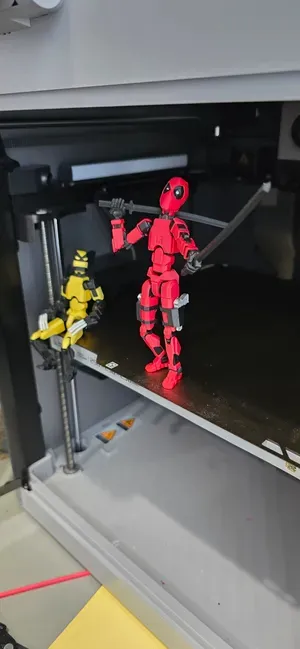
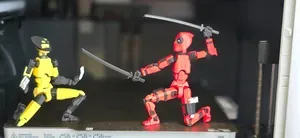
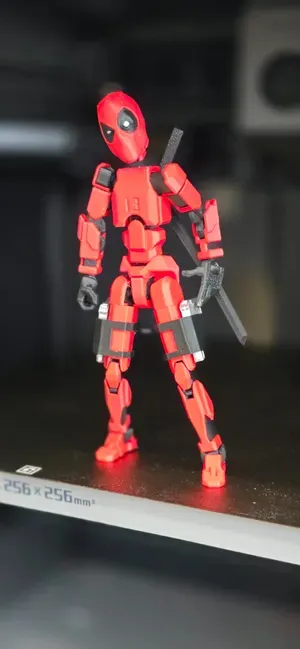
Hey everyone! I’m excited to share the new and improved version of my Deadpool Dummy 13 Model, now officially Version 1.0. This update brings some fantastic enhancements based on your feedback:
- Runners for Easy Printing: The model is now organized on runners, making it much easier to print and assemble.
- Updated to Dummy 13 Version 1.0: Fully compatible with the latest Dummy 13 platform.
- Updated Deadpool Head assembly to fit the new neck piece.
YouTube Assembly Instructions: I’ve created a detailed assembly video, addressing the most common questions I’ve received.
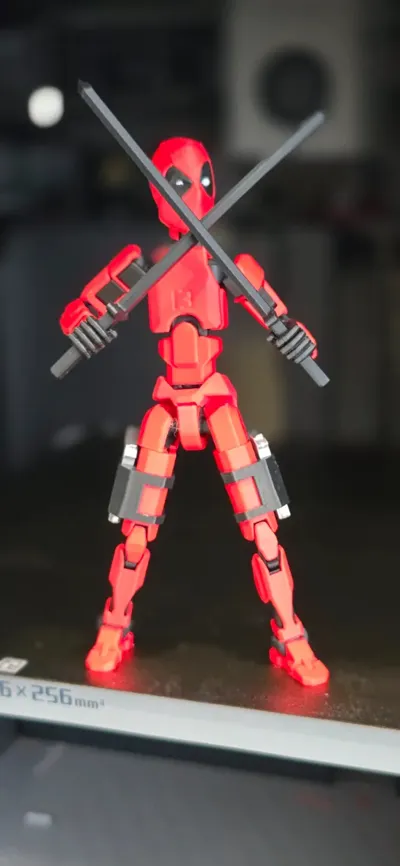
- Updated V2 Katanas and Holsters for optimal fit. (Increasing the connector for the figure's back to fit the Katana's holster in the new Dummy 13 V1.0 chest piece.
This revamped version ensures a smoother, more fun process for printing and building your very own Deadpool Dummy!
Big Thanks to:
- Edited Base Model on runners: Dummy 13 Version 1.0 (Original Creator) https://makerworld.com/en/models/638587?from=search#profileId-564186
- Updated Head for new size connection: Custom design from Kaleb08 https://makerworld.com/en/models/187814?from=search#profileId-206932
- Weapons Updated for new sizes.: Swords (V2), holsters, and guns by Kaleb08 and Mici
Printing Details
You have to change the print settings with each plate.
- Plate 1. Print the armor with PLA or filament of your choosing. (No Brim, no supports).Matte PLA Check it out here!
- Plate 2. Print the Frame with PETG or ASA (Very important) I recommend using PETG for the frame because PLA loses rigidity over time, especially with heat or moisture. PETG is more durable, flexible, and holds up better for articulated models that need to last. PETG Over here! (No Brim, No supports).
- Plate 3. Holsters for guns and swords, I recommend using tree supports and brim.
- Plate 4. For the updated head I did not need to use tree support, just inner and outer brim.
(These are affiliate links, so if you purchase through it, you’ll be supporting my work—thank you!)
Boost Me (for free)
🚀 Love this design? Want to see more like it? Boost this post! 🔥
Every boost helps my work reach more makers and helps me keep creating awesome 3D designs to share with you all. Your support means the world to me—whether it's a boost, a like, or even trying out my designs yourself. Let's keep pushing the boundaries of what we can make! 🙏💡✨
Tips for Printing:
- Use hair spray for bed adhesion.
- Runners: The runners streamline the process and keep the parts organized during printing.
- Post-Processing: Carefully remove supports and clean up joints for the best fit.
Visit my 3d Printing Essentials list in notion: Essentials List :)
Redirect for Previous Users
If you saw my original Deadpool Dummy 13 post, you’re going to love this new version! This update simplifies printing and includes the instructions many of you requested.
Thank you for all the amazing feedback that inspired these updates! I’m thrilled to see how your builds turn out. Don’t forget to tag me in your prints—I love seeing your creations!
Happy printing,
Marco 🎨✨
Boost Me (for free)
If you enjoyed this model, you can boost me, to support future designs, Thanks!
🔧 Want to level up your 3D printing setup? I’ve compiled a list of essential tools, filaments, and accessories I personally use and recommend:
👉 🛠️ MS 3DPrints Essentials – Amazon Buying List (Affiliate link – helps support the project at no extra cost to you!)
💬 Feedback, remixes, and makes are always welcome. Let’s build smarter, together!
You can buy me a coffee here, any support is much appreciated!

Comment & Rating (388)