


Print Profile(9)


Bill of Materials


Description
Membership
Your support directly allows me to invest more time in creating the useful and innovative solutions we all enjoy. Love using my unique designs in your business or products? By subscribing to my Commercial License Membership, you get the legal right to sell prints of my models. Subscribe today and let's build the future of 3D printing together!
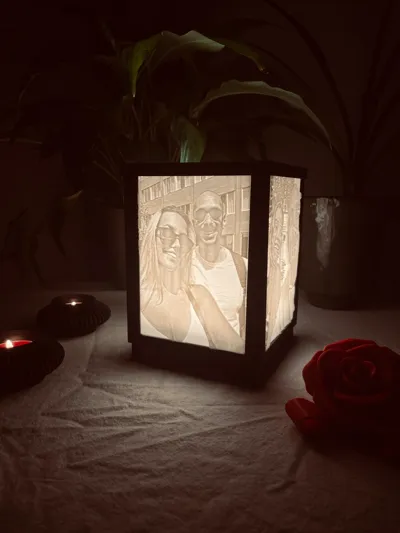
Memories in Light – A Valentine’s Day Gift - Customizable
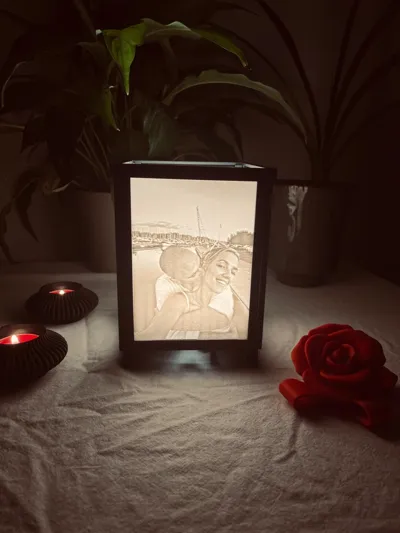
After the overwhelming support for my previous design, I wanted to take things to the next level and create something even more memorable. The result? A unique gift box that transforms into an elegant table lamp – illuminated with your own cherished memories.
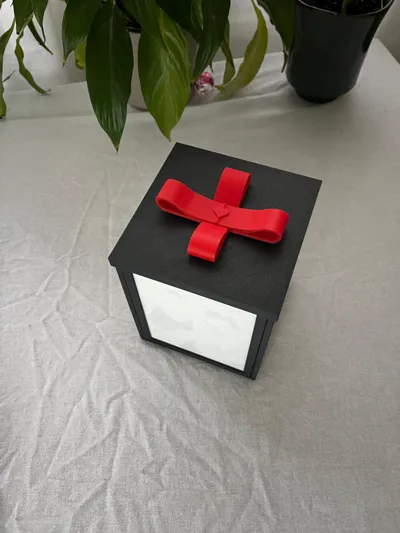
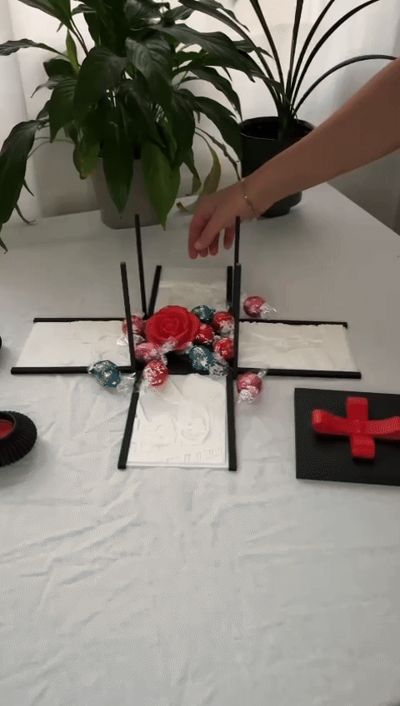
Start by gifting it as a beautiful box, perhaps filled with something special, or use the included rose design to make it truly romantic. When the lid is lifted, the lithophane photos are revealed. Hold them up with light behind them to truly bring your memories to life. But the magic doesn’t stop there – the photos can then be assembled into a table lamp, a glowing reminder of your most treasured moments.
Perfect for Valentine’s Day or any special occasion, this gift highlights not only your memories but also the love and care you’ve put into creating it. A thoughtful, personal present as unique as your story.
Let your memories shine brightly – for your special someone or just for yourself.
Instructions for Creating Your Lithophane Images
- Visit ItsLitho
Begin by visiting www.itslitho.com and selecting Get Started. You’ll land in the Model section, but switch to Upload first to upload your images one at a time for simplicity. - Image Details
The images used in my model are 1200x1600/1599 pixels, taken with an iPhone. Using similar dimensions ensures optimal results. - Editing Your Images
Once your image is uploaded and visible, go to the Edit tab. You’ll see your image on the right. Note: Only work on one image at a time to prevent merging.- My Recommended Settings:
- Contrast: 0.24
- Crop Width: 2-98%
- Crop Height: 2-98%
- My Recommended Settings:
Adjusting the Model
After editing, proceed to the Model tab. To ensure your lithophane fits perfectly into the frame, use these settings:- Shape Options:
- Width: 105mm (Height auto-adjusts to ~139.9mm)
- Max Thickness: 4mm
- Frame Options:
- Select Border and enable Advanced settings.
- Check Left and Right under Frame Options.
- Set Thickness to 4mm.
Note: Original image size and aspect ratio impact cropping. My dimensions ensure consistent results.
- Shape Options:
- Download Your Lithophane
When finished, click Download in the bottom-right corner. Choose Lithophane from the options to download your lithophane as an STL file. - Repeat for Additional Images
Repeat these steps for three more images, as the box holds four lithophanes. Prepare for Printing
Once you have four STL files, open them in Bambu Studio. For optimized settings, download one of my sample lithophanes, import your images into the same session, and then delete my file.- Printing Settings:
- Layer Height: 0.20mm
- Printer: Bambu Lab X1C
- Profile: Standard @BBL
- Enable supports for build plate adhesion.
Note: Printing all four lithophanes together at maximum quality takes approximately 24–29 hours.
- Printing Settings:
Step 2: Printing the Base Plate and Frames
After completing your lithophanes, print the base plate and frames. Here are my recommendations:
- 0.16mm Optimal @BBL X1C: ~8 hours
- 0.12mm High Quality @BBL X1C: ~17 hours
- 0.20mm Standard @BBL X1C: ~10 hours
Choose the setting that fits your time and quality preferences.
Assembling the Base and Frames
- Attach Frames to the Base Plate
Snap the four picture frames into the base plate using the secure snap-on mechanism. Handle carefully to avoid damage. - Insert the Lithophanes
- Place the lithophanes into the frames.
- For gifting: Insert the images facing inward to preserve the surprise.
- (Optional): Assemble the included rose and stem and place them inside the box for an elegant touch.
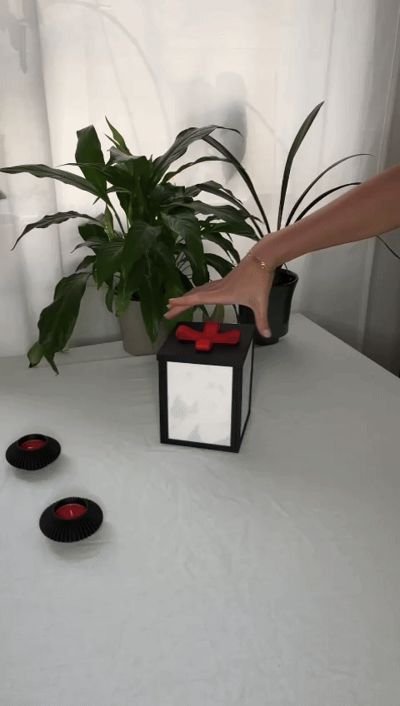
- Close the Box
- Hold the assembled box carefully.
- Attach the lid by aligning one side and working towards the other.
- Tight margins ensure a perfect fit—patience is key.
- Finishing Touches
- Add the ribbon to complete your gift box!
Tips for a Memorable Presentation
- Surprise Element: Fill the box with candy or small surprises that spill out when opened. After the reveal, highlight the lithophanes’ uniqueness.
Step 3: Create the Lamp
- Flip the lithophanes outward to let the light shine through.
- Use the open lid to allow light to flow freely into the room.
- Attach your chosen lamp feet by sliding them into the grooves at the base. (Choose from seven included options!)
- Insert the lamp (designed for Bambu Lab’s LED Lamp Kit) into the cylinder-shaped section of the box. Feed the cable through the provided hole.
With these steps, your gift box transforms into a beautiful lamp showcasing your cherished memories!
Pro Tips for Success
- Fine-Tuning Fit: Be prepared to use a small cutting tool or sandpaper. Even with precision printers, small tolerances can sometimes make parts fit tightly.
- Patience is Key: Start this project well in advance, allowing plenty of time to work through each step without rushing.
- Cooling Matters: Always let your printed parts cool completely on the build plate, and if possible, leave them to cool inside the printer. This minimizes the risk of warping and ensures perfect results. (This is the method I’ve used for all my prints!)
Boost Me (for free)
Creating this product has been my longest journey yet and a journey of learning and refining, and I hope it shows in the final result. My aim was to design something meaningful and versatile, and I’m truly excited to share it with you.
If you enjoy the idea and think it’s worth supporting, your vote would mean so much. Even a small action like leaving a boost, comment, or like makes a big difference and helps me move forward. Thank you for taking the time
Boost Me (for free)
A Boost truly helps more than you might think. It’s a clear signal that you enjoy what I’m building and that this design is worth pushing even further. Every Boost supports my journey to improve every day, learn faster, and keep creating original, useful models for the community. If you also leave a like or a comment, it means a lot and helps more than you know. Thank you so much for the support!
Documentation (1)
License
You shall not share, sub-license, sell, rent, host, transfer, or distribute in any way the digital or 3D printed versions of this object, nor any other derivative work of this object in its digital or physical format (including - but not limited to - remixes of this object, and hosting on other digital platforms). The objects may not be used without permission in any way whatsoever in which you charge money, or collect fees.
Comment & Rating (67)