Skadis Bottom Row Shelf System


Print Profile(1)

Bill of Materials

Description
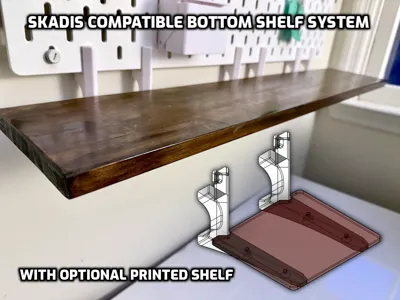
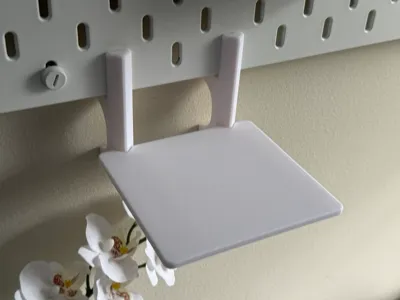
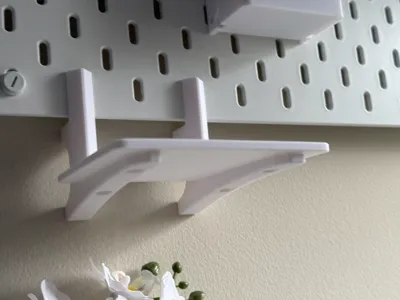
Expand your Skadis system beyond its original footprint! This is a system of brackets for the IKEA SKADIS style pegboards. Basically you insert each bracket into the bottom row of Skadis holes. If you want to put something light on the shelf, print 2 brackets. If you want to put in a long heavy shelf print as many support brackets as are required. I do suggest if you use this shelf system you make sure your Skadis board is attached to the studs and can take the weight of whatever you want to put on it in addition to your other Skadis accessories. You can either print individual shelf tiles which are made to index with both the holes on the shelf and the Skadis hole spacing for the brackets. One other thing is I designed this around an actual Ikea Skadis board with the IKEA standoffs. The bottom part of the bracket is meant to stabilize itself against the wall to prevent the bracket from slowly creeping downward from weight. This means the surface of the Skadis board should be ~24mm \ ~1" from the wall if you installed it with the IKEA hardware. If you want to put really heavy stuff on it you may want to consider securing the bottom of the Skadis board to the wall as well.
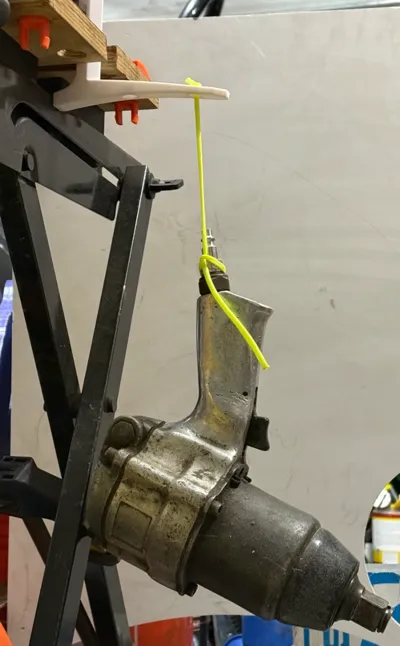
***Please keep the print orientation the same for maximum strength.*** They will be significantly weaker if you try to print them vertically. See photos for strength test. Please take care to remove all support material left behind from the hook or it may be stiff going into the holes.
A wooden shelf can be used with this system as well instead of the printed one. The board in the photo is about 30"x6" for reference. If you use a wooden board you can use the countersunk holes underneath to secure a board with screws so it doesn't slide around.
Boost Me (for free)
Any boosts are greatly appreciated!
License
You shall not share, sub-license, sell, rent, host, transfer, or distribute in any way the digital or 3D printed versions of this object, nor any other derivative work of this object in its digital or physical format (including - but not limited to - remixes of this object, and hosting on other digital platforms). The objects may not be used without permission in any way whatsoever in which you charge money, or collect fees.
Comment & Rating (4)