The content might be a bit long, please scroll down to read the main part, thank you!
Author's Notes (If you are here to print my model and don't want to read this, you can skip directly; detailed explanations are in the main content):
[Junior High School Grade 7 - QIJI] I've always had a problem—my desk is always messy. I've tried printing existing storage boxes, but after a few days, various cluttered small items would again not fit entirely into the pen holder. So, I decided to create a pen holder that can freely change in size!
First, I observed my desk situation. My pen holder was placed quite high, and a vertical pen holder was not very convenient to access each time. So I decided to make the pen holder angled upwards, with the opening facing me. The sides would be parallelograms, and the front would be square.
Next, I started thinking about how to make the pen holder freely changeable in size. Magnets? No, not only are they not sturdy, but I don't have any at home. Glue? This way, disassembly and assembly would not be flexible enough, and once assembled, it couldn't change its shape again. Finally, I chose the wisdom of the ancients—the mortise and tenon joint structure. This makes it easy to print, the connection is strong, and it can be conveniently disassembled and assembled.
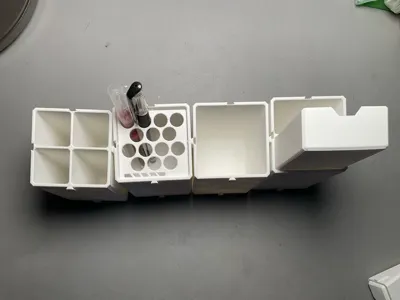
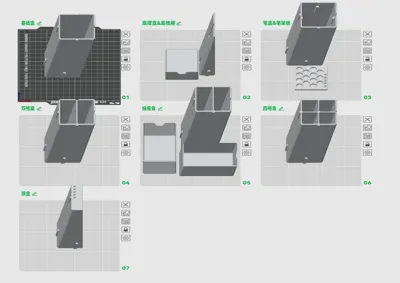
Then, I designed the accessories. Based on my own needs, I designed the following 5 accessories for this pen holder: a base box, a basic box, a two-compartment box, a four-compartment box, a pen holder box, and a drawer box. Finally, I consulted my mother's opinion and added a top box, which further expanded the storage space. I also used a large number of chamfers in the appearance, giving it a somewhat cyberpunk style.
Finally, printing the model. I used P2S, A1 mini, and A1 to print the accessories for this box, but the temperature was low in winter, and the parameters couldn't be adjusted properly. It was either warping or spaghetti. Finally, after applying glue, the printer obediently completed the printing of this storage box.
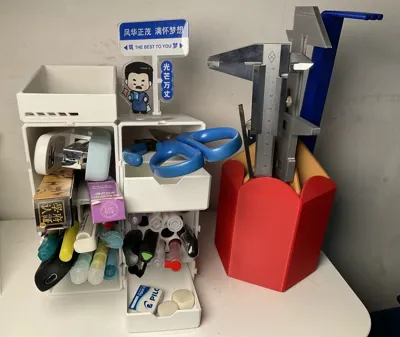
It's finally done! When the completion sound for the last accessory print rang, after a simple assembly, I immediately placed the pen holder on my desk and put in my pens. Perfect! Not only did it organize all the small items that were previously on my desk, but there were also a few empty compartments left. Looking at this "beautiful (my ability is truly limited, I really don't know if this counts as beautiful)" pen holder, I was filled with a sense of accomplishment.
Attached is a design screenshot (the model was purely designed by me personally; my parents are not very good at 3D modeling 😅):
Additionally, here is a three-view drawing sketch with dimensions:
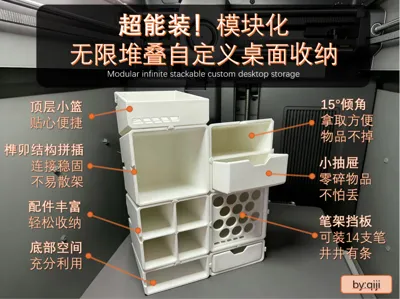
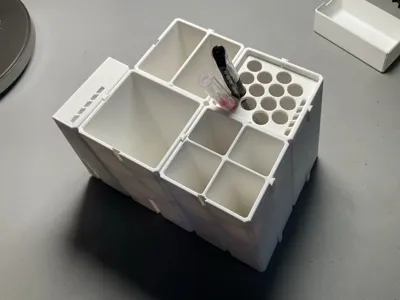
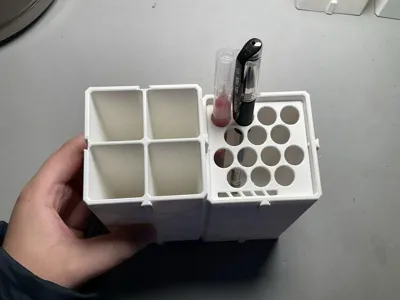
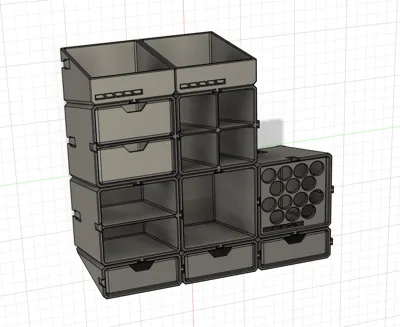
This Modular Infinitely Stackable Customizable Desktop Organizer adopts the wisdom of the ancients—the mortise and tenon joint structure for fastening, making it easy to disassemble and assemble, allowing for structure adjustments at any time, like "deploying troops"
The overall design is angled upwards by 15°, with the opening facing you, making it easier to access when placed flat on the desktop, allowing you to reach pens without having to raise your hand
The pen holder includes the following 6 accessories: a base box, a basic box, a two-compartment box, a four-compartment box, a pen holder box, a drawer box, and a top box, offering rich variety to meet most needs. If you have special requirements, please leave a comment, and I will try my best to customize it for you if I see it
The appearance uses a large number of chamfers, giving it a cyberpunk style.
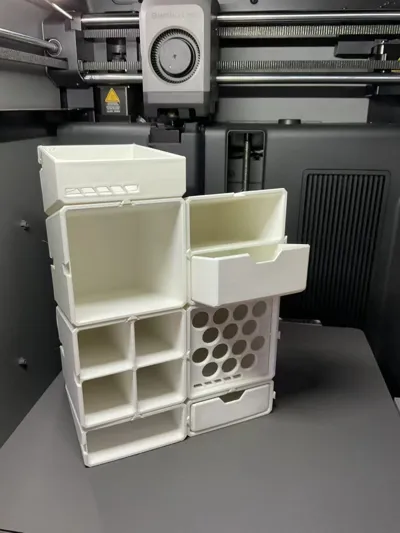
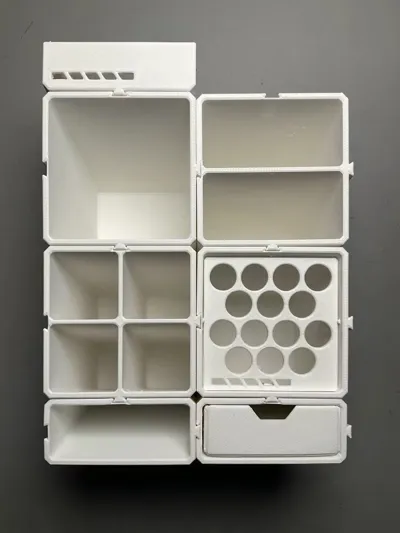
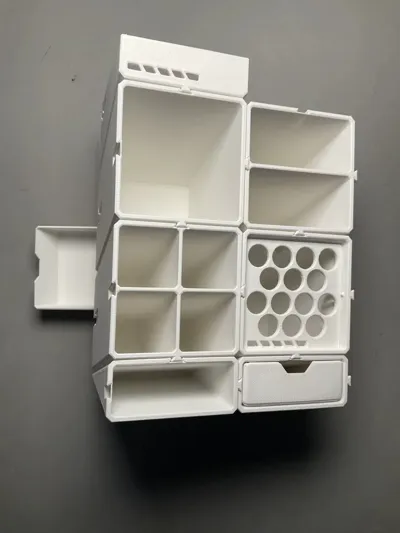
See the image below for more information (Due to my poor camera equipment, this image and the cover image were AI-retouched, which might look a bit strange, please understand, but the main effect of the model remains unchanged!):
Printing Reminder:
In winter, when the temperature is low, the model is prone to warping, which may lead to deformation and abnormal assembly. Please do not give me a low rating for this! It is recommended that you print with the following settings:
1. Clean the build plate and apply glue
2. Add a brim in the slicer software
3. (For machines with an enclosure) Preheat in advance
4. Recommended to use Bambu PLA Basic for a higher success rate
Assembly Guide (Super Easy!):
For the following tutorials, if you have any questions, please post them in the comments or explore on your own!
Thank you for printing! Since all accessories are included in the print profile, it uses more filament and takes longer. You can also choose to print only a few of them.
Wishing you, who print/like/collect/boost this model, abundant wealth in the Year of the Horse, all your wishes come true, and never have spaghetti or warping!
End.
Boost Me (for free)
Thank you for browsing! It would be even better if you could boost me. I will continue to bring better models. Enjoy life!
Thanks for downloading! Happy printing!
If you have any questions, comments, or suggestions, please feel free to ask!
This user content is licensed under a Standard Digital File License.
You shall not share, sub-license, sell, rent, host, transfer, or distribute in any way the digital or 3D printed versions of this object, nor any other derivative work of this object in its digital or physical format (including - but not limited to - remixes of this object, and hosting on other digital platforms). The objects may not be used without permission in any way whatsoever in which you charge money, or collect fees.


Comment & Rating (0)