Adjustable Wire Stripper


Print Profile(1)

Bill of Materials
- Screws M2 × 8 mm x 2:
- Screws M2 × 16 mm x 1:
- Threaded brass heat-set inserts: M2 × 3.1 × 3 mm x 3:
- 18mm utility blade segments x 1: break a standard blade into pieces
Description
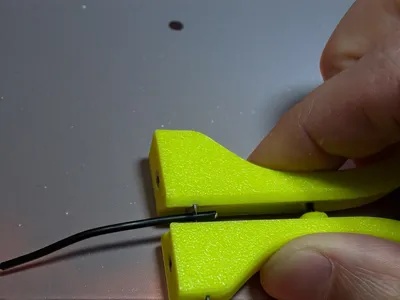
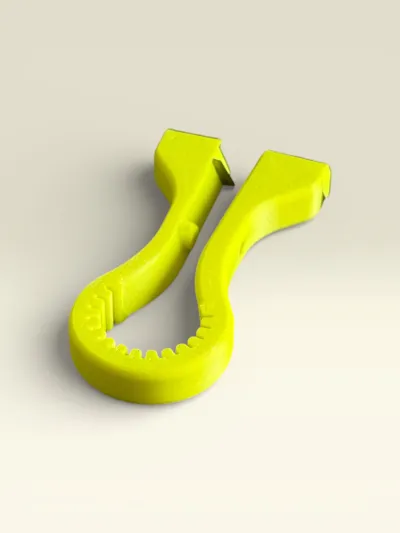
Adjustable Wire Stripper (18mm Utility Blade)
A compact, workshop-friendly wire stripper you can 3D print in PLA or PETG, designed to use two blade segments from a standard 18mm utility knife blade. The blades are clamped with screws and can be finely adjusted, allowing you to tune the cutting depth for different wire insulation thicknesses.
A central locking screw works as a built-in stop, helping you keep consistent stripping length and preventing over-insertion.
Features
- Uses 2× segments from a standard 18mm box cutter blade
- Adjustable blade depth via dedicated blade clamping screws
- Central locking/stop screw for repeatable strip length and controlled insertion
- Compact ergonomic shape with a large grip area
- Great for quick stripping jobs on common small/medium gauge wires
Required hardware (not included)
- 2× 18mm utility blade segments (break a standard blade into pieces)
- Threaded brass heat-set inserts: M2 × 3.1 × 3 mm (for 3D prints)
- Blade screws: M2 × 8 mm
- Stop/locking screw: M2 × 16 mm (length can vary depending on your preferred stop travel)
Recommended materials
- PETG (recommended): tougher and more durable for a hand tool
- PLA: works fine for light use and quick prints
For heavy/constant use, PETG (or ABS/ASA) will last longer.
Print settings (suggested)
- Layer height: 0.20 mm
- Walls/perimeters: 3-4
- Infill: 15-30%
- Supports: not needed (typically)
- Orientation: print flat for maximum strength around the screw areas
Assembly & setup
- Print the parts included in the model.
- Install the M2 brass heat-set inserts in the dedicated holes.
- Insert the two blade segments into their slots.
- Secure with M2×8 mm screws and fine-tune blade exposure.
- Install the M2 stop screw (M2×16 mm or your preferred length) and set your stripping length.
How to use (quick guide)
- Insert the wire.
- Squeeze the tool to score the insulation.
- Pull the wire out to remove the insulation section.
- Fine-tune blade depth if you see conductor marks or incomplete cuts.
Safety note
Utility blades are extremely sharp. Assemble and adjust carefully, keep away from children, and always test on spare wire first.
License
You may create derivative works based on this object, provided that all such derivative works are published exclusively on the MakerWorld platform and include proper attribution to the original creator. You may not share, upload, host, distribute, or publish this object—or any derivative work of this object—on any other digital platform, marketplace, or distribution channel. Commercial use of this object and any derivative works is strictly prohibited. This includes, but is not limited to, selling, renting, sublicensing, or using the object in any context in which you receive monetary compensation or other financial benefits.
Comment & Rating (0)