AMS Riser Dryer


Print Profile(1)

Bill of Materials

Description
I always wondered why the heat generated during printing couldn't be used to dry filament, thus saving energy since the printer is running anyway.
This led me to design this dryer, which also includes a riser.
The project required considerable time, filament, and patience.
No additional parts are needed except for two standard temperature/hygrometers, but these can also be omitted (file for the lid to follow).
Assembly:
The rest is all plug and play. The entire interior and electronics from the AMS are used, as well as the seal and lid.
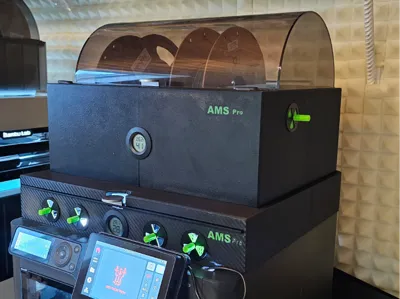
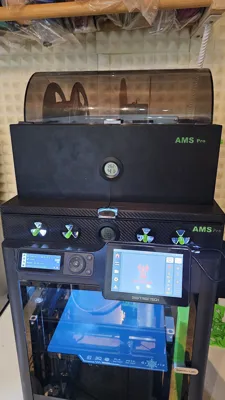
Ultimately, it's a 1:1 copy of the original AMS, only taller and wider for better spool compatibility, plus space for sound insulation and future improvements to enhance spool operation, allowing even almost empty spools to run smoothly. Updates to follow!!
Function:
When printing PLA (bed 55°C, nozzle 220°C) with the door closed on a P1s or X1c, temperatures of approximately +/- 45°C (even higher with PETG) are generated in the upper area of the printer. So, if you want to dry and have a few hours of printing, remove the glass lid and open the side vents on the AMS Pro. Since heat rises, the filament will be automatically dried.
If you don't want to dry or are printing ABS, which creates dust, put the glass lid back in, close the side vents on the AMS, and the AMS is closed.
Assembly:
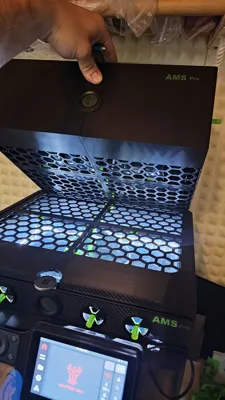
Everything is designed to be plug and play, meaning the riser and the AMS are each divided into four parts, so almost no supports are needed, except for the cutouts of the lid seal.
I printed it myself in Yajo matte PETG HS.
- The parts are then simply clipped together with the clips.

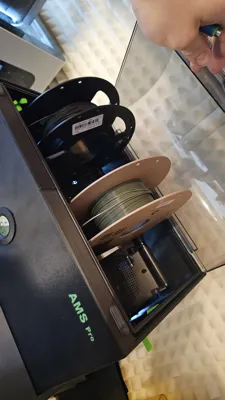
- Remove the lid and lid seal from the old AMS and mount/screw them onto the new AMS.
- Also loosen the two screws on the spool holder and remove it from the original AMS.
- Screw the AMS control board from the old to the new one.
- Remove the last two screws from the AMS hub on the underside of the AMS interior so that the hose later aligns as it originally did.
- Mount the spool holder in the AMS.
- Assemble the ventilation flaps. The inner wings have two lugs on two wings as stops when opening and closing.
The rest should be self-explanatory, based on the pictures.
I appreciate feedback and a boost to support my work.
The project is not yet finished; upgrades, pictures, and improvements will follow.
Feel free to check out my other printer upgrades.
License
You shall not share, sub-license, sell, rent, host, transfer, or distribute in any way the digital or 3D printed versions of this object, nor any other derivative work of this object in its digital or physical format (including - but not limited to - remixes of this object, and hosting on other digital platforms). The objects may not be used without permission in any way whatsoever in which you charge money, or collect fees.
Comment & Rating (3)