Astro MixAmp Support


Print Profile(1)

Description
Key Features:
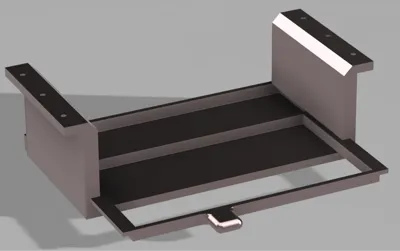
- Precise Compatibility
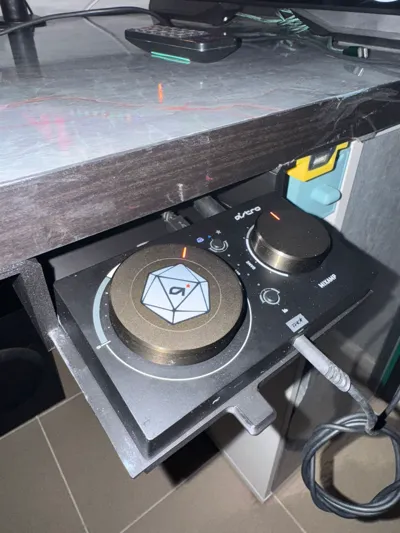
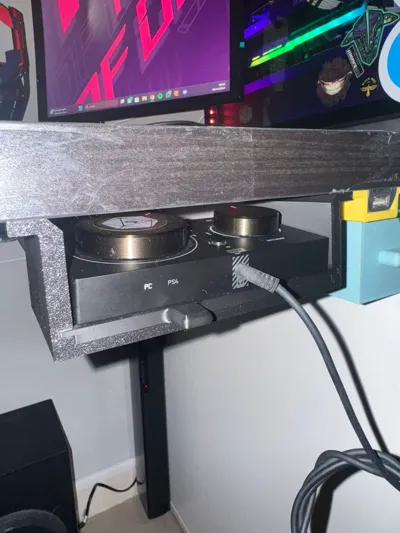
Custom-designed for the Astro MixAmp (Gen 4), the mount incorporates a sliding drawer providing effortless access to the device without complex removal. - Drawer Locking System
The drawer features a latch, which is adhered in place to prevent accidental dislodgement from the rear guide. Once correctly assembled, the drawer remains stable in both open and closed positions. - Customizable Mounting Holes
The mount base includes pre-drilled 3mm diameter holes for under-desk attachment. However, these can be enlarged if necessary using a screwdriver and a plastic bit (maximum 4mm diameter).
Assembly Instructions:
- Drawer Insertion
Before installation, insert the drawer from the rear into the mount's guide and ensure smooth operation. This must be done before adhering the latch, as it becomes irremovable once fixed. - Latch Attachment
- Once the drawer is inserted, slide it to its furthest extent.
Apply a small amount of adhesive (preferably cyanoacrylate glue, such as Attack) as indicated in the illustrated guide, marked “GLUE” and accompanying guidelines. (SEE IMAGE).
1.

2.

- Allow the adhesive to cure completely before proceeding. This step is crucial to prevent the drawer from dislodging from the rear when closed.
- Securing the Mount to the Desk
Once the drawer and latch are correctly fitted and the adhesive has cured:- Verify smooth drawer operation.
Position the mount in the desired location under the desk.
Secure it using screws compatible with the 3mm holes. If necessary, enlarge the holes using a screwdriver and a plastic bit (maximum 4mm) to accommodate available screws.
***THIS PROJECT IS STILL UNDER DEVELOPMENT***
License
You shall not share, sub-license, sell, rent, host, transfer, or distribute in any way the digital or 3D printed versions of this object, nor any other derivative work of this object in its digital or physical format (including - but not limited to - remixes of this object, and hosting on other digital platforms). The objects may not be used without permission in any way whatsoever in which you charge money, or collect fees.
Comment & Rating (3)