


Print Profile(2)
Bill of Materials


Description
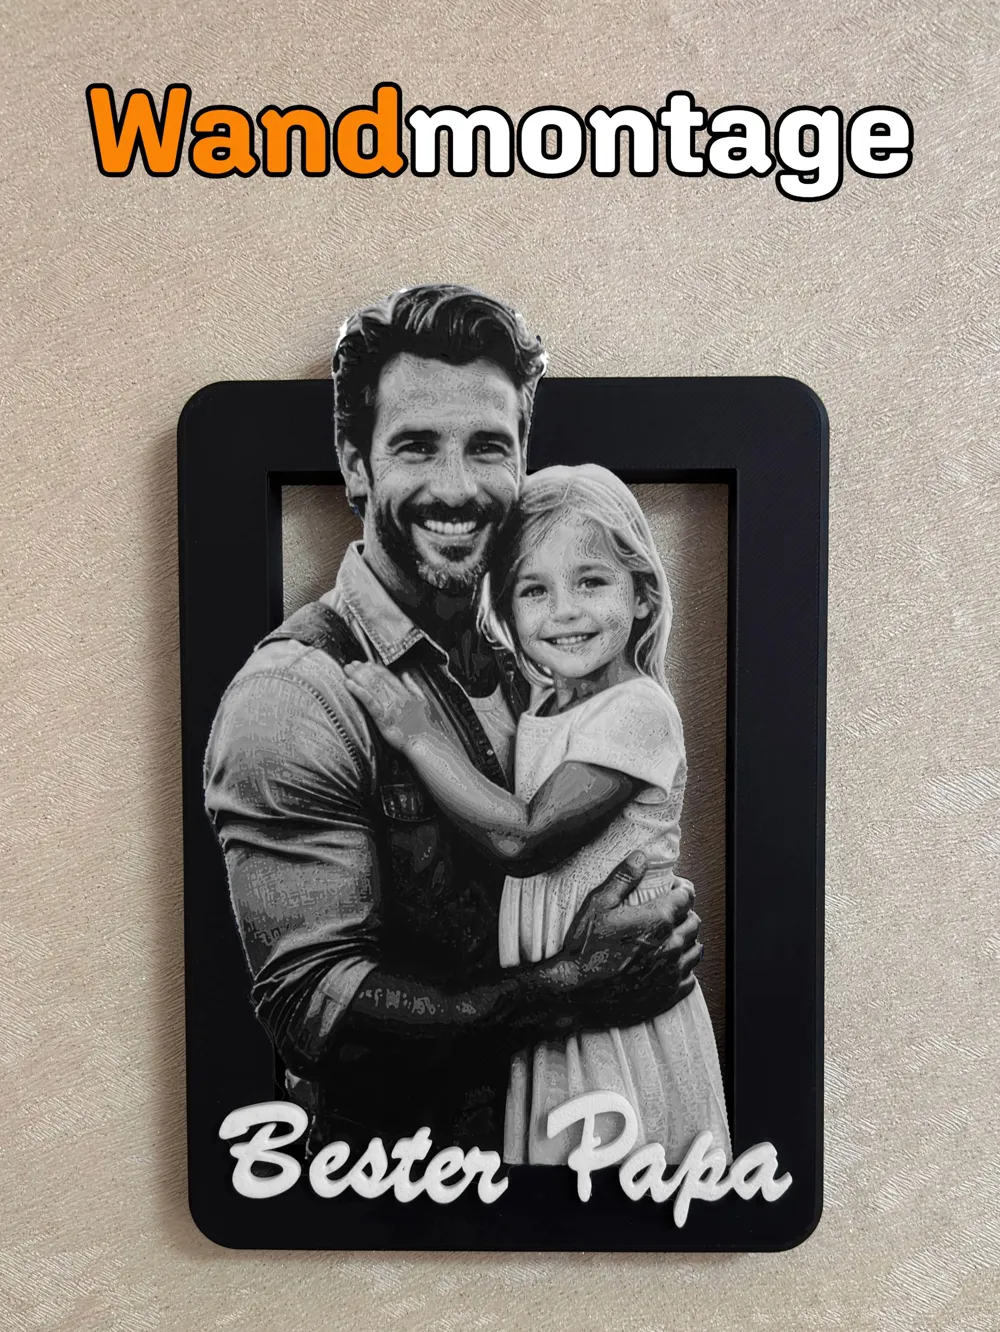
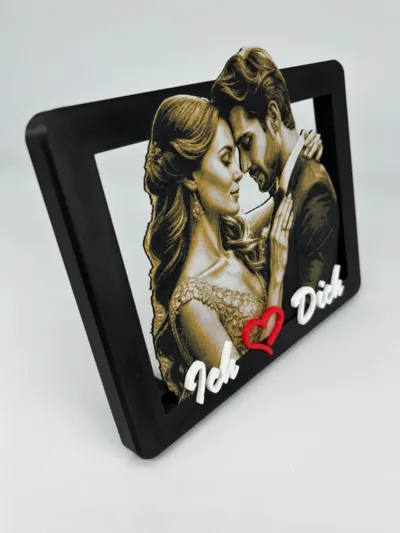
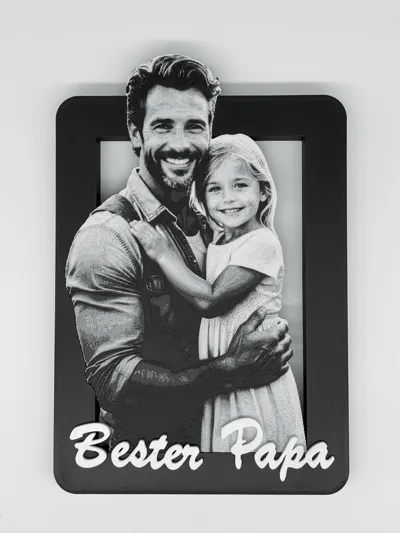
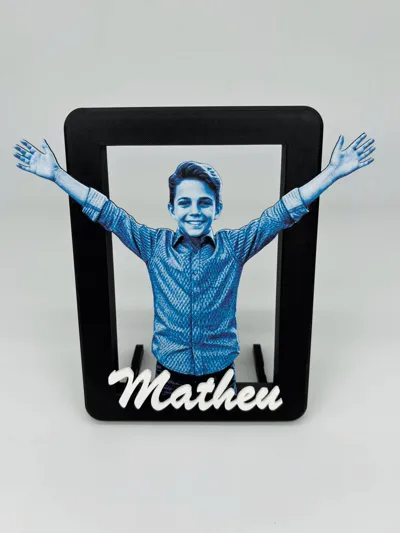
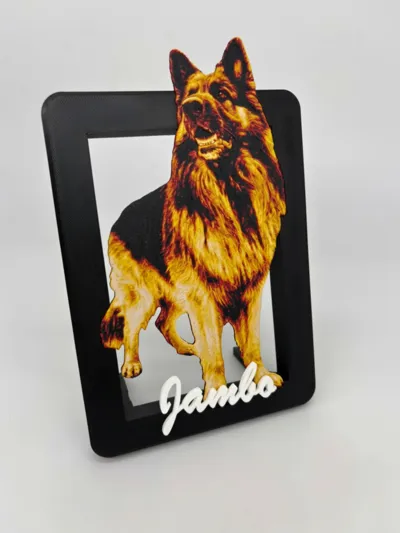
Turn your favorite photo into a unique 3D printed keepsake. The perfect personalized gift for any occasion.
What is the SELFIE FRAME?
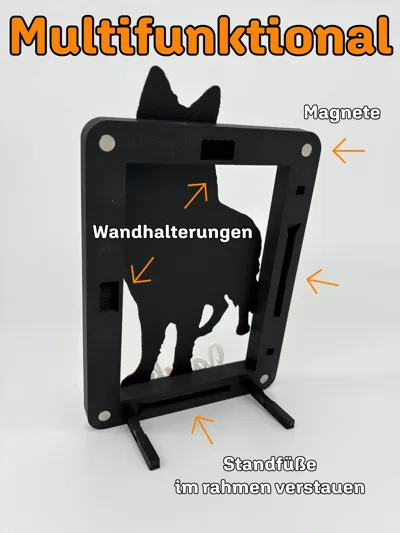
A fully personalized picture frame where the photo and frame are created as an inseparable whole in a single 3D printing process. No separate photo, no glass, no assembly.
Your advantages:
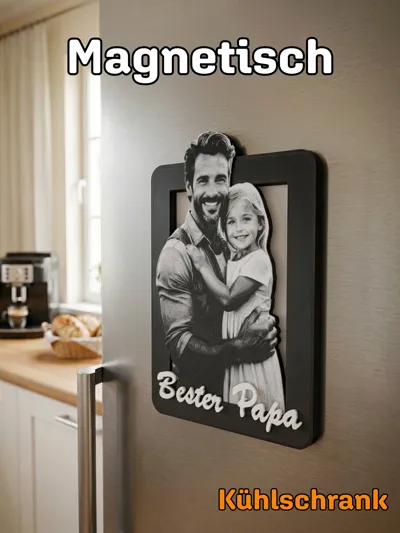
🧲 Magnetic - adheres to refrigerators and other metal surfaces
🪝 Wall mount - integrated hanging
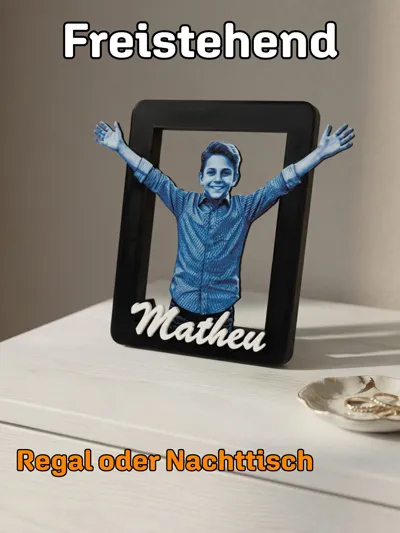
🪑 Freestanding - stable feet integrated
🎨 Customizable - desired text, e.g. names, dates or "I ❤ You"
The perfect gift for:
💍 Wedding & Engagement
💑 Anniversary & Valentine's Day
👨👩👧 Mother's Day, Father's Day & Family
🎂 Birthday & Christmas
🐾 Pet Portrait
🏠 Housewarming Gift & Home Decoration
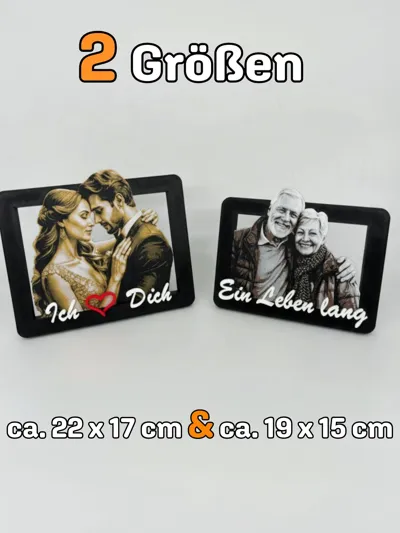
Frame Size:
Large: 22 x 17 x 1.5 cm
Small: 19 x 14 x 1.5 cm
Boost Me (for free)
Support my work with a BOOST
How to achieve this:
A photo is required in PNG format and without a background for it to work.
Next, open CHROMA-CANVAS from Makerlab and import your photo. In the Size tab, set the plate thickness to 0.8mm, and in the cutting area, click on FREE and adjust the size. For example: the frame's outer dimensions are 22 cm wide and 17 cm high, and the inner dimensions are 20 cm wide and 15 cm high. So, depending on the photo you have, you need to set it up like in my photos, creating an overhang with the frame to achieve this effect and also so it can be glued to the frame. For instance, if the inner frame width is 20 cm, I make the width 20 cm, and if the inner frame height is 15 cm, I make the height 19 cm to have my overhang.
Then, in the Palette tab, select a color combination and click “Customize Palette”. In this area, you can adjust the number of color layers. I use a maximum of 20 layers; this number is above the last color “usually white”. If you make too many layers here, your model will become unnecessarily thick, leading to more material and time consumption. There are YouTube videos on how to work with CHROMA-CANVAS if you are not familiar with this tool. Then simply export.
The slicer will open with your image; everything is already set up. You just need the appropriate filament you selected during creation.
Right-click on the image and press “Export as STL”.
Then open my files. The TEXT can be edited here; you can write a different saying and/or change the font. Add a build plate and import the STL files you exported there.
Copy the appropriate frame, either “Horizontal or Vertical” orientation, and add it to the plate with CHROMA-CANVAS. Select both objects, right-click, and merge. Now you need to align the image and the frame, so move the image upwards. A piece should overlap with the frame, but here you must be careful not to cut too much of the frame at once because the image is not uniformly high everywhere. “TIP: Change the color of the image so that it contrasts with the frame; this greatly facilitates the next step.” Move the image up or down so that no frame color shows through the image until it is flush with the frame surface. If it is not flush but frame color is already showing through, then you need to repeat the next step, “BOOLEAN MESH”, more often until it fits.
Step BOOLEAN MESH:
Select both objects and click on BOOLEAN MESH in the top tab, then click DIFFERENCE. The frame must be blue and the image yellow. In the same window, activate KEEP ORIGINAL MODELS and then Execute. This step can take time, so be patient. Repeat this process if necessary until the image is flush with the frame's surface. If everything fits, you can delete the image.
For the text, follow exactly the same steps as with the image: Copy, paste into the plate with the frame, select both, merge, align. "Here, cutting 0.4mm from the frame surface is sufficient." And BOOLEAN MESH as before on Difference, but here you do NOT need to activate KEEP ORIGINAL MODELS and then Execute.
Important: Right-click on the original frame “i.e., the uncut one,” copy PROCESS SETTINGS, then right-click on the cut frame and paste PROCESS SETTINGS. This is important because otherwise, the frame's settings would be overwritten by those of the text.
Have fun….
License
You shall not share, sub-license, sell, rent, host, transfer, or distribute in any way the digital or 3D printed versions of this object, nor any other derivative work of this object in its digital or physical format (including - but not limited to - remixes of this object, and hosting on other digital platforms). The objects may not be used without permission in any way whatsoever in which you charge money, or collect fees.
Comment & Rating (0)