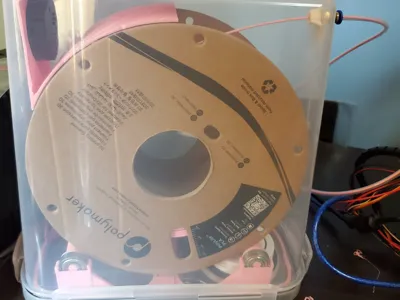
Drybox

Print Profile(0)
Description
Update Notes
- Added two new files `dessicant holder triple start` and `dessicant holder lid triple start` uses a better thread
- Added PC-4 M-6 cover to cover the opening while not in use
Test Print
- Print the file called Tolerence Test Piece as well as a single copy of each of tolerences for roller support as well as the roller insert
- Choose the tolerence that fits the best within the test piece making sure you are testing on the bottom surface
Print quantities
Print a single copy for everything except the following and their respective quantites
- Roller Support x 2
- Roller Insert x 4
- Roller x 4
Only print a single version of top support based on the hygrometer you buy, I highly encourage you to use the square hygrometer.
Printing Guidelines
Everything is oriented according to intended printing direction no supports are needed except for the top support, make sure you add an outer brim for this on your slicer, this is due to the part being very thin. Infill and walls at your own discretion, I used 3 walls and 30% infill
Bill of materials
| Item | Qty | Link | Notes |
| Printer Parts | 1 | ||
| Cereal Container Large | 1 | https://s.lazada.com.ph/s.K5pmy | |
| 608zz Bearing | 4 | https://s.shopee.ph/5psxxR4QAz | |
| PC4-M6 Fitting | 1 | https://s.shopee.ph/7AOLXfZWWf | |
| M3x8 Bolt | 1 | https://s.shopee.ph/704vLCroEW | Other lengths work here just test out what you have |
| 3x4x5 Heat Set Insert | 1 | https://s.shopee.ph/3AsCmS37Pl | |
| Square Hygrometer | 1 | https://s.shopee.ph/9ziWudiCaA | Pick one hygrometer Type |
| Round Hygrometer | 1 | https://s.shopee.ph/4q0QlZ4DwL | Needs Batteries LR44 |
| Rechargable Dessicant |
| https://s.shopee.ph/40RJm61WC0 | Amount Varies |
| 3ID x 4OD PTFE Tube |
| https://s.shopee.ph/5AdH9v0cPh | Length up to you |
| 1CS x 4OD o-ring | 1 | https://s.shopee.ph/3AsCmBnaDe | Optional |
- Links are affiliate links
- The tube is used to go from the box to the printer
- If you find cheaper options please use those
Guide
- Print all the necessary parts, assemble the rollers together I used superglue here though im not sure if its necessary.
- Drill a 3-3.5mm hole on the bottom center portion of the cereal container, you should clearly see that there is a divet here.
- Drill a 5-5.5mm hole on the front of the container measure from 2-3cm from the bottom of the cereal container. MAKE SURE THIS SIDE IS THE SIDE WITHOUT VOLUMETRIC MARKINGS
- Add a heat set insert to the hole of the top support make sure its flush
- Press fit your hygrometer into the top support
- Screw in the top support to the bottom of the cereal container facing the with volumetric markings, make sure to add an o ring to your bolt (the o ring is optional but i find that it keeps the dessicant dryer for longer)
- Screw in your PC4-M6 to the side hole this should create a thread on the container. Lock it with a coupler from the inside of the container
- Put the spool holder bases on the lid of the container orientation doesnt matter.
- Press fit the bearings with the rollers on them into the bases.
this drybox project was heavily inspired by the following video, however the drybox itself was very pricey and I couldn't source it where I live so i found a cereal container on lazada that fit the spool. I designed all the components from the ground up based on the dimensions of the cereal container.
Comment & Rating (0)