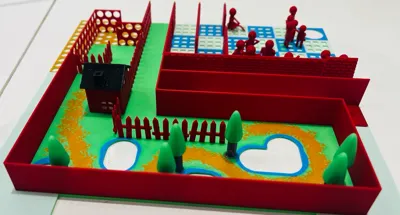
Marble Run with Lap Timer


Print Profile(3)


Bill of Materials
- M5StickC x 1: Cualquiera similar a este (no incluye referido): https://es.aliexpress.com/item/1005006331521752.html
- ESP32 with battery x 1: Cualquiera similar a este (no incluye referido): https://es.aliexpress.com/item/1005007130391124.html
Description
Hi everyone! This is my first model uploaded to MakerWorld, so please be patient with any potential issues. 😊
I got my Bambu Lab P1S a few weeks ago, and I’ve been absolutely thrilled with it—it’s a life-changer! My original plan was to design a marble sensor/detector to track lap times, but the project spiraled into something much bigger. I ran out of time and had to publish this at the last minute (I only discovered the “Master Challenge: Marble Run” contest recently).
At home, we’re 2 kids and 2 “big kids,” and we love competing at almost everything. Naturally, if I made a marble run, it had to track who’s the fastest racer. Assemble it and give it a shot—can you break the 20-second barrier?
The box is optional; you can print it and add the lap timer, or simply play for fun without tracking times.
The marbles used are 16mm glass ones, but if you don’t have any, I’ve included a printable file for marbles.
To-Do List (Coming Soon!)
Let me know in the comments which of these features interest you most so I can prioritize them!
• A. New 3- and 4-story tracks, more fun and challenging.
• B. Online hall of fame: a leaderboard for the fastest laps and best average times.
• C. Moving track parts, possibly powered by servos or motors controlled by an ESP32 and triggered by new sensors.
• D. More sounds, effects, and music in the timer app as the marble moves through different track zones.
• E. LED effects triggered by sensors, including dark zones and illuminated areas of the track.
• F. An improved and more visually appealing exterior box design, with further filament optimization.
• G. Cases for the ESP32 and power bank.
• H. Any other ideas you can suggest!
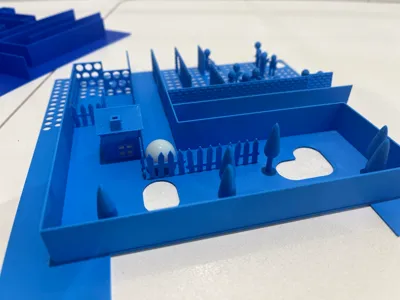
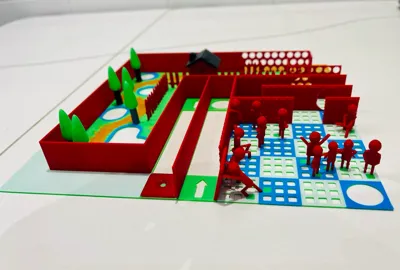
Design Details
This track was created from scratch using Bambu Lab Studio and TinkerCad for 3D modeling, with GIMP and Inkscape for SVGs. No external 3D models were used.
3D Models
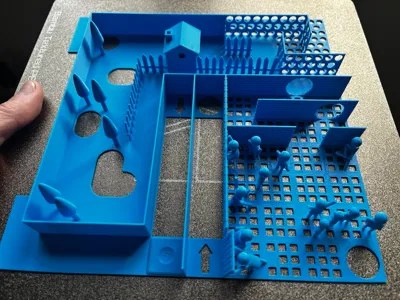
• Figurines: These are small, so if you want detailed prints, I recommend lowering the layer height to 0.16mm or 0.12mm.
• Floor 1 (Simple, No AMS): This version has flat floors to simplify printing and reduce print time by 20 minutes. If you’d like an even simpler version, let me know in the comments.
• Floor 1 (No AMS): All details included, but in a single color.
• Floor 1 (AMS, Multicolor): I don’t have many filament colors, so feel free to experiment with better combinations. Changes happen in layers 4 and 5 (11 changes total). To use five colors with one AMS, there’s a pause after printing the orange filament so you can swap it for green. After resuming, the print continues seamlessly.
• Sensor Test Track: A minimalistic test track for checking the sensor’s reliability. After 50 laps, the sensor recorded every lap accurately. If it doesn’t work for you, print this model and fine-tune it.
• Floor 0: Simple design. I printed it in blue to represent water level.
• Box: The box can be used with or without the lap timer sensor. Just attach the lid without the sensor if you want to play casually.
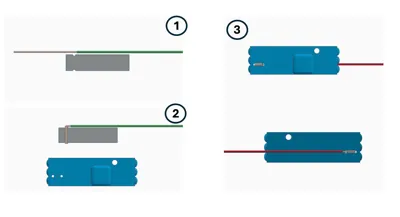
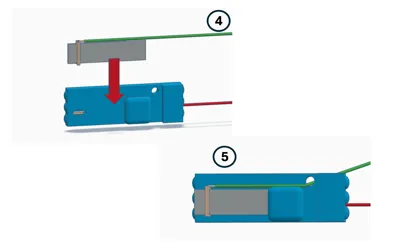
Lap Timer
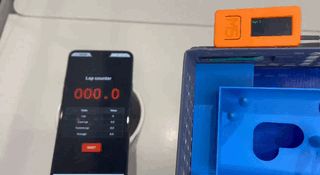
I designed the lap timer using items I had at home. First, I used a 2019 M5StickC M5Stack (an ESP32 with a built-in screen and battery) for testing. It costs around $25 and is compact, versatile, and tidy—ideal for saving space and reducing cables.
For accessibility, I adapted it for a standard ESP32 paired with a mobile phone as a screen. ESP32 boards are widely available online for $4–5, and some come with cases for 18650 batteries.
The timer program is simple to set up. Connect to the ESP32’s Wi-Fi from your phone, open your browser, and enter the default IP (192.168.4.1). You’ll have a functional lap timer! Default settings:
• Access Point: ESP32_AP
• Password: 12345678
• IP: 192.168.4.1
In future updates, I plan to add support for connecting the ESP32 to your home Wi-Fi for features like an online hall of fame.
Create Your Own Track!
Designing custom tracks is easy. The box allows for 3 or even 4 floors, each consisting of a 10x10 grid of 20x20mm squares. Sketch your ideas on graph paper, and you’ll have new expansions in no time!
Comment & Rating (12)