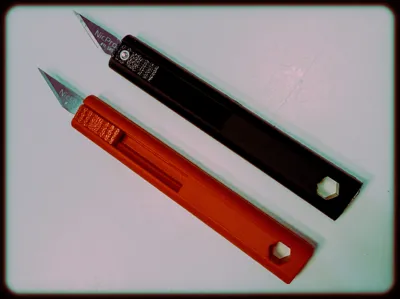
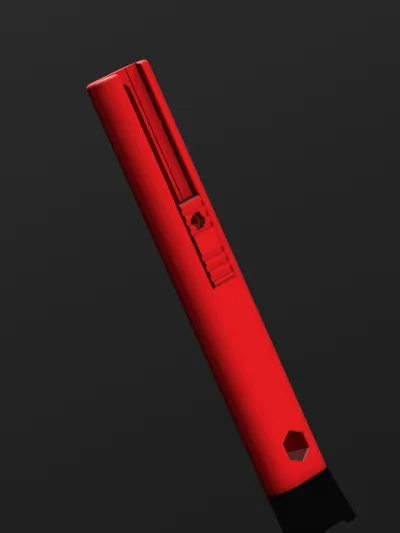
EDC Craft Knife


Print Profile(2)


Description
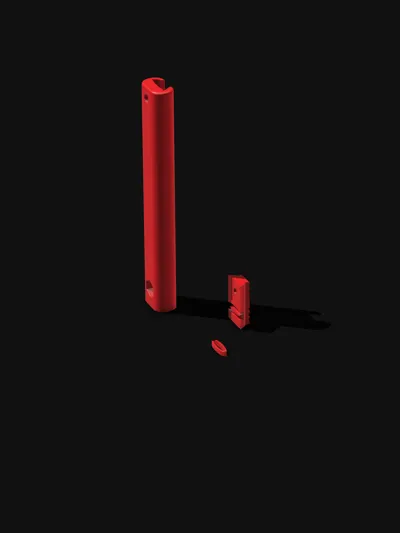
This is an EDC craft knife that I designed when I could not find what I was looking for on MakerWorld. I'm uploading two different designs, one which uses an M2 3.2X4mm heat insert to clamp the blade into place, and the other uses an M2 nut. Both designs utilize a small spring that creates a semi-locked position on both the top and bottom of the slider’s position inside the main body while the bolt that holds the blade into place also pulls double duty by clamping the blade into place and also acting as a captive lock keeping the slider assembly from falling out.
Dimensions
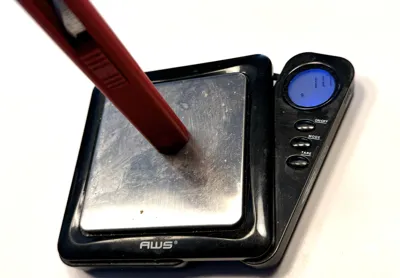
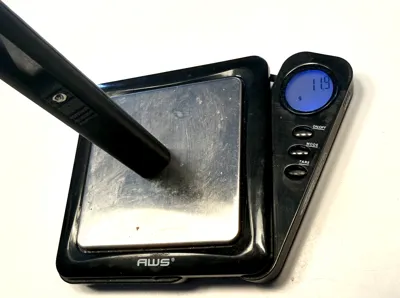
10mm x 16mm x 100mm, assembled masses are 11.7 grams for the heat insert and 11.9 grams for the nut insert.
Heat Insert
Required Tools
1X Heat Set Inserter
1X 1.5 hex driver
BOM
1 X 3D print (Main Body, slider, “spring”)
1 X M2 heat insert
1 X M2 hex socket 4mm
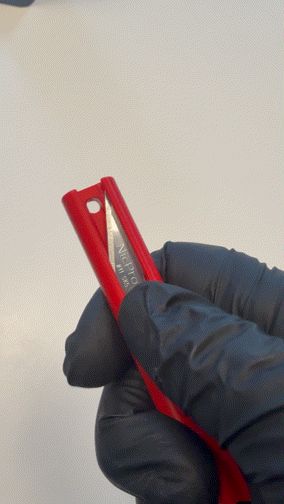
1 X #11 craft knife (X-acto and generic should both work)

Assembly Instructions
Step 1A. Insert the insert
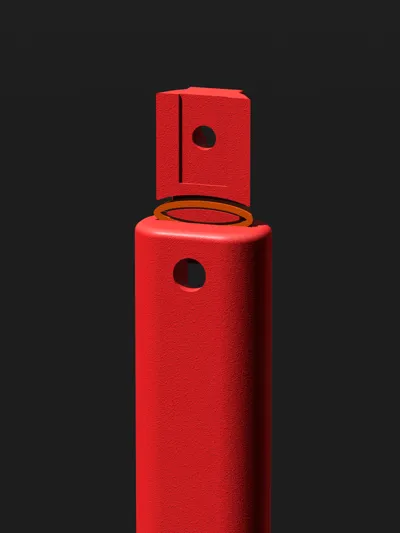
This design calls for a M2 3.2 X 4mm heat insert, but I'm guessing here since I have not used them, a slightly larger/slightly smaller heat insert will work as well. Upon inserting the insert into the slider, please make sure that the insert is either flush or slightly below the face of the slider; otherwise, the heat insert will interfere with the insertion of the craft knife later on.


Step 2A. Sub-Sub-Assembly Assembly
Insert the tiny “spring” into the slider so that its taper matches the taper of the slider. Otherwise, the slider won’t be able to be inserted into the main body of the print.


3A. Assemblies… Assemble!
Insert the slider assembly into the main body of the EDC craft knife. The spring might be small, but it's fierce; it will not want to quietly slip into the night. I have found that the best way to get it in is to insert the assembly into the main body up until the spring is touching the main body, then, ever so slightly, start working on one edge of the spring and then work on the other a little and repeat until fully seated (read wiggle-wiggle-wiggle). Due to the tight tolerances, I have found that once inserted, it is best to slide the assembly up and down a few times to get it used to its new home before adding the crafting blade, much like it is impossible to pick up a pair of tongs and not click them before using.


Step 4A. Clamp dat thing
After inserting the slider and giving it a few good up-downs in its new home, bring the slider up to the top of the main body so that the top of the slider is flush with that of the top of the main body. You will know if you did this right if you can see the heat insert through the hole on the back. Speaking of that hole, once flush, take the #11 generic or proprietary-named craft knife blade and insert it into the gap at the top, making sure that the blade is fully seated before taking your M2 hex socket 4mm bolt and clamping it down into place, cementing it into its final resting place. It should be noted that once screwed in, the blade/slider are now locked into the main body. The design uses the bolt to captively lock everything into its new home.


Step 4.1A EDC CRAFT KNIFE COMPLETE!
Your EDC Craft knife is now complete. Feel free to use it however you see fit. Craft stuff, cut things into smaller things. The possibilities are endless!
Nut Insert
Required Tools
1 X 1.5 hex driver
1 X small pliers
BOM
1 X 3D print (Main Body, slider, “spring”)
1 X M2 Nut
1 X M2 hex socket 6mm
1 X #11 craft knife (X-acto and generic should both work) (not shown)
1 X M2 hex socket 8mm (for installation purposes only)
2 X M2 washers (for installation purposes only)

Assembly Instructions
Step 1B. Insert dat Nut
Place the two M2 washers onto the 8mm M2 bolt and place that through the slider so that the threads of the bolt are sticking out the backside or the side opposite the face that holds the spring. Now thread the M2 Nut onto the threads of the 8mm bolt, using the small pliers hold the nut into place and use your hex driver to pull the nut home, channelling your inner Happy Gilmore to coax it into place. Caution: do not over-tighten the nut, once the nut is flush with the surface of the back, as seen below, stop tightening, otherwise the nut will be pulled through trashing the part. If this happens, feel free to channel your inner Happy Gilmore again.


Step 2B. Follow Step 2A though Step 4.1A, as seen above except replacing the 4mm hex socket M2 with a 6mm hex socket M2


Boost Me (for free)
I hope that you all enjoy your new EDC craft knife. This is my first assembly, and I have thoroughly enjoyed the building process. If you feel that my design is deserving of a boost, please feel free to send one my way. Otherwise, it’s just nice knowing people enjoy my work.
Thanks again,
A Wiggley armed Man
License
You shall not share, sub-license, sell, rent, host, transfer, or distribute in any way the digital or 3D printed versions of this object, nor any other derivative work of this object in its digital or physical format (including - but not limited to - remixes of this object, and hosting on other digital platforms). The objects may not be used without permission in any way whatsoever in which you charge money, or collect fees.
Comment & Rating (0)