Wall clock Minecraft retheme


Print Profile(1)
Description
Disclaimer: This is NO a ful clock object, just retheming a cheap one.
My son is a grown up kid, so he doesn't want that paw patrol wall clock he had anymore.
He's now 7! He's OLDER!
He plays minecracft now, so… what could I do?
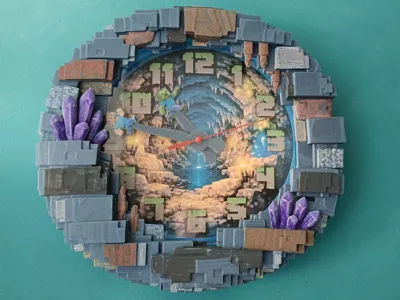
I had this cheap plastic wall clock since my older kid was… well… younger LOL. And didn't want to throw it away, but I can RETHEME it.
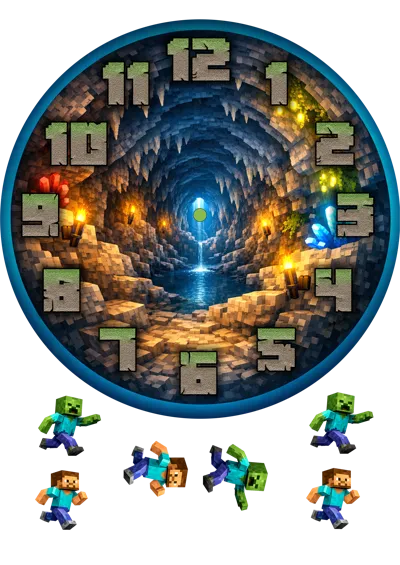
So, I added silhouettes from a player and a zombie to the clock hands, designed a frame and printed a new background.
This project was made for a clock with a 21 cm diameter of the clock face, 20cm diameter hands, which had a 2cm flat rim around. (this is important, it has to have rim, as I used the same clock, just used hot glue to stick the new frame over it.
Print the clock face and the characters on a A4 glossy paper. Remember to cut the middle hole of the clock face!
There're 3 different sized characters, slightly larger, just so you can choose which ones you prefer.
When printing the hands: First check your clock's axle diameter for minutes and hour hands using a caliper and adjust the hole's size accordingly. They are thin, so you might need to lower your printer speed if it rips them off the bed.
Glue the characters on each hand.
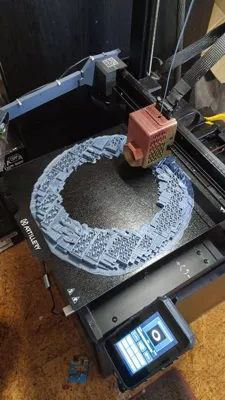
Printing the frame: On the bambu 3mf it's split in 4 parts to fit most bed sizes, not sure if it'll fit smallest ones. There's solid frame on the stls if you need it. I printed it in just one piece and it used all my bed (artillery sidewinder x4 plus s1)
Paint the frame as you wish, remove the old clock face and glue the new one, place the hands making sure they won't hit each other, put the transparent cover if your clock's has it, then use a bit of hot glue to stick the frame to the old clock's rim.
I also added some numbers, but I didn't use them as then the zombie would hit them.
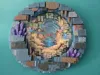
Don't trust my pictures, and try for yourself. I never sand mines after printing, and usually just use acrylic paints without priming it first, and print using probably a thicker layer than what I should because… I'm impatient LOL anyway, they look better in real life than in my pictures!
Boost Me (for free)
Do you like my objects? I would really appreciate a boost! My dream is to purchase a P1 or a P2 and any help is more than welcome ;D
Proudly tested and printed in an Artillery Sidewinder x4 plus S1
Comment & Rating (0)