DIY jewelry polisher – Polishing 3D print


Print Profile(2)


Description
Do you want to polish your 3D prints without buying an 80€ polisher
Here's a DIY version, printable at home, with only a few components to buy 👇
This model works perfectly but can be optimized, both structurally and electrically, feel free to comment, and if there are enough downloads, a Bambu supply compatible model will be released
👉 Jewelry polisher suitable for PLA / PETG / resin
👉 Works with 2 5V motors
👉 Easy to assemble
👉 Low budget
🔧 Required components (in addition to 3D printing, links at the end) :
- 2x motors → 0.91€
- Power adapter 5V 2A → 2.03€
- Speed controller → 7.99€
- Switch → 2.85€
- 4x 608zz bearings → 2.48€
- 8x M5x16 screws
- 6x 32mm inner diameter seals (see photo) present to aid drive, can be replaced by TPU print, or even elastic
- 8x 8x2mm magnets
- 4x m3 screws (28mm) (may be supplied with motors)
- 4x m3 nuts (may be supplied with motors)
💰 Total cost ≈ 15€ (instead of 80€ 💸)
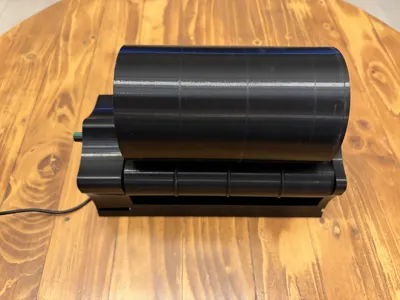
⚙️ How it works :
Fix the motors side by side → roller → place the print and polishing pellets in the cylinder
It also works for : jewelry, resin, PLA prints, small decorative pieces, miniatures, etc
Assembly photos
Required hardware elements :


Insert the m3 nuts into the block provided for the motors :

Insert the bearings into the slots above the M3 nuts

then attach the side axles to this part using M5x16 screws
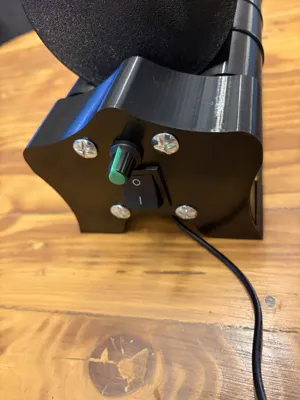
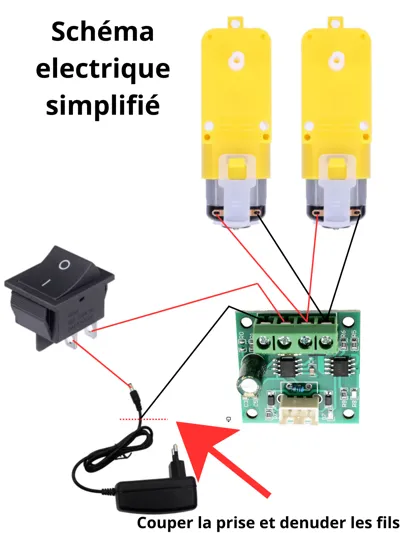
Electrical assembly photo


Screw the plate to which the switch and speed controller are attached to the part containing the motors using 4 M5x16 screws
Place the O-rings on the rollers :

Insert the rollers onto the motors

Insert the two remaining bearings into the designated slots :
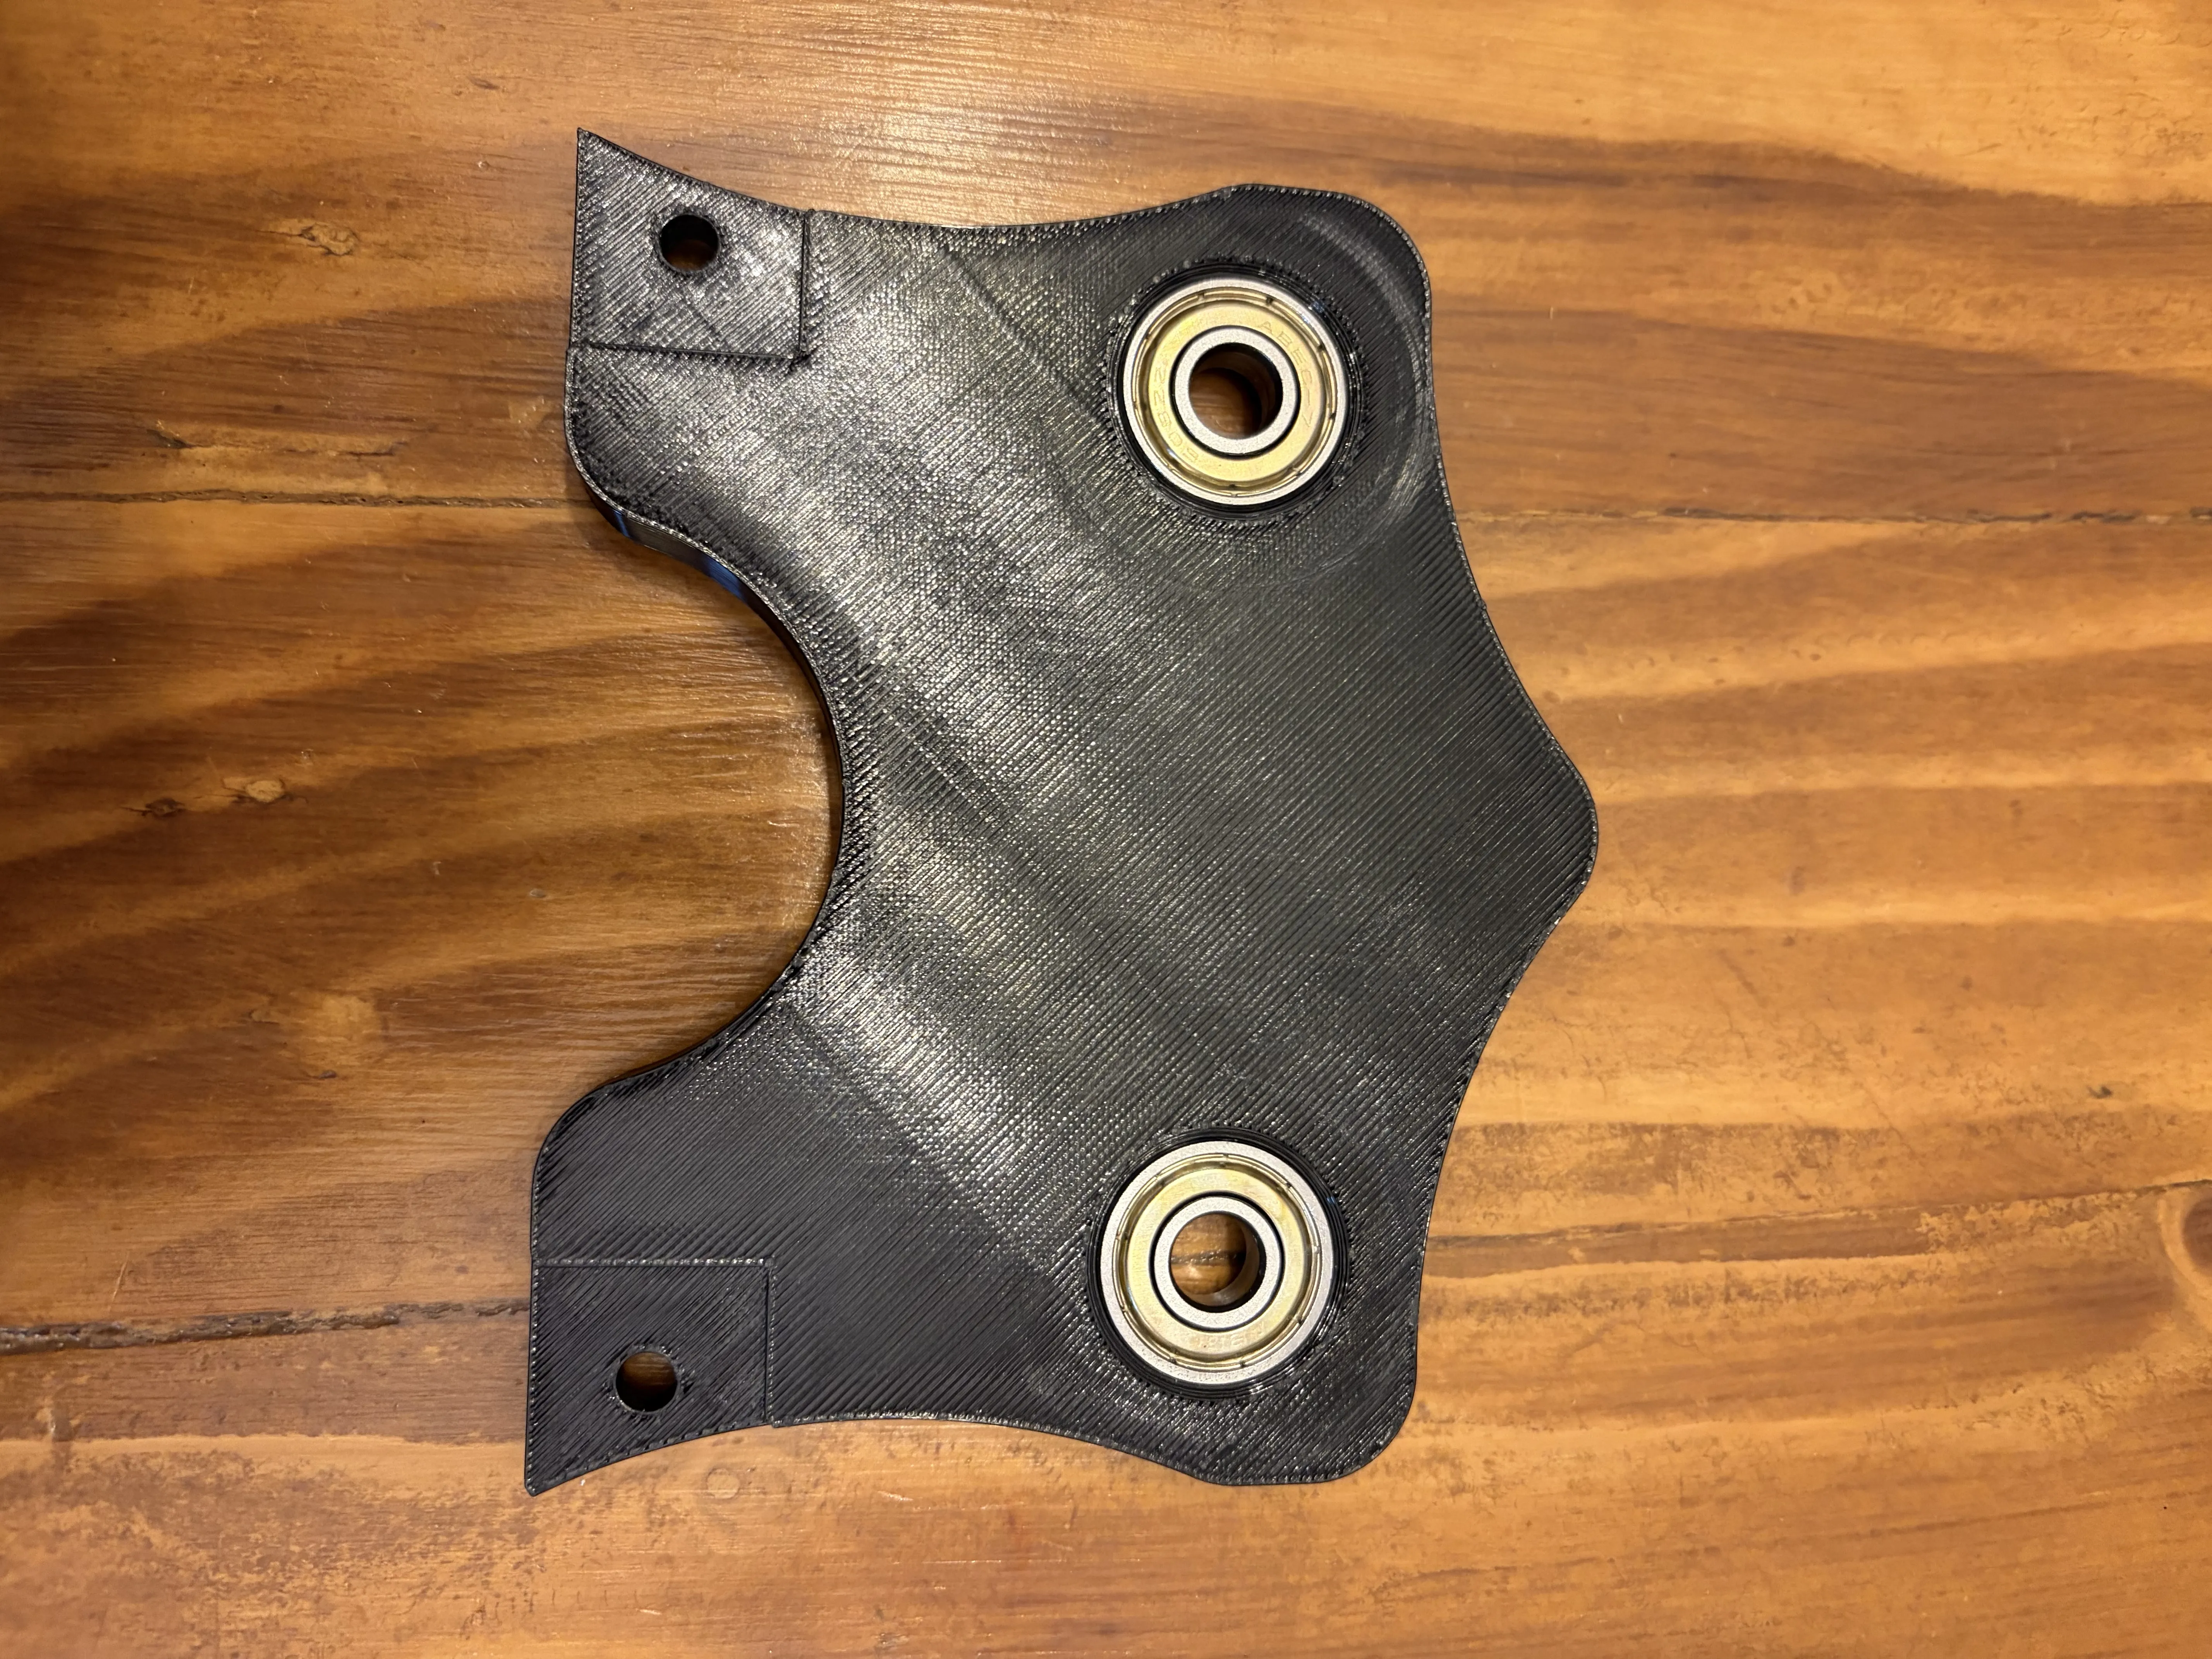
then screw this part to the rest using two M5x16 screws
The magnets must be fixed in these locations using glue :


Links (amazon/aliexpress) :
2 motors 0.91€ : here
Power adapter 5V 2A 2.03€ : here
Speed controller 7.99€ : here
Switch 2.85€ : here
4x 608zz ball bearings 2.48€ : here
Polishing pellets : here
License
You shall not share, sub-license, sell, rent, host, transfer, or distribute in any way the digital or 3D printed versions of this object, nor any other derivative work of this object in its digital or physical format (including - but not limited to - remixes of this object, and hosting on other digital platforms). The objects may not be used without permission in any way whatsoever in which you charge money, or collect fees.
Comment & Rating (26)