Interlocking Drawer Storage Box


Print Profile(8)


Description
Boost Me (for free)
Follow me before you go
This is an interlocking drawer storage box that can store screws, USB drives, hand ornaments, rings, earrings, necklaces, and small items It is very compact and cute and requires screws
If printing the M2 drawer storage box, you will need round head hex M2*6mm long screws
If printing the M3 drawer storage box, you will need round head hex M3*6mm long screws
It should be noted here that if the drawer storage box has M2 added after it, it means M2 screws are needed
If the drawer storage box has M3 added after it, it means M3 screws are needed
The M3 drawer storage box with separate letters is suitable for 3D printers without AMS, you only need to change to another color filament and it requires super glue for assembly
Of course, I also provided AMS multi-color printing You can find the M3 drawer storage box (multi-color lid) in another file
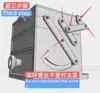
Supports must be completely removed
Supports must be completely removed
Supports must be completely removed
Interlocking demonstration


Must-see for assembly
Step one
Use the printed wrench to secure the printed hex nuts and screws The first thing to clarify here is to put the drawer box in first, take out the three-hole connecting rod, and align the wrench with the nut and screw to secure them

Step two
Gently push in the second layer divider If you want it a bit tighter, you can also use super glue

Step three
Secure all the screws Pay attention to the smallest three-hole installation, do not install it backward, otherwise it will be too short If the rod that pulls the lid is too short, then the installation is incorrect, this needs to be noted

Documentation (3)


License
You shall not share, sub-license, sell, rent, host, transfer, or distribute in any way the digital or 3D printed versions of this object, nor any other derivative work of this object in its digital or physical format (including - but not limited to - remixes of this object, and hosting on other digital platforms). The objects may not be used without permission in any way whatsoever in which you charge money, or collect fees.
Comment & Rating (44)