


Print Profile(1)

Description
Welcome to my 3D world!
Remix from https://www.printables.com/model/607388-netatmo-sunshield
Description
The Netatmo outdoor module is supposed to be placed in a shady place with sufficient air flow for accurate readings. Ideally, it is placed high above the ground and not too close to buildings.
However, it's not always easy to find a spot where the sun is not shining at least at some times of the day. So we need to make our own shade, taking care that we don't block the air flow/convection.
This sun shield has an outer diameter of about 13cm, leaving around 2,5cm distance to the Netatmo module in order to avoid heat transmission.
The shield provides a central hole for a M6 screw at the bottom ring.
Printing
You will need:
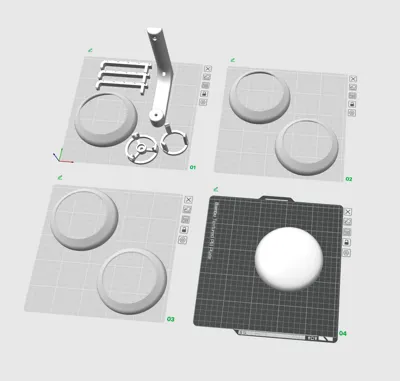
- 1x Bottom (no support needed)
- 3x Pillar (no support needed, print laying flat on its side)
- 5x Segment (no support needed, print upright)
- 1x TopRing (no support needed, use 100% infill and high temperature while printing so that it doesn't break when inserting/removing the roof)
- 1x Roof (needs support, of course!)
- 1x Mount foot (no support needed)
I printed it in PETG.
Assembly
No glue or screws needed!
Start with the Bottom part, three pillars and the first segment. When the fit, add the next segment from above and put it in place carefully. Proceed with the next segments, until all are in place.
Now, take the TopRing and snap it in-place. This might need some force. If you have the impression that its too hard, slightly shorten one of the prongs that go into the TopRing with sand-paper and try again.
Connect to your mount foot with M5 screw. Now you can insert your Netatmo module and snap-in the roof.
Thanks for downloading – please leave a comment or a picture if you print the model!
Boost Me (for free)
Did you like the model? Please give it a boost – it means a lot and helps me make more!
Comment & Rating (13)