Search models, users, collections, and posts

Flexi JIMGA
@JIMGA
9.5 k
163.9 k
291.7 k
196.6 k
Social Media Links
Bio
💖 New designs are dropping every week! 🫶 Join me on the road to 50,000 followers 🎨 Hi! I’m a designer of articulated figures — animals, fantasy creatures, dinosaurs… and even community requests! 📈 To get a full Commercial License, click the “Membership License” button.
Achievements

MakerWorld Guardian
Active more than 20 days out of last 30 days UTC time

Featured Creator
2 models are featured by MakerWorld.

Popular Model
9 models more than 5,000 successful prints.

Popular Creator
More than 1,000 followers.

Stellar Reviewer
Rate or Comment 211 different models

Pioneer Maker
Print successful 119 different models and 2,098 hours
Recent Article
Quick Guide to Adding Magnets to 3D Prints!!
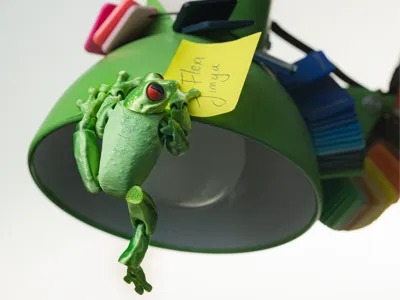
Quick Guide to Adding Magnets to 3D Prints!!Quick Guide to Adding Magnets to 3D Prints!!The little frog I designed is the perfect example. The idea is simple: add a magnet pocket to almost any model so it sticks to metal surfaces, no extra software. In Bambu Studio there’s a tool called Negative Part. It lets you subtract a volume from the model in the shape you choose, like square, circular, toroidal, or cylindrical.Example of how Negative Part works in Bambu StudioTo add the hole for our magnets, do this:Select your model in Bambu Studio.Right click → Negative Part → Cylinder.In my example, the magnet is 3 mm in diameter and 1.5 mm tall.Important: in 3D printing I always add tolerance. I add 0.3 mm to each dimension because plastic shrinks a bit and every printer varies. If you make the hole exact, the magnet often won’t fit or goes in too tight and can crack the part.Hole diameter: 3 + 0.3 = 3.3 mmHole depth: 1.5 + 0.3 = 1.8 mmPlace the cylinder where the magnet will go.  Quick controls: M to move, R to rotate, S to scale. On the frog, I put one in each foot. Duplicate and position.To wrap up Slice, print, and test the magnet. If it feels loose, lower the tolerance a bit; if it is too tight, lightly sand the edge or add 0.05 to 0.1 mm to the diameter. Mark polarity before gluing and use a small drop of adhesive. If this helped, try the method with my frog. If your magnet is a different size, no worries: scale and move the cylinder until it matches your magnet. Remember to add 0.3 mm of tolerance so you don’t run into fitting issues. I hope this quick guide helps. I used my little frog as the example, but you can do this with many other prints. Thanks for reading, and see you this week with more flexi models.https://makerworld.com/en/models/1955916-tiny-flexi-frog-animal-separated-colors-print#profileId-2102076
How to Take Studio-Style Photos Without a Studio
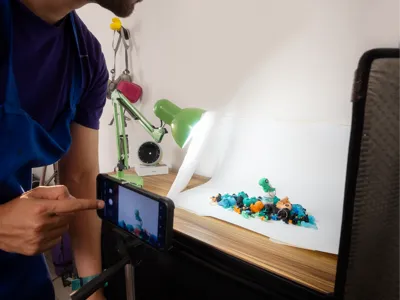
How to Take Studio-Style Photos Without a StudioI live in a semi-desert area. Harsh light, messy backgrounds, deep shadows. Outdoor photos just didn’t work — unless I was designing a 3D-printed camel.So I asked myself:How can I get a clean, studio-style photo without expensive gear or a dedicated space?Spoiler: you don’t need a fancy camera. You just need to understand light… and get creative with what you already have.Simple Materials That WorkWhite paper sheets or poster board (I use a $3 photo background from AliExpress)Natural light (from a window)Any lamp (preferably with white light)Something white to bounce light (I use a piece of an old cooler with a reflective surface)A makeshift diffuser (a thin curtain, a white sheet, or translucent paper)Your favorite modelNo fancy gear needed. This is about intention, not equipment.Step 1: Use Your Best Light Source (It's Free)Find a window with strong daylight. If you have sheer white curtains, use them to soften the light. If not, a thin fabric works great. Complement it with a side lamp — but don’t place it too close to the background. That avoids harsh hotspots or overexposed areas.Step 2: Create a Seamless White BackgroundThis is the trick that transforms your setup.Tape a sheet of white paper in a smooth curve from the wall to the table. No harsh folds or visible corners — you want that clean, infinite look. Place your model in the center. Let it shine.Step 3: Bounce the Light, Soften the ShadowsThis one’s easy to skip… but makes a massive difference.Place something white on the opposite side of your main light source — it bounces light back and fills in the shadows. Move it around until the shadows soften and the lighting feels balanced. Even a simple sheet of paper can make your model look more polished and professional. Diagram of the setup I usedResult using this lighting setupWhat I Learned (the Hard Way)Bouncing light is everything. Without it, shadows dominate and details get lost.Don’t put your lamp too close to the background. It’ll create bright patches and wash things out.A $3 photo background changed my game. Clean, consistent, and no weird textures.Colored sheets = mood control. Swapping backgrounds shifts the entire vibe of the photo.Tripods (or anything that holds your phone still) improve clarity. Stable shots = sharper images.Compose the photo before editing. The more you get right in-camera, the less you have to fix later.Perfection slows you down. I used to wait for the “perfect photo.” Now I just post, learn, and keep going.🧠 The Real MessageYour window is your light. Your paper is your studio. Your creativity is your edge.Upload your models. Don’t wait for tomorrow.