Automatic coffee dispenser


Print Profile(1)

Bill of Materials


- Nottolino-Filettato-M4 x 5:
- ViteM4X10 x 1:
- VitiM4X30 x 4:
- Molla x 1:
Description
Boost Me (for free)
Lend us your support; it is invaluable to us!
Enhance Your Electric Coffee WDT with Our Automatic Coffee Distributor Project!
This model seeks to expand and enhance the functionality of the Electric Coffee WDT, drawing inspiration from its design. Our project aims to elevate the experience by automating the filling of the 58mm portafilter, dispensing the precise amount of coffee. Each rotation of the dial delivers the correct quantity for a single espresso; two rotations are required for a double shot portafilter.

Product Features:
Automatic Operation:
Effortlessly and cleanly dispense the perfect dose of coffee into your portafilter—automatically!
Error-Proof:
The detent system ensures precise dosing, complemented by a convenient locking mechanism that prevents accidental back rotation. Truly user-friendly.
No Power Required:
Our device needs no power or recharging. It is entirely mechanical, eliminating the need for batteries or replacements.
Organized Workflow:
The redesigned base keeps the automatic distributor and Electric Coffee WDT neatly organized on a single workstation!
Seamless Integration:
After dispensing the coffee for one or two cups, use the Electric Coffee WDT to ensure a perfect, homogenous brew!
Easy Cleaning:
The disassemblable design maintains hygiene. Simply unscrew the four rear screws for effortless cleaning.
Assembly Instructions
WARNING: Given the product’s intended contact with food, we recommend printing with food-safe materials such as PETG.
Necessary Parts:
- Print all model files
- 5 M4 threaded inserts
- 4 M4 x 30 screws
- 1 M4 x 10 screw
- 1 Spring (can be salvaged from an old click-pen)
- Once all required parts are printed (see image below)

2. Gather the non-printed materials listed above.

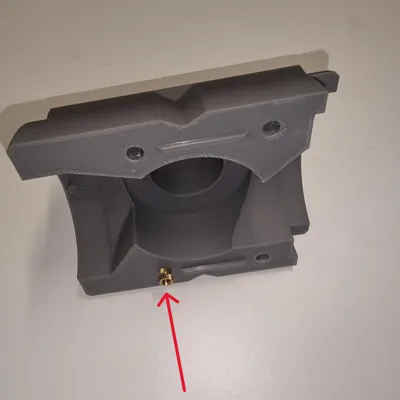
3. Proceed by taking the front piece and inserting the threaded inserts into the designated holes (as shown in the image below). Insert them while warm using the appropriate tool; alternatively, a soldering iron tip or a lighter can be used.


4. Insert a threaded insert into the hole shown below.

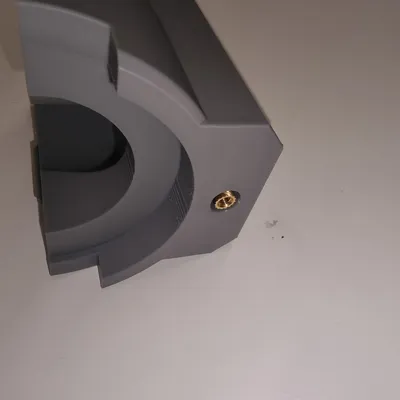
5. Insert the M4 x 10 screw into the insert below. This screw also serves as an adjustment for the detent tension. Tightening it increases the detent force of the pin to be inserted later. For even greater tension, a longer M4 screw can be used.

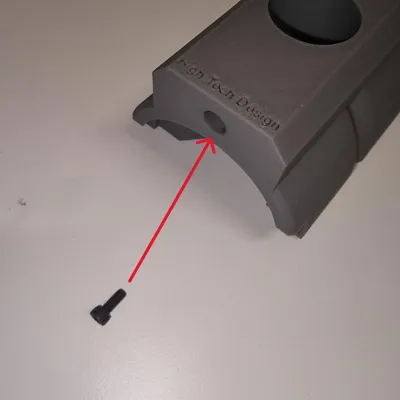
6. Insert the spring into the hole shown in the image below.


7. Now comes the slightly more “complex” part of the assembly. Carefully insert the pin into the hole, keeping everything pressed down with a finger, as you will need to insert the rotor ensuring it passes until you feel the locking detent. (See image below)


8. Attach the back piece and tighten the four screws into the designated holes.


9. Install the upper coffee container, ensuring the holes align, and rotate for tightening.

10. Attach the lid and place everything on the provided base.

Instructions for Use:
- Once the coffee is in the reservoir, position it above the portafilter. For single shots, perform one rotation; for double shots, perform two clockwise rotations. The locking mechanism prevents counter-clockwise rotation, thus avoiding errors.


2. Use the Electric Coffee WDT for a perfect, homogenous brew.

Printing Guide:
The model is designed to minimize support usage; however, the mechanical parts and their form require a few considerations, outlined below.
WARNING: For support generation, we strongly recommend using a support material. While not strictly necessary, it greatly facilitates removal and minimizes aesthetic imperfections.
In the .3mf file, the parts are already positioned for optimal printing. Please share any superior printing solutions you discover in the comments!
Front: Set the parameters as shown below and add manual support only where indicated. The rest of the part requires no additional supports.

Back: For the back part, use the following support parameters.

Rotor and Reservoir: Use the same parameters as for the BACK component, but remove the raft.
Rotor Disassembly Guide:
With cleaning in mind, we’ve also considered disassembly. After removing the screws and the rear part, extract the rotor by rotating it slightly before the detent, gently pressing inward. This allows for complete cleaning!
Conclusion:
That concludes the construction guide for our project. We hope you enjoyed printing it and brewing excellent coffee. The project is presented in a single color; let your creativity flow and choose the colors that best suit your style!
Support our project in any way possible.
Thank you all
High Tech Store Roma
License
You shall not share, sub-license, sell, rent, host, transfer, or distribute in any way the digital or 3D printed versions of this object, nor any other derivative work of this object in its digital or physical format (including - but not limited to - remixes of this object, and hosting on other digital platforms). The objects may not be used without permission in any way whatsoever in which you charge money, or collect fees.
Comment & Rating (11)