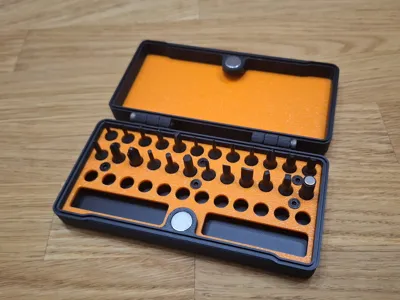
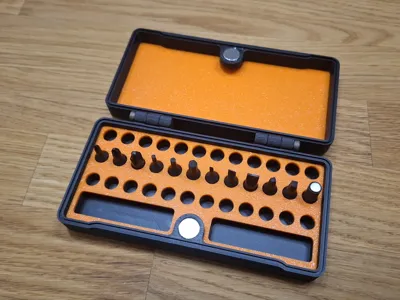
LTT bit case 36 bits


Print Profile(1)

Bill of Materials


Description
Hey!
I designed a bit case for LTT screwdriver bits. They (LTT) use less popular 20mm bit length, so if you want a bit case for your 25mm ones check out my other model (that is in the works right now - will post it soon).
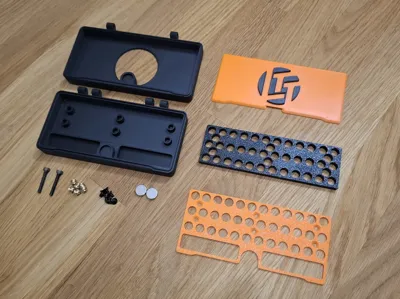
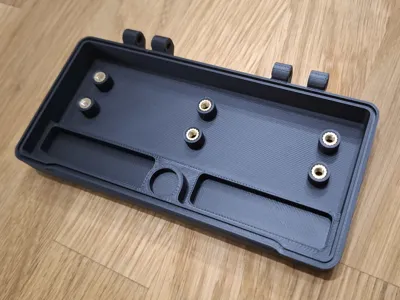
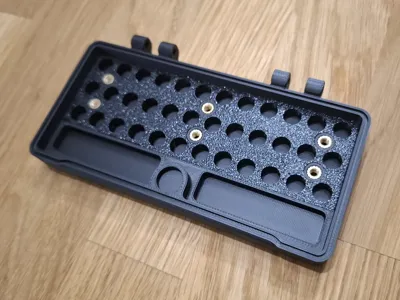
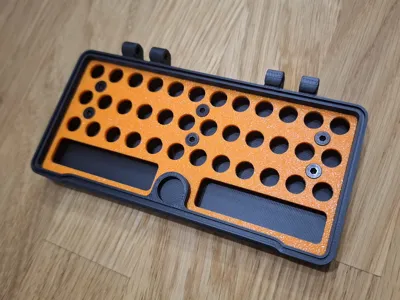
There are two options - with TPU insert or completely hard shell (if you don't want to mess with the TPU printing quirks). The hard shell model has big enough tolerances so the bits fit loosely (getting them out with tight fit isn't fun at all). TPU insert keep the bits in, but the fit isn't too tight either - if you find it too loose, try waiting few hours after printing (my guess is that TPU absorbs moisture from the air and swells a tiny bit) or feel free to edit the step file to make it tighter.
I prepared top part of the shell in three flavours:
- without any logo
- embossed LTT logo
- “window” kind of LTT logo (I don't know how to name it) that you can see in the pictures
There is one print profile with separate plate for every part. If you choose to print this “windowed” version and want it to look like the ones on the photos, there is a pause baked in into the top shell insert's plate, so you can change filament mid print (if for some reason it'll get lost, just add a pause on 11th layer).
I think I named the plates intuitive, so you can choose the parts you want, but hit me up if you'd get confused on what to print.
You'll need some non printable parts:
- M3 socket cap screw 20mm thread length - 2 pieces
magnet of maximum dimensions 10 x 3 mm - 2 pieces
* note on the magnets size - I used 10 x 3mm, but they stick together very strongly. You can use smaller ones with some kind of an adapter (e.g. torus shaped part easily made even in the slicer)
And for the TPU version:
- M3 threaded inserts (5mm diameter) - 6 pieces
- M3 countersunk head bolts of total length < 7mm (I used 5mm) - 6 pieces
I've found compatible parts at Bambu store so you can either get them there or use it as a reference if you'd want to buy somewhere else.
I recommend to glue in the inserts (except the TPU one and the one that you screw in place) - CA will do, but i prefer epoxy glues. Of course you'll need to glue the magnets in too.
I hope you like it and have fun tinkering!
Comment & Rating (0)