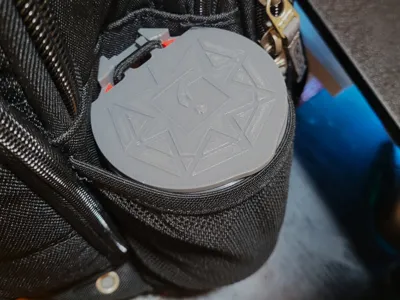
Backpack Side Pocket Bin


Print Profile(2)


Description
An everyday carry accessory for cleanliness, convenience, and control when on the go.
Introducing The Mini Backpack Trash Bin designed for 3d printing. It specifically fits inside the side pockets of backpacks allowing for easy access.
On my visit to Japan, I quickly learned that trash bins are hard to find in public spaces. If you happen to have trash, you have to carry it until you can find a trash bin. The best place to find a public trash bin is in certain convenient stores. Surprisingly, Japan is a very clean and free of litter even though trash bins are hard to find. This inspired me to create a small trash bin to carry in my backpack to avoid littering in public spaces when I cannot find a trash bin nearby.
The Mini Backpack Trash Bin is ideal for those who:
- Do not like to litter when a trash bin is not nearby.
- Likes to keep their space tidy and clean.
- Values proper hygiene, especially when dealing with a stuffy nose.
- Wants to develop the good habit of not littering.
The Mini Backpack trash Bin can also double as an easy small storage container for your backpack.
Features

- Semi automatic lid. Open manual and closes automatically with the help of an elastic band.
- Separate insert bin for easy emptying when the trash bin is full.
- Fits in the side pockets of backpacks for easy access.
- Easy straight forward assembly.
Assembly

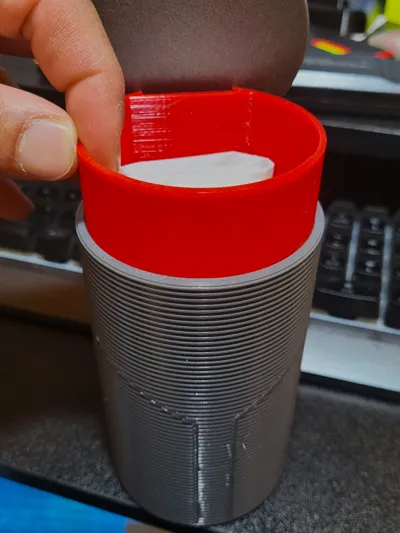
There are 4 main parts for the trash bin:
- Lid
- Bin insert
- Main bin shell
- Elastic band hook
Figure 1 illustrates the elastic band placement. In the picture I used a hair elastic band. A rubber band can also be used for the lid closing mechanism. Figure 2 illustrates the alignment of each part that requires assembly.
License
You shall not share, sub-license, sell, rent, host, transfer, or distribute in any way the digital or 3D printed versions of this object, nor any other derivative work of this object in its digital or physical format (including - but not limited to - remixes of this object, and hosting on other digital platforms). The objects may not be used without permission in any way whatsoever in which you charge money, or collect fees.
Comment & Rating (0)