IKEA Lack Table Enclosure


Print Profile(1)

Description
Oh look, another Lack enclosure…
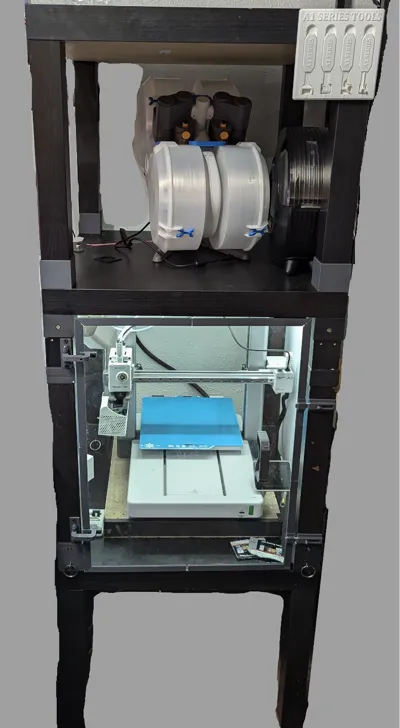
So this is a journey I started a long time ago in a tiny apartment a long way away when I needed some nice, space saving, protection for my Ender 3. I have printed and built multiple versions of this enclosure that I got from other people, first Thingiverse, then Printables, and frankensteined multiple ones together to try to get the functionality I wanted.
Then I got an A1…
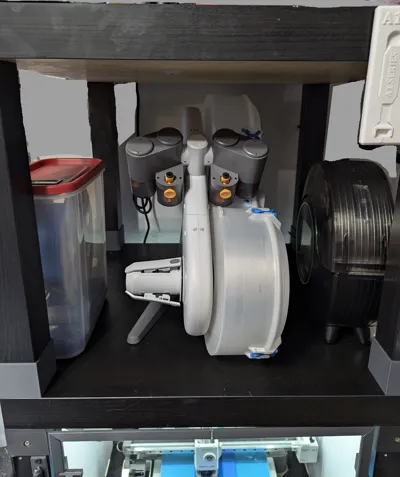
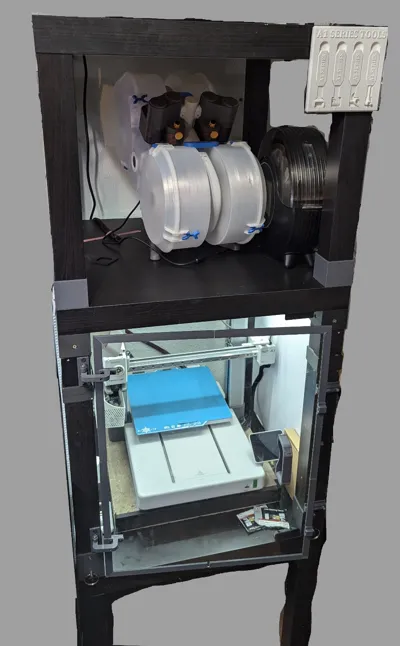
And I needed a taller version, with a place to stick my AMS, and filament dryer, and, and, and. So after mix and matching multiple different versions from all kinds of people I decided to make my own with all the things I learned along the way. Is this the right one for you? I don’t know, maybe, maybe not; or maybe parts of it are and other parts aren’t, you decide.
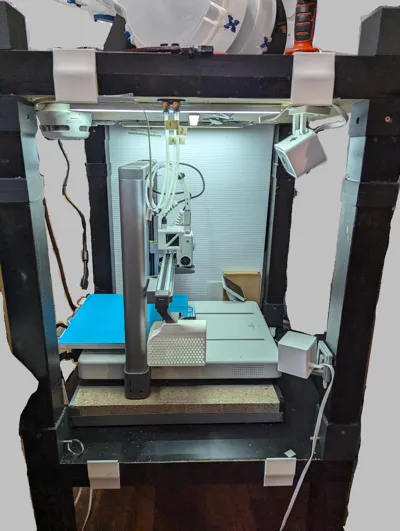
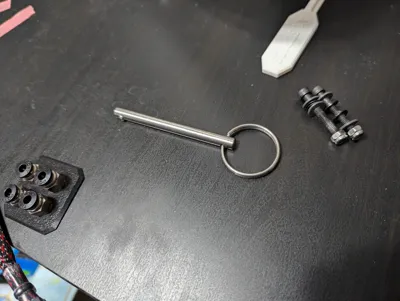
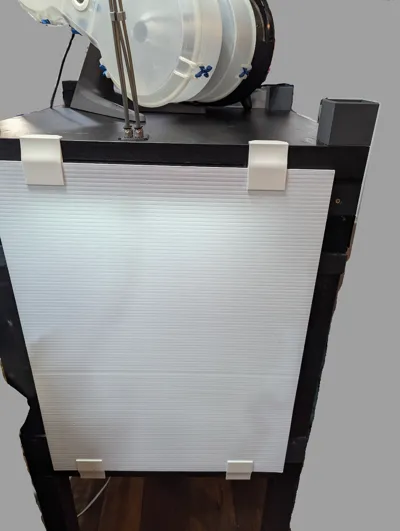
So to start this will need minimum 2 lack tables(if you’re okay with it on the floor), but more realistically at least 3, and a forth to go on top if you choose. To increase the height I have a connector that will screw into the top of the regular leg, and then into an open section of a cut leg. This will allow you to decide how tall you want it to be, by chopping off the legs of another table and combining them. You can then use the standard mount for the table or I’ve included and recommend a connector that screws into the top and then screws into the legs themselves. I wanted to be able to gain complete access so for the bottom of the legs there’s another connector with 5 screws to mount to the bottom and then the smaller one that mounts onto the bottom shelf. I used some 1/4x3inch quick release pins to secure them together, which means it can act as one unit until you need lots of access, then pull the pins and gain that sweet sweet space to work. On the topic of access, the sides are 18x24 inch corrugated plastic sheets I picked up at the home depot. There are 8 connectors that mount to the top and bottom table tops to hold the plastic sheets and then 2 that are shorted to be a stop at the back of the enclosure. This mean if you need side access just slide those walls right off and gain as much as you need. I do not have a back as I just push it to a wall and with the space required by the A1 it wouldn’t really work anyways.
I included a plate of various jigs to help you drill the holes and cut the legs and generally mount everything correctly. I also have, at this point, built a whole set of hardware for mounting a plexiglass door, however I don’t like where some of it is so I’m going to release it separate in the near future once I fix a couple things. Also I made a pass-thru for the AMS Lite that can be seen in the pictures, I have already released this and so did not include it here as you can just find it in my profile.
I want to note that I have pulled inspiration from all sorts of different setups, from all over the place, and though some might seem familiar I have changed a fair amount of things to all of them to get here. If you see something that you feel has been taken from your or others setups, please let me know so I can cite them and provide a source in case people are looking for something similar to mine but different. Good luck and happy printing.
Quick release pins:
https://www.amazon.com/gp/product/B0D6VZT85K/ref=ppx_yo_dt_b_search_asin_title?ie=UTF8&psc=1
Corrugated Sheets:
https://www.homedepot.com/p/PLASKOLITE-18-in-x-24-in-Corrugated-Plastic-Sheet-1TW1824P/202043334
Comment & Rating (15)